How to Make a Coopered Basket Without Math
Peter Lutz demonstrates jigs he uses so that he can work safely and accurately, building a coopered basket with sides that cant outward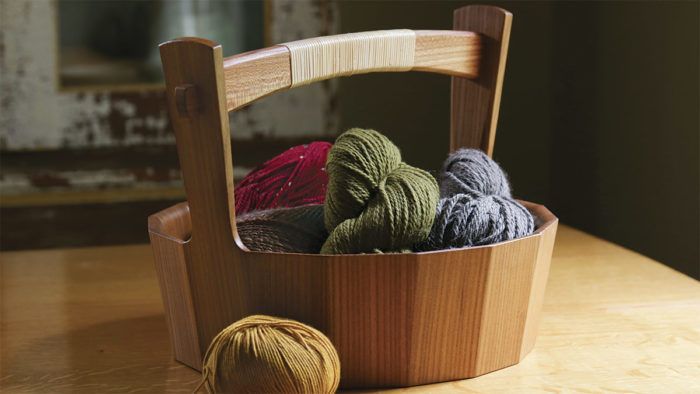
Synopsis: Light and graceful but quite strong, coopered containers combine elegance with approachable construction. Whether you make a design with vertical sides or sides that angle outward, one of the challenges is figuring out how best to cut, joint, and rout the small parts. Here, Peter Lutz demonstrates jigs he uses so that he can work safely and accurately, building a coopered basket with sides that cant outward. Lutz’s system of wedges allows you to cut the compound angles without math.
After making coopered pieces with vertical sides, I began building some with sides that splay. I’ve used this basket as a centerpiece on the dining table and to bring a dish to a potluck—it definitely makes my contribution look better. Building the basket is similar in most respects to making the coopered trays. The key differences (apart from creating the handle) relate to making the sides splay outward.

Splayed and coopered
When you make a coopered vessel with vertical sides, the staves are rectangular—their sides are parallel. But in a coopered piece with sides that lean outward, the staves are trapezoidal—wider at the top than at the bottom. Typically, such parts are made by angling the tablesaw blade to make the bevel, while also angling the miter gauge to create the trapezoidal taper. Because the staves are tapered, the bevel angle isn’t the same as for a vertical-sided piece. Divining the correct angles for the taper and bevel settings can be complicated. I found a website that will make calculations for you, and I’ve done coopering that way, but then I discovered a far simpler and virtually math-free method. By making a wedge to the angle of splay I want (9° in the case of this basket) and using it to support the workpiece during machining, I can cut the bevels using the same angle I’d use if the sides were vertical.
See how Peter Lutz makes his stackable containers with vertical sides
I built this basket with a cutoff from a thick plank of English elm. Once I had 1⁄2-in.-thick stock cut and milled, I rough-crosscut the staves to around 5 in. I left two staves longer—12 in. These are the staves that receive the handle.
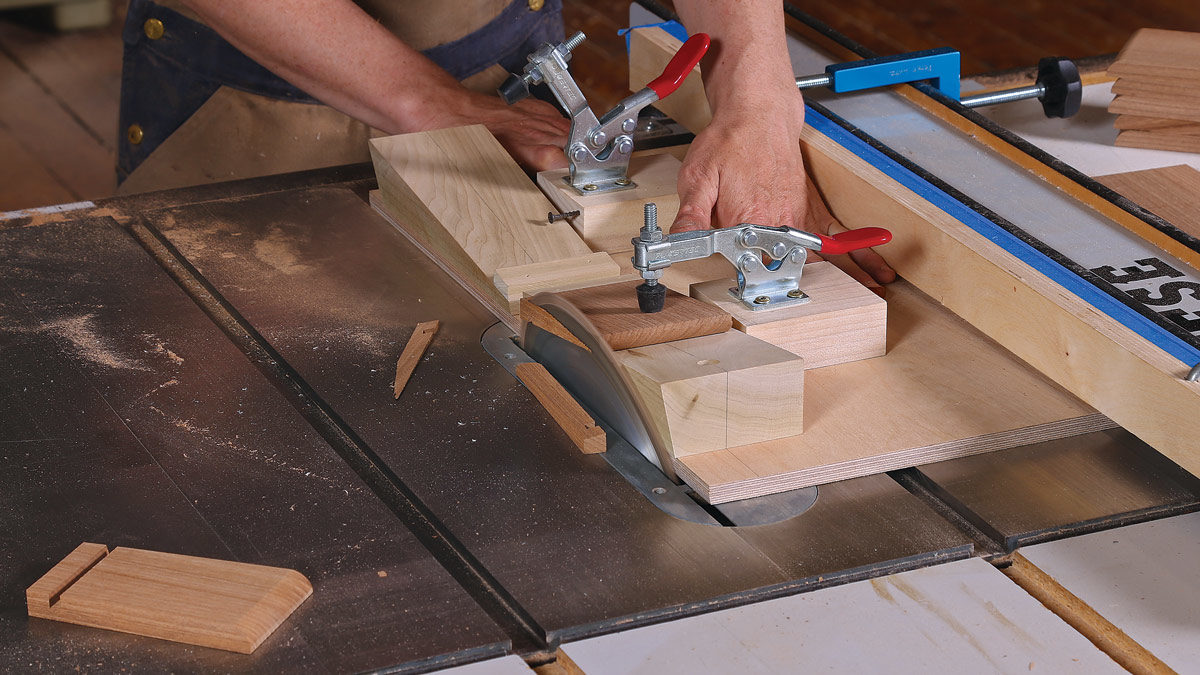
Unlike with the trays, where I bevel the staves at the start, with the basket I do all the other machining before beveling, while the staves are still rectangular and easier to work with. At the tablesaw, I crosscut the staves at the bottom, using the 9° wedge attached to a crosscut sled with double-sided tape. Then I cut the dado for the bottom. Here again I use a crosscut sled and elevate the workpiece on the wedge. Next, at the router table with a 1⁄2-in. roundover bit, I create the rounded profile at the lip of the basket. I hold the staves in the same kind of jig I used to rout the coves for the trays. At every other step, including beveling, the two tall staves are machined just like the short staves, but here they are not—they don’t get the roundover.
Beveling
Now the staves are ready to be beveled. I made a jig for the tablesaw with two 9° wedges, one for cutting each side of the stave. Because this basket, like the trays, has 16 staves, I set the blade to the same 11.25° bevel angle. To keep the jig’s travel perfectly consistent, I added a raised lip along the left side of its base that tucks under a board clamped to the tablesaw fence.
Once I have all the pieces beveled I take them to the jointer. This is another task where a jig for holding small pieces is essential. Again I tilt the jointer fence to 11.25°. After jointing, I dry-fit the basket to ensure that the joints are tight, then move on to making the handle.
Put a handle on it
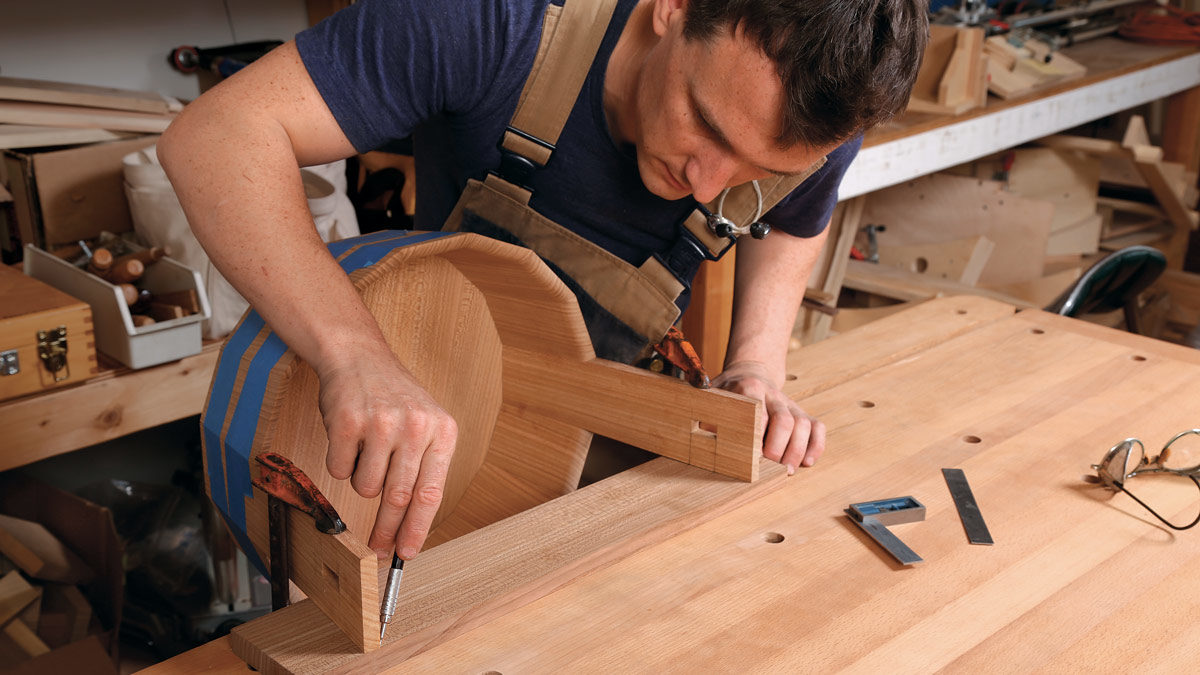
I start the handle with the through-mortises in the long staves, drilling them out with a Forstner bit and cleaning up the corners with a chisel. Then I dry-assemble the basket again and transfer direct measurements from the long staves to the handle blank. Once I’ve marked the tenon locations, I use a 9° wedge to cut the cheeks and shoulders. For the shoulders I use a crosscut sled, and for the cheeks I use an over-the-fence tenoning jig. I make the final cuts for the tenon on the bandsaw.
Once the tenons are cut, I bandsaw the handle’s curve and clean up with a spokeshave. I also bandsaw, file, and sand the upper part of the long staves to shape. Finally, I wrap the handle in rattan or cane, tacking the ends of the rattan on the bottom side of the handle with a small wire nail. After prefinishing all the parts, I glue up with blue tape and stretch wrap.
For the full article, download the PDF below.
More on FineWoodworking.com:
- The Craft of Coopering – Staves and a hoop make a watertight vessel by Carl Swensson and Jonathan Binzen #248–July/Aug 2015 Issue
- Coopering a Door – Accurately beveled staves produce a graceful curve by Garrett Hack #126–Sept/Oct 1997 Issue
- Small Stand is a Lesson in Curves – Cut joinery first, then saw the curves by Stephen Hammer #163–May/June 2003 Issue
Fine Woodworking Recommended Products

Suizan Japanese Pull Saw






Comments
The double-sided jig has two wedges, one for cutting each side of the stave. In order to make the staves beveled (wider at top than at bottom), the centerline of each wedge must be oriented at an angle to the rip fence of the table saw. What is this angle?
“[Deleted]”
“[Deleted]”
Third time a charm?
So, after some very kind direction from a highly placed senior editor I now get it. The staves do indeed have, and need, a 1.749 degree taper. It is generated by placing the stave on the 9-degree wedge with a 90 degree stop block. While cutting the 11.25 degree bevel the stave is also tapered along its edge because of the rising wedge. It is quite plain to see, with a combination square, once the jig is created and the initial pass of the blade has cut the 11.25 bevel. So, a stop block with a 1.749 degree taper flat on the sled with a 11.25 blade bevel would, does, work but the "wizardly” 9 degree wedge approach is easier to fabricate.
A word or two in the article would have been helpful at least to this trigonometry impaired woodworker.
And the next question... how on earth do you measure and then implement a 1.749° taper?
Dear Studiosquared, THANK YOU so much for your clear response to a question I was also struggling with. That wedge is indeed genius. I can't wait to cut a stave and measure the trapezoid!
Log in or create an account to post a comment.
Sign up Log in