How to Make the Cove-and-Pin Joint
A clever way to re-create a vintage joint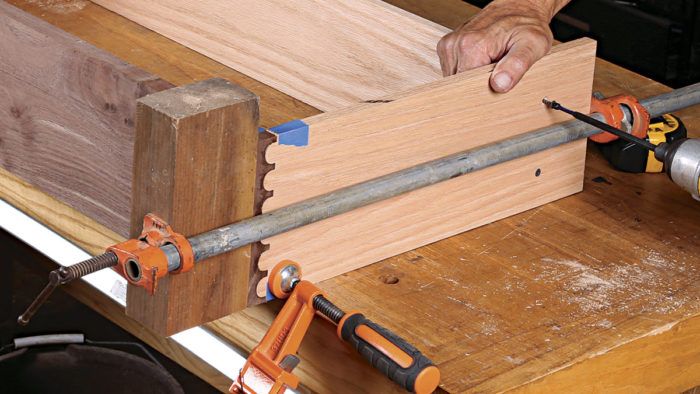
Synopsis: Machined joinery is not a new thing. In fact, there was a dovetailing machine in the late 1800s that made a joint known as the cove-and-pin, or pin-and-scallop, and it was commonly used by furniture makers of the day. That machine is no longer available, but Louis Kern devised a method using a sled and two jigs that allows him to make the joint with common router bits and a brad-point drill bit.
A few years ago I saw an old dresser with a beautiful and unique joint. I was taken with the joint and did some research. Turns out the cove-and-pin joint, also known as the pin-and-scallop joint or the Knapp joint, was commonly used on factory furniture in the late 1800s. In fact, there was a dovetailing machine patented by Charles Knapp and Nathan Clement that was used to make the joint. I’m not sure why, but in the early 1900s the cove-and-pin fell out of favor and the machines along with it.
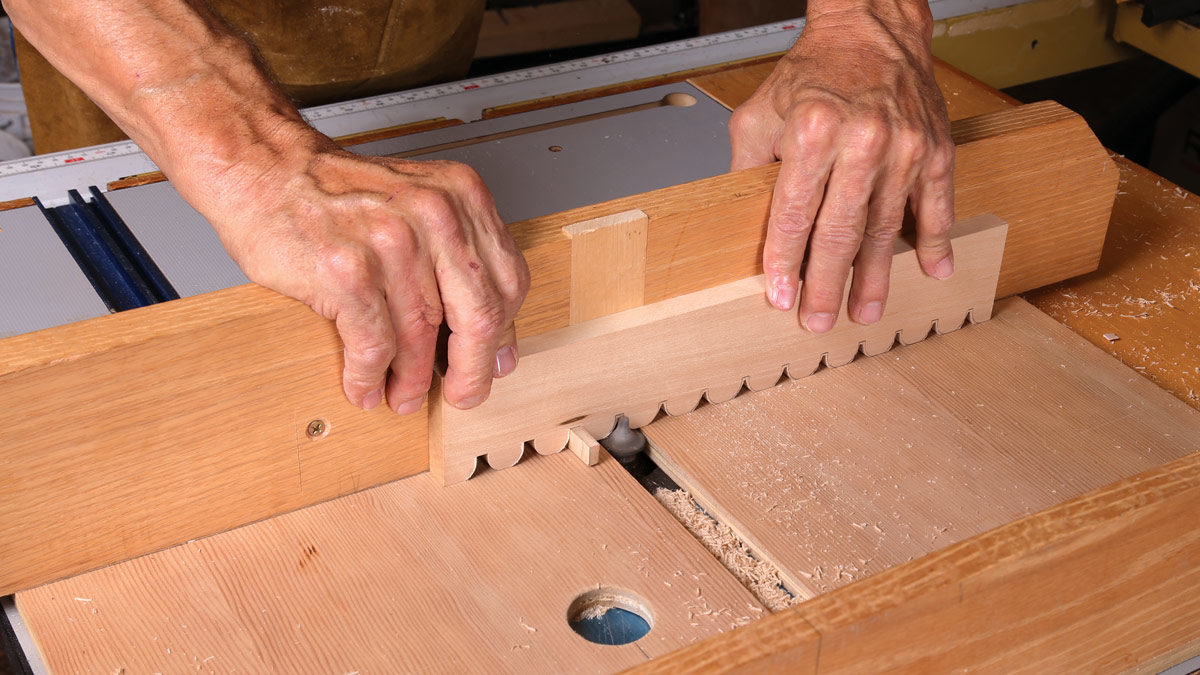
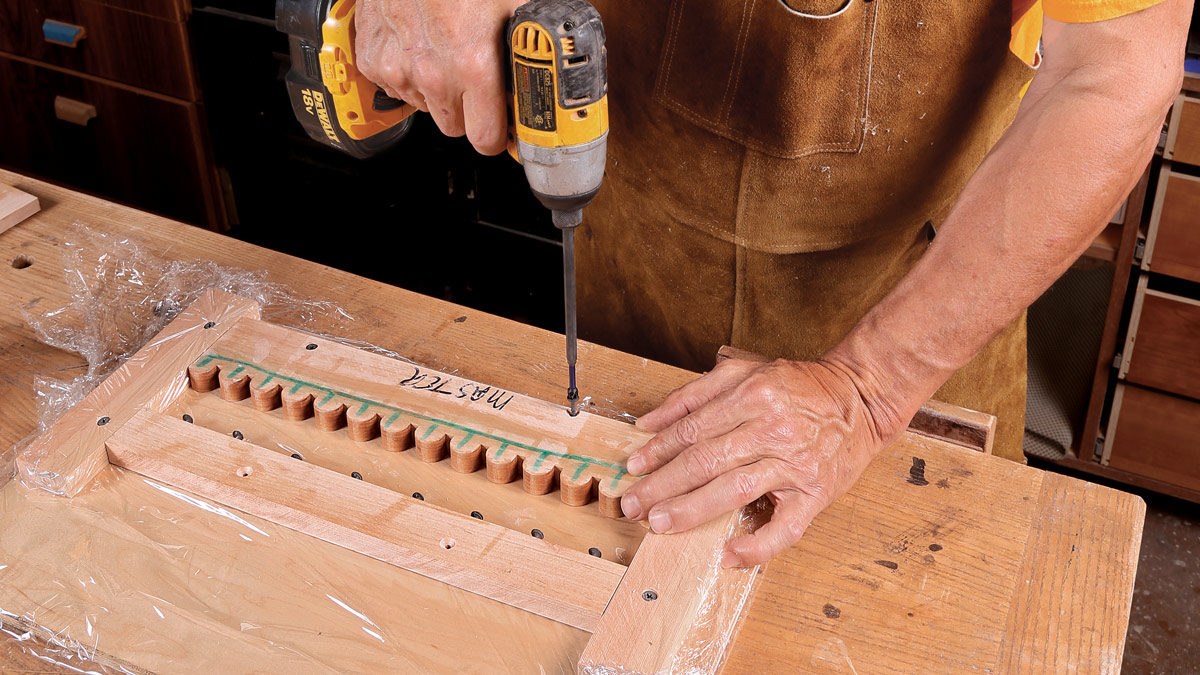
Finding one of those relics and restoring it wasn’t realistic, so I built a sled and two jigs that allow me to create the joint using the router table and a handheld drill. The rounded fingers on the ends of the drawer sides are simple to make using the sled, which is essentially a finger-joint jig for the router table. The trick is cutting the other part of the joint, the line of semi-circular cutouts in the ends of the drawer front. To rout them I need a template, and I make it by taking a casting of the finger side of the joint. It turns out that casting with epoxy is easy to do and remarkably accurate.
Extra: Megan Fitzpatrick explores the history behind the Knapp dovetailing
machine, one of the first machines to efficiently manufacture first class drawers
My joint differs from the original, in which the pin was integral to the drawer front; I use dowels for that circular detail, adding them after the joint is cut and the drawer box is glued together.
Create a master template
My sled rides in the miter track in my router table, but if you don’t have a miter track you can screw a piece of hardwood to the top of the router table so that it stands proud and cut a matching dado in the bottom of your sled. Or you could clamp or screw two straight boards to the table so that the sled exactly slides between them.
Once the sled is built, I use it to create a master template that will establish the pattern and spacing that carries through the process. I set my sled’s indexing pin to cut on 1-in. centers because of the bit I use (Amana Round Over no. 49704). With the 1-in. finger spacing, your drawer height needs to measure on the 1⁄4 in. (for example 5-1⁄4 in., 6-1⁄4 in., 7-1⁄4 in.). Begin cutting the fingers, moving the workpiece over and registering the indexing pin after each cut.
This type of cut often yields tearout. I use a replaceable insert that prevents most tearout on the side that runs against the fence, but there is often still tearout on the front. So I start with my drawer sides slightly thicker than the final dimension and plane them to thickness after the fingers have been cut, removing tearout.
Make the mold template for the drawer-front jig
Now you’ll use the master template to create a duplicate, which will become part of the mold. You could skip making the duplicate and use the master in the mold, but I like to have a perfect master for future use. If anything should go wrong along the way, I can just back up to the master and easily start again. First, trace the master template onto the mold template. Then go to the bandsaw to waste out the space between the fingers. This preserves the router bit and gives a cleaner cut. Sharpening the bit will slightly change its shape and the whole process will have to be redone, so I do anything I can to put that off as long as possible. Buying a pair of bits at the same time helps as well.
Once I finish on the bandsaw, I go back to the router table and cut the finger shapes into the mold template as I did on the master template, using the sled and moving across the board by locating the most recent cut on the indexing pin.
For the full article, download the PDF below.
More on FineWoodworking.com:
- Fine Drawers Without Dovetails – Pinned rabbets are attractive, durable, and much easier to make by Hendrik Varju #208–Nov/Dec 2009 Issue
- Joint Wizardry – Japanese craftsman transforms joints with artistry and innovation by Kintaro Yazawa and Jonathan Binzen #191–May/June 2007 Issue
- My Favorite Dovetail Tricks Five ways to increase accuracy and reduce the time it takes to execute this hand-cut joint by Christian Becksvoort #171–July/Aug 2004 Issue
Fine Woodworking Recommended Products

Olfa Knife

Marking knife: Hock Double-Bevel Violin Knife, 3/4 in.
Freud Super Dado Saw Blade Set 8" x 5/8" Bore







Comments
This is an incredibly beautiful joint, and I admire the heck out of Louis Kern's ability to make the jigs and plan out the whole idea. I wish I had half that imagination and creativity.
And although I read the article over and over, I don't know if I'll ever have the time or patience to build these beautiful joints. I'm proud if I can get dovetail joints to look good consistently! But I know right where to go if I ever decide to make these unique and lovely joints.
Log in or create an account to post a comment.
Sign up Log in