How To Use Stringing To Liven Up Table Legs
Add a traditional stringing pattern to a leg.
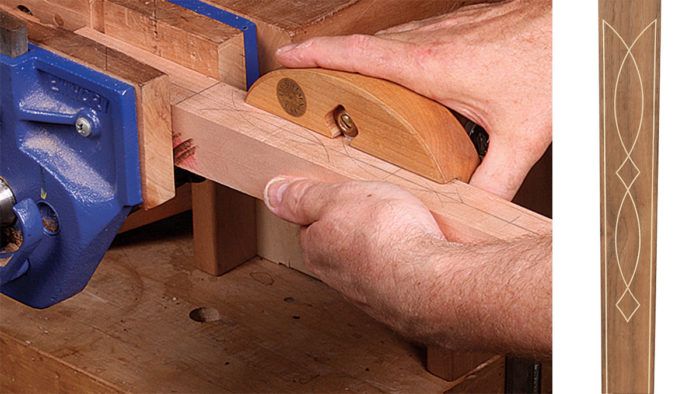
Synopsis: Learn to set stringing into the face of a table leg using Steve Latta’s expertise as a guide. He demonstrates how to lay out the design on the leg, cut the grooves for the stringing, slice, cut, and thickness the stringing, and finally, glue it into the grooves. Included are two options for managing the intersections between pieces of stringing—the run-by joint and the miter joint.
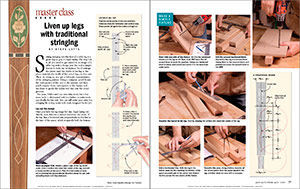
Setting stringing into the face of a table leg is a great way to give it visual vitality. The way I do it, all you need to get started is an image of a table leg with a design you like and a simple fixture to hold the workpiece. You’ll enlarge the photo until the width of the leg in the photo matches the width of the actual leg—in this case, 1-5⁄8 in. In doing so, you get a full-scale representation of the stringing pattern. Using a compass, you’ll locate the centerpoints of the arcs in the pattern, and then you’ll transfer those centerpoints to the fixture and use them to guide the radius tool that cuts the arced grooves.
Watch a video demonstrating how
Latta sizes his stringing to perfection
For years, I fabricated my own inlay tools, but a few years back I collaborated with Lie-Nielsen Toolworks to make tools specifically for this task. You can still make your own, but stringing life is way easier with tools designed for the job.
Lay out the design
Once you have the leg image full size, begin laying out directly on it. First run a vertical axis down the center of the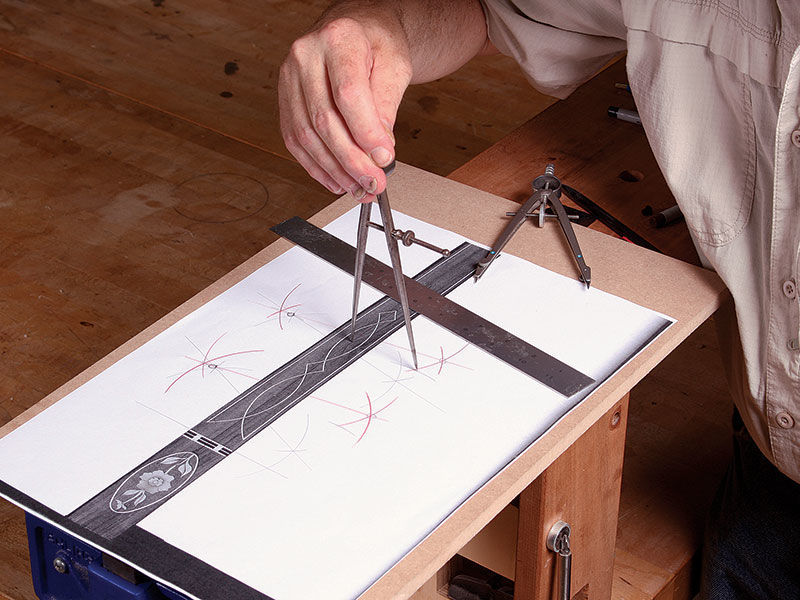 leg. Run a horizontal axis perpendicular to this line at the base of the apron, which is typically both the bottom edge of any banding and also the start of the taper. Now find the centerpoints of all the arcs in the design. To find the centerpoint of an arc, plot perpendicular bisectors at two different points along the path of the arc. Extend the bisectors until they intersect, and this is the center of the arc. Repeat this process for all of the arcs on half of the inlay; because the pattern is symmetrical, you won’t need to lay out both sides. Historically, a single radius was typically used, so if you are coming up with arcs that are really close to each other, pick an average.
Make the fixture and transfer the pattern to the leg
To make the fixture, screw two maple blocks, 1-5⁄8 in. thick by 2 in. wide by 10 in. long, to a piece of 1⁄2-in.-thick plywood or MDF. The two blocks should be spaced so that you’ll need a little bit of pressure to slide the leg between them. Make sure the lower banding line fits just inside the top of the fixture so you can use it as a reference.
Start by marking vertical and horizontal axes on the actual leg just as you did on the drawing. Then run lines down the leg 1⁄8 in. from the sides to indicate where the straight border stringing will go. Slide the leg securely into the fixture and add a clamp to keep the face of the leg flush with the top of the maple blocks. Continue the horizontal axis out across the maple blocks, making certain this line is perpendicular to the vertical line down the face of the leg. The horizontal apron line on the blocks will become a reference mark for all the legs when inserted into the fixture.
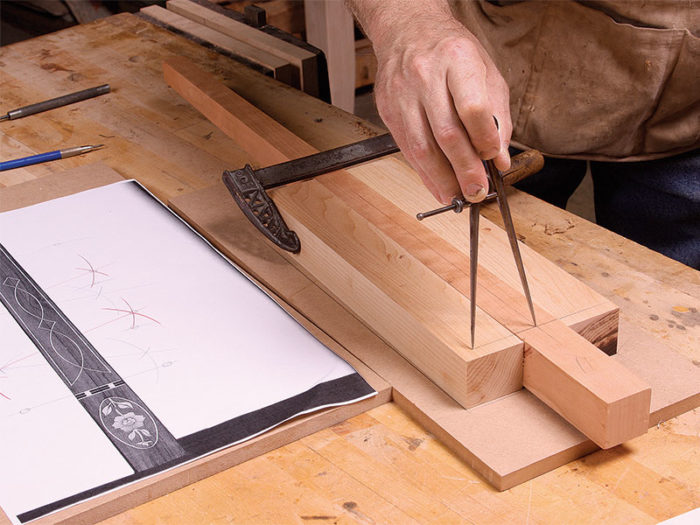
With the leg firmly mounted, use dividers to transfer all the pivot points from your drawing to the fixture. Sometimes a little fudging needs to happen to get the pattern to work out just right. In this case, because the leg tapers, I wanted the lower enclosure a little smaller than the top, so I bumped the center points out about 1⁄32 in. It is only a small adjustment but it does have a significant impact on the final design.
To view the entire article, please click the View PDF button below.
From Fine Woodworking #273
More on FineWoodworking.com:
- Advanced Stringing Techniques: Part I by Steve Latta
- How to make a sinuous, tapered string inlay by Steve Latta #266-Jan/Feb 2018 Issue
- Federal Details Transform a Simple Table by Steve Latta #246–Mar/Apr 2015 Issue
Fine Woodworking Recommended Products

Bahco 6-Inch Card Scraper
Whiteside 9500 Solid Brass Router Inlay Router Bit Set




Log in or create an account to post a comment.
Sign up Log in