How To Make Greenwood Shrink Pots
Explore the magic of wet-dry joinery by making shrink pots with Maine woodworker Danielle Rose Byrd.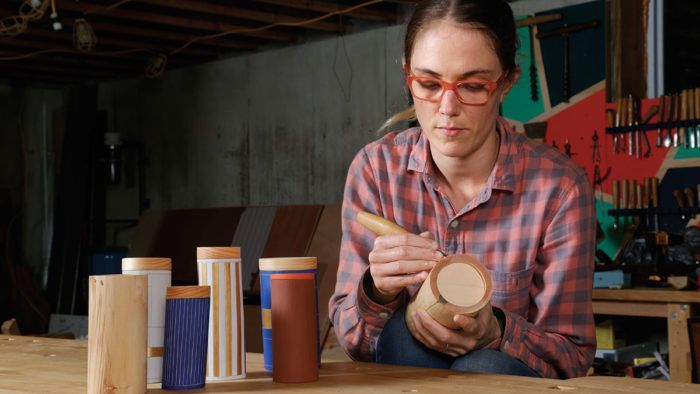
Synopsis: Explore the magic of wet-dry joinery by making shrink pots with Maine woodworker Danielle Rose Byrd. Shrink pots are a straightforward way to try green woodworking while making something useful and decorative for your home. First, the pot is roughed out from a wet log, then, once it has been hollowed out, the bottom is added. The dry bottom fits in a groove in the wet wood, and as the pot dries out, it shrinks for a tight fit.
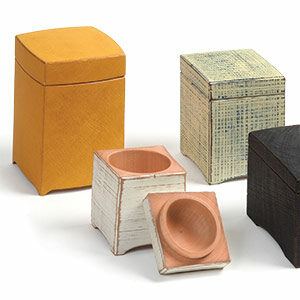
Making shrink pots is a great, straightforward green woodworking project that relies on the magic of wet-dry joinery. After hollowing a wet round, you let it shrink as it loses moisture, trapping a dry solid-wood bottom within. I love the intersection of utility and beauty, so the limitless options that shrink pots present are very appealing to me. They’re commonly used to hold dry goods, pencils, candy, cat treats (at least for me), and other knickknacks. Also, once dry, they’re great vessels for exploring design options such as colors, textures, and chip carving. Shrink pots are part of a home, and I think they should reflect some of that personality. But I’ll let you explore that on your own, as this article covers only the fundamentals of making one.
Choose the right wood
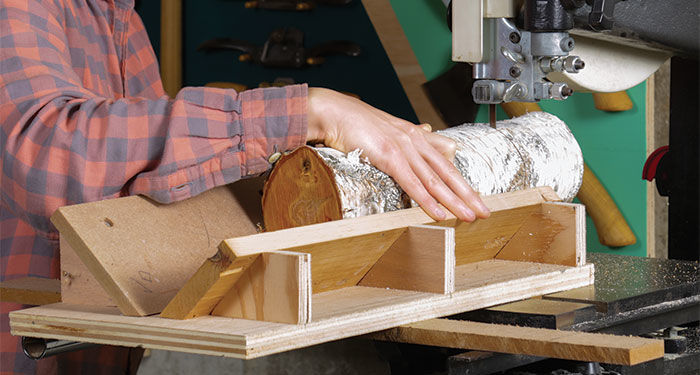
Birch is my favorite wood to use for shrink pots, though maple, alder, and aspen can be used, too. Stay away from aromatic woods, like cedar, for any jar that will store dry goods, candies, or other food items. For the lids, though, wood selection doesn’t have much effect. Look for smooth, knot-free sections from trunks or branches. Shrink pots 5 in. dia. or smaller are easier to process, though much larger ones are doable.
Watch Danielle Rose Byrd create a
shrink pot from start to finish in this video
Shrink pot tool kit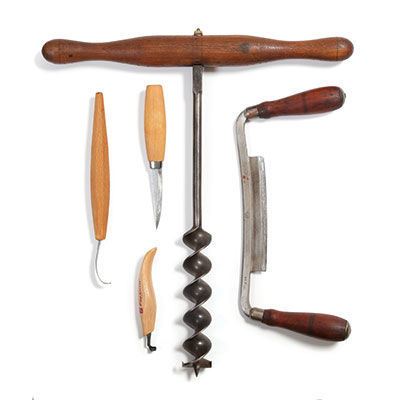
Making shrink pots requires just a handful of green woodworking tools. The T-auger (center) may be hard to find, but you use it for only one task, coring the pot blank, and luckily, a drill press will also work. If you do find a T-auger, be sure the lead screw is intact. The scorp (bottom left), used to make the channel that the bottom fits into, is from Flexcut, and sloyd knives (center left) and hook knives (far left) are available from a number of makers both large and small. Drawknives (right) are fairly easy to find, both antique and new.
Lay out the walls and core the blanks
After cutting the stock to length, making sure each end is flat, use a compass to lay out the vessel’s walls about 3⁄8 in. thick. Thicker walls can be trickier when fitting the bottom because they contain more moisture, which means more shrinkage as the pot dries. The opposite is true for thinner walls.
I use a T-auger to core the blanks, but other woodworkers have used a drill press and Forstner bit. Power drills can be used, but just make sure to use smaller bits. I’ve killed a motor trying to use the biggest bit possible.
When drilling out the blank, don’t cut right to your inner layout line. Instead, leave room to smooth the surface with a hook knife. If there’s a significant amount of material to remove after coring the blank, turn to a mallet and a hearty gouge with a deep sweep before using your hook knife. For this work, I like a hook knife with a long handle. Make sure the texture you leave at this stage is what you want, because once the bottom is fitted, you won’t be able to easily reach all parts of the inner walls again.
Now clean up the exterior. Remove the bark and work close to, but not up to, the exterior layout line.
 To view the entire article, please click the View PDF button below.
From Fine Woodworking #273
More on FineWoodworking.com:
- Video: Greenwood Shrink Pots by Danielle Rose Byrd #273–Jan/Feb 2018 Issue
- Wooden Spoons by Peter Galbert #252–Jan/Feb 2016 Issue
- Carve a Greenwood Bowl by David Fisher #263-Sep/Oct 2017 Issue
Fine Woodworking Recommended Products

Suizan Japanese Pull Saw






Log in or create an account to post a comment.
Sign up Log in