Dark, Rich Cherry Finish with Household Products
Drain cleaner, roofing tar, and shellac team up for a foolproof finish.
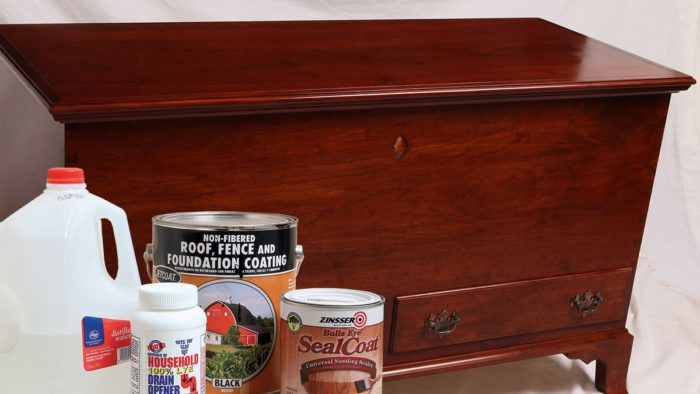
Synopsis: Tim Puro will stack his favorite cherry finish up against all kinds of fancy finish recipes. It is accomplished in three steps, with three common products: 100% lye drain cleaner mixed with distilled water, non-fibered roofing tar mixed with mineral spirits, and SealCoat dewaxed shellac right out of the can.
Students often ask me to name my favorite cherry finish. I tell them that there’s nothing wrong with using a clear, oil-based finish on this popular hardwood, but I know another finish that imparts deep, rich color and more depth. Better yet, it consists of common products, all available from the local hardware store or home center: lye (in the form of drain cleaner), asphaltum (from roofing tar), and SealCoat shellac.
These inexpensive products darken cherry and highlight the grain in a way that no dye, stain, or oil can on its own, creating depth and color that attracts attention from across the room. And the shellac makes it durable enough to use on almost any piece of furniture.
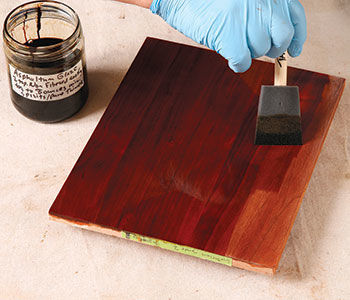
The lye reacts with the cherry to create rich color without blotching, and brings out beautiful yellow and orange figured grain lines in the wood. It makes good cherry look great and figured cherry look spectacular. Shellac seals in the first step and lets you then use diluted tar as a glaze, adding more warmth and getting into nooks and crannies to create a subtle aged effect. Used over shellac, the tar glaze is reversible, meaning you can wipe it off if you don’t like the look. The final topcoats of shellac deliver shimmering depth and a soft sheen.
Prep some sample boards
I always start with sample boards. This is critical for multi-step finishes. One of the main reasons people don’t color wood is because they’ve had bad experiences in the past with dyes and stains, which can be expensive and unpredictable. I’m using inexpensive products and an almost foolproof approach here, but sample boards are still an important insurance policy.
Make yours from the same wood you used to build the actual piece, prepped the same way. On the back of the board, take notes on each step, such as how you mixed and applied the lye to the wood.

From Fine Woodworking #273
To view the entire article, please click the View PDF button below.
More on Finewoodworking.com:
- How to Pop the Curl in Cherry by Mark Schofield #200–Sept/Oct 2008 Issue
- Cherry–A rose among woods by Jon Arno #66–Sept/Oct 1987 Issue
- Finish Cherry … without Blotches by Jeff Jewitt #130–May/June 1998 Issue
Fine Woodworking Recommended Products
Osmo Polyx-Oil
Foam Brushes
Odie's Oil


Comments
I thought I would try this finish on a chest of drawers I made. So far I am pleased with how it is turning out. However, a couple of notes. First, any bit of glue is going to prevent the lye from darkening the underlying wood - I found you can sand the area and apply more lye and it does not seem to be a problem. Or you can use artist paints to cover up the area. Another problem is if you have any tear-out and used 5-min epoxy to fill the gap - that again prevents the lye from staining the cherry. Other than that, it's just a lot of layers of shellac and sanding!
I tried this technique on a demilune table, and the results looked great. Just one question for Mr. Puro: Do you finish all the pieces before assembly, or do you complete some or most of the finishing before assembly? Thanks.
Log in or create an account to post a comment.
Sign up Log in