SketchUp: Modeling A Queen Anne Back Slat
Tim Killen makes great use of SketchUp's intersect tool to model a complicated 3d piece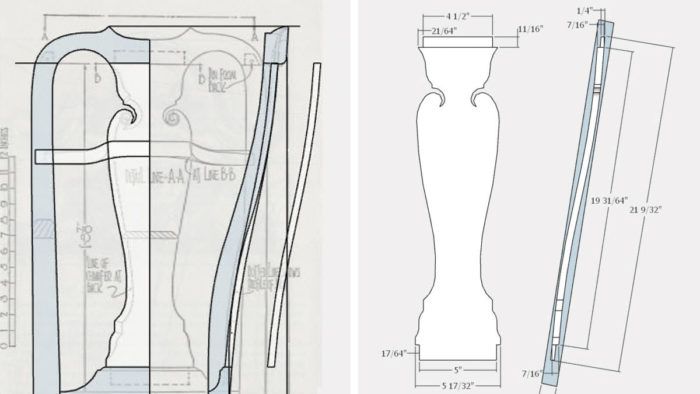
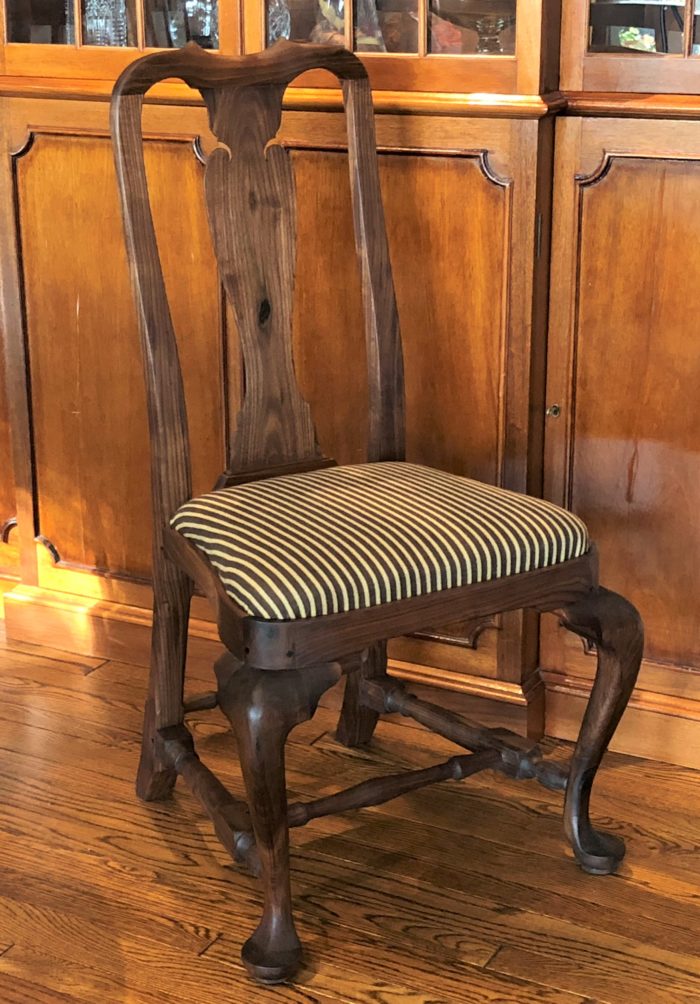
I’ve reproduced an historic Queen Anne Side Chair, circa 1720-1740, in walnut. Every component of this chair is shaped in many directions, and it is difficult to find a 90 degree angle. The Queen Anne designers in the 18th C. were motivated to create a more comfortable seating experience, and this resulted in more shaping, particularly the rear legs and the Back Splat. And indeed, they achieved better comfort and improved lower back support.
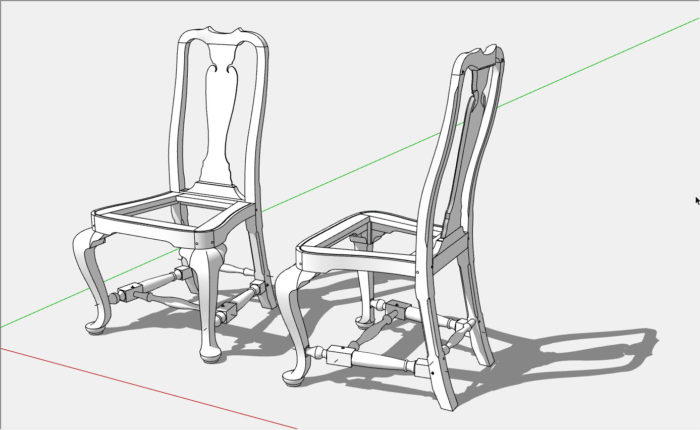
In the following illustrations and video, I will show the process used to create the serpentine shaped Back Slat in SketchUp. But first here is the final assembly model of the side chair – one view is rotated 90 degrees to highlight the side view of the Back Legs and the Back Slat.
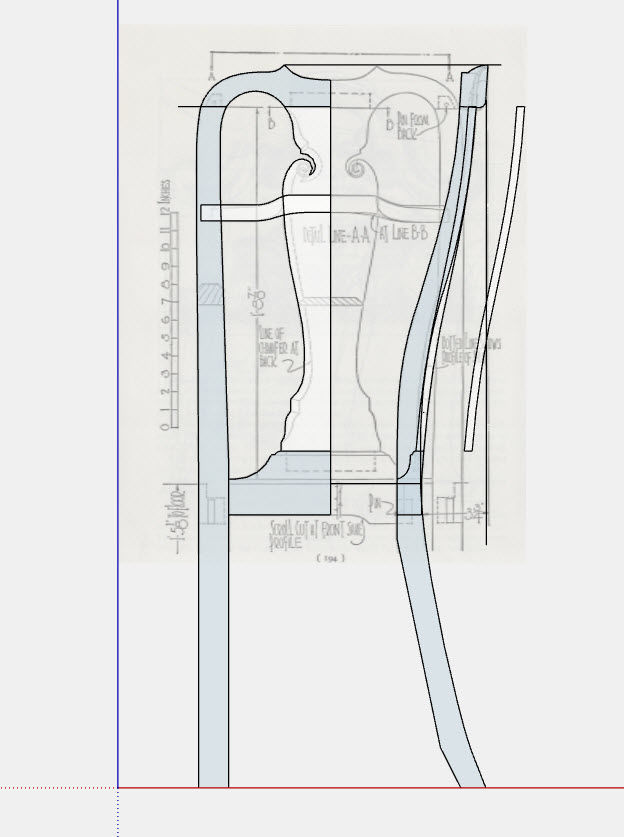
I started the SketchUp modeling after importing a scanned sketch found in Wallace Nutting’s “Furniture Treasury”. You can see my traced-over shapes in grayish-blue and white over the top of the face of the scanned image. There are both front and side views to capture on this image. In the side views, note the serpentine shape of the legs and Back Splat.
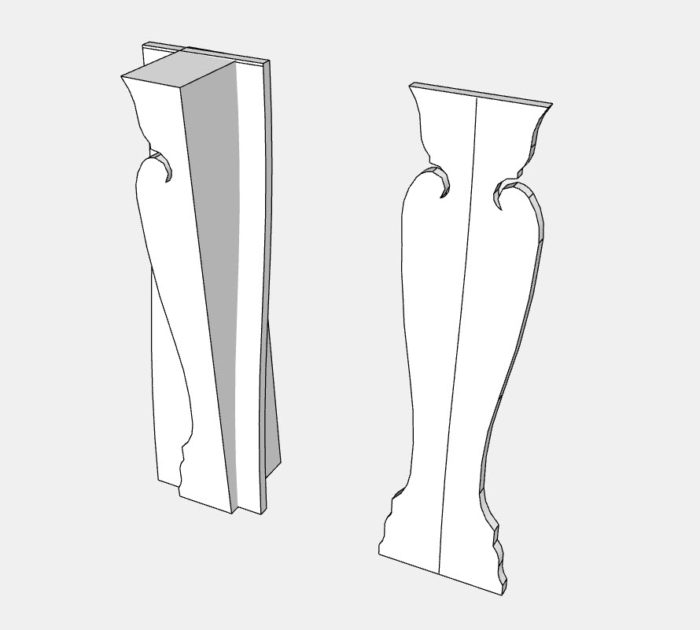
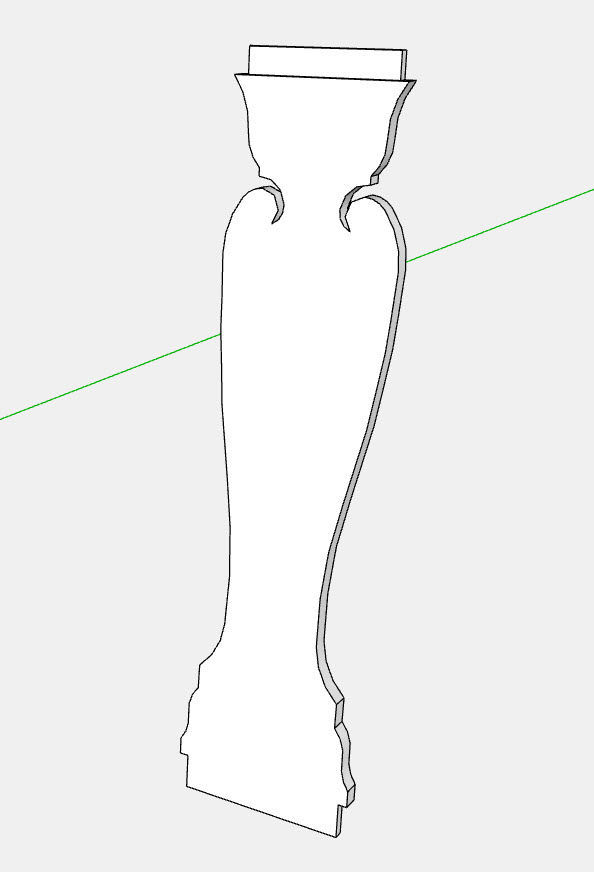
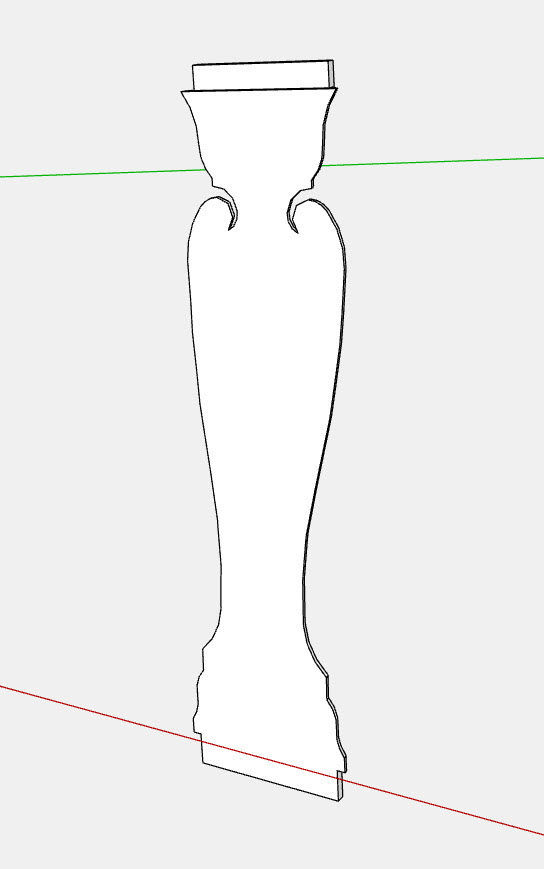
On the left, you can see where I used the Push/Pull Tool to create two solids, a “front” and a “side” and positioned them to intersect. Then with SketchUp’s Intersect function, the result is a component shown on the right which is a 3D model of the Back Slat. This component is about 1/2-in. in thickness.
In the next step I added the tongues or tenons on the top and bottom edges. These are 1/4-in. thick – the top fits into a socket in the Crest Rail, and the bottom tongue fits into the chair’s Shoe.
The next stage in SketchUp was to add detailed dimensions and create a Scene with the views needed in the shop. The grayish-blue rectangle behind the side view of the Back Slat shows that 1-in. thick lumber can be used to bandsaw the serpentine shape.
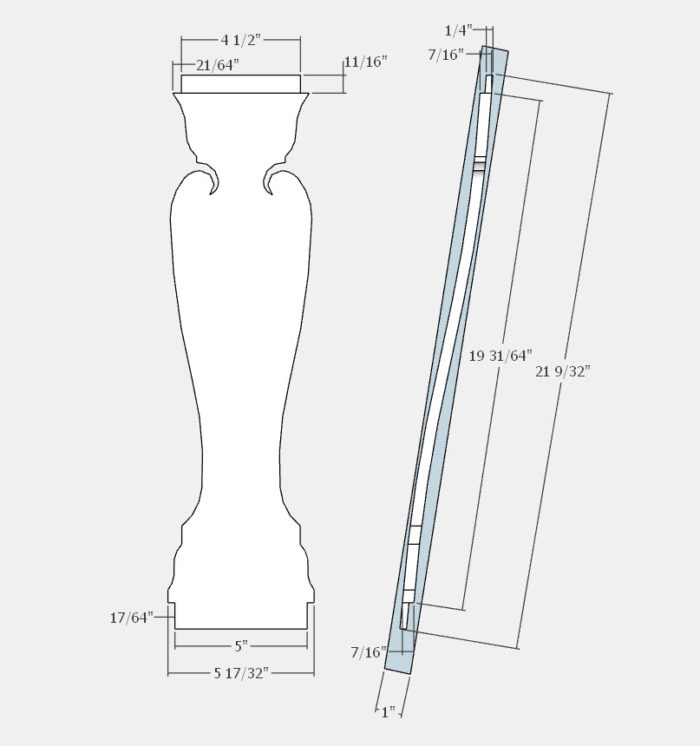
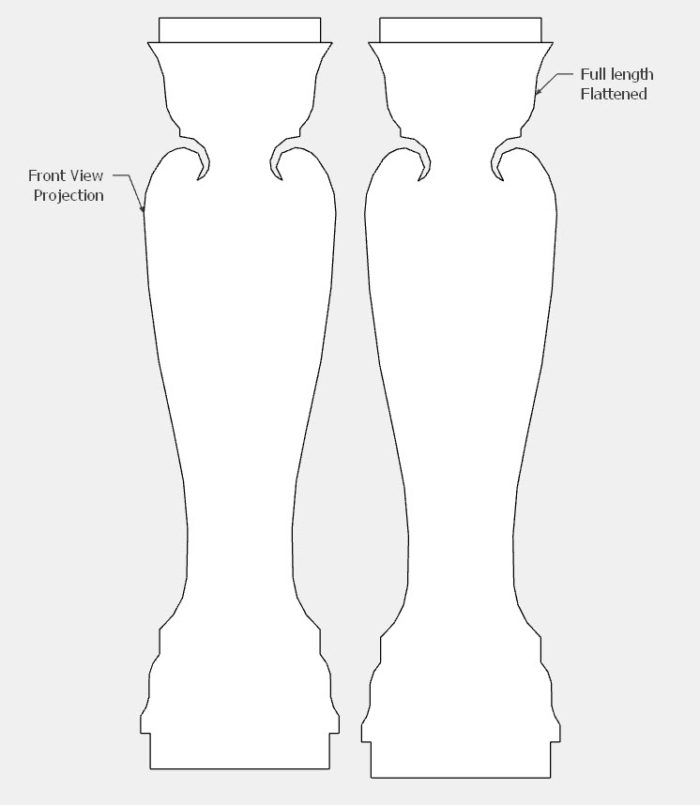
A very powerful feature of having the SketchUp model is the production of full size templates for shop work. In this case, I created three templates – one for the serpentine shape (shown above) and a second front view based on its orthographic projection. The third template was a “flattened” front view, so that it can be held down into the band-sawed face. This is slightly longer and allows a more accurate tracing over the scroll shape of the Slat’s side edges. I did use a Plug-in for SketchUp that quickly creates the “flattened” shape and length.
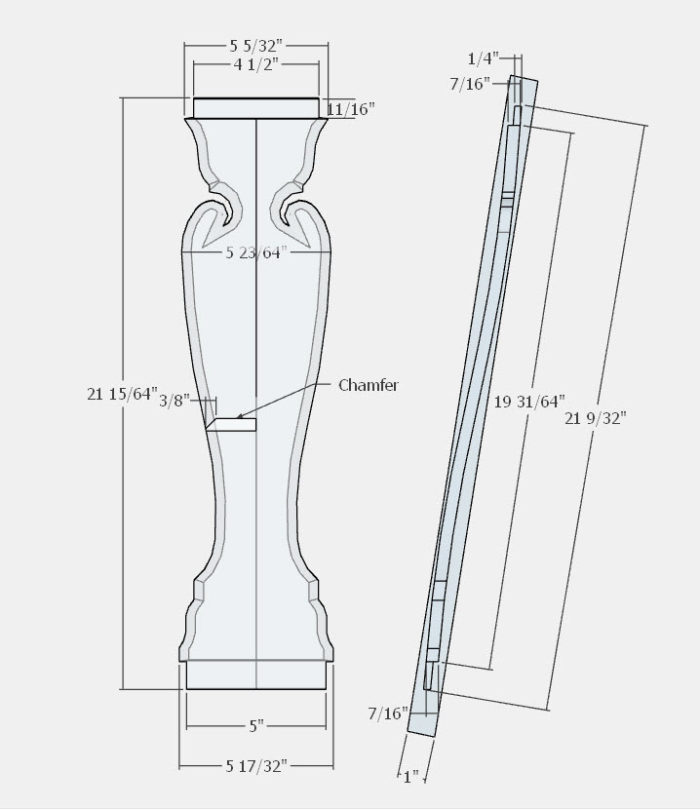
The Back Slat has a 3/8-in. chamfer on the back edge. This was an original embellishment to make the Slat appear extremely thin. This is a beautiful artistic enhancement. I used the Follow Me Tool to create this detail. I turned on X-ray Style so the chamfer is visible in the background.
Here is the final component. Note the apparent thinness due to the back chamfer.
https://www.youtube.com/c/killenwood




Comments
What was the Plug-in you used to flatten the back splat?
I used the Plug-in Unwrap and Flatten Faces.....
Tim
Log in or create an account to post a comment.
Sign up Log in