Chris Gochnour’s sharpening process
Watch a hand tool aficionado who is always looking for new ways to be a better sharpenerChris Gochnour has been an avid hand-tool user for decades. When you use hand tools as much as he does, you get pretty good at sharpening. Sharpening is as much about process as it is the tools you use. Without a good sharpening process, the world’s most expensive tools aren’t going to help get you sharp.
In this video, we let Chris’s process play out in real time, so you can see the speed of his methods for yourself.
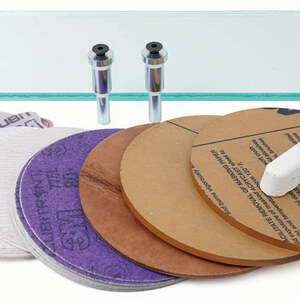
Chris’s sharpening kit contains the following:
- Norton IM 83 waterstone case
- Atoma 400 plate for flattening waterstones
- Lie-Nielsen honing guide
- Trend lapping fluid
- DMT coarse diamond stone for establishing the bevel
- Sigma 1k, 6k, and 13k waterstones for honing
- Leather strop charged with Simichrome
- Raw denim for an extra level of stropping
- Camellia oil
More on FineWoodworking.com:
- Tool Test: Honing Guides – The best guides to help get a keen edge on a variety of blades
- Modifying an inexpensive honing guide – All it takes is a file and a little time by Bob Van Dyke
- Handplane Sharpening – You’ll never get a handplane to perform the way you want it to until you get the blade truly sharp.
by Michael Pekovich


Comments
Does anyone know what product he was using to spread Camellia Oil on the blade? It reminds me of Paul Sellers' "Oiled Rag in a Can."
This may be sitting in my amazon cart right now.
I couldn't understand a word he said.
I love Chris's visual demonstrations! It would be great if we could know what is going on in his head as he works. At any rate, thanks for the video. I'm off to Amazon to purchase the Norton IM 83 waterstone case.
would be more helpful with words...
Very nicely shot and enjoyable to watch. Chris Gochnour is such a talent.
I watched this without disturbing anyone around me.
An exellent video showing all the equipment required for good sharpening procedure if you don’t do it freehand. I can’t so I bought a Worksharp.
@kiltedwoodworker on insta has been selling little containers with plaid charged with that oil for the same purpose.
Chris, the Veritas Bevel Up Smoother is ... well ... a smoother. The last things that you wish to leave on your workpiece are tracks from a straight blade. This is intended to be the last plane to touch the board. So, where is the camber in the blade to avoid tracks?
Regards from Perth
Derek Cohen
From Chris,
Thanks for reaching out for clarification. As this is a smoothing plane I do indeed camber the the iron. This is done by alternating pressure on the right side of the blade and then the left. An interesting fact is that bevel up planes require about 3 times the amount of camber as bevel down planes. This is due to their low bedding angle(12degrees). Because of this I do my initial chambering with a course diamond stone. Once the camber has been established, the diamond isn’t needed for subsequent honings as maintenance of the camber can be done on the water stones alone.
Chris/Ben
I did not see camber being created in the video, and I am aware that many users of BU planes are unsure how to do this, as well as giving up as it can be too much work (since the camber needs to be greater than with BD planes).
I have been involved with pre-production testing with Lee Valley/Veritas for many years, and had a special interest in BU planes. One of the problems with creating a camber, especially as the bevel angle becomes steeper, is the availability of single bevel blades (such as in 38- or 50 degrees). Attempting to camber these is an exercise in futility, as there is so much steel to remove.
In 2008 I published (on my website, but actually earlier in discussons here on Knots) an article on how to camber high angle BU plane blades: http://www.inthewoodshop.com/WoodworkTechniques/TheSecretToCamberinBUPlaneBlades.html
Briefly, only add camber to a blade with a 25 degree primary bevel, and do so as a secondary bevel. The secondary bevel is at the angle of choice to create the desired cutting angle. For BU planes, honing guides are a necessity, since the secondary bevel needs to be reasonably precise. I may freehand sharpen all other blades, but not BU blades.
In my case, building with West Australian hardwoods, which are interlocked and hard, high cutting angles are necessary to avoid tear out. A secondary micro bevel of 50 degrees is needed. Camber on this is only possible via the secondary bevel.
Regards from Perth
Derek Cohen
Derek, with respect, I'm not sure what you're getting at. Are you arguing that Chris is leaving track marks, even though there are none visible or detectable by touching the board which I did? Are you arguing that the finish he was getting wasn't impeccable? Because that's what matters, the results.
Sure, it's not how you do it... but this is about how Chris does it.
Ben, I understand that this is how Chris sharpens his BU blades, but he does not include the camber. The camber is extremely important with smoothers (and other types of planes). The video may not show plane tracks, and you may also not see them in day light ... unless it is raking light. Then it will show, and be an issue when finished.
The process of adding a camber is not complicated, but needs to be explained as part of the process of preparing BU blades. This is a different process from doing so with BD blades (which do not have secondary bevels of 40+ degrees). It cannot be assumed that the reader/viewer will know what to do.
Without including an explanation of how the camber is done on a BU plane, the instruction is incomplete.
Regards from Perth
Derek Cohen
Derek, this wasn't intended to be an end-all-be-all on sharpening bevel-up planes. If it was titled, "Everything you need to know about sharpening bevel-up planes" I can see how it fell short for you. This was a woodworker in the middle of a project, who stopped to hone his smoother. We kept recording. I think it's important to show how someone touches up a blade and gets back to work. He wasn't preparing his blade from new, nor did we claim ti was.
No problem then, Ben.
Perhaps we should have Chris make a video that does the whole enchilada. Many would find this helpful as these are popular planes. I am a big fan of Chris, and I look forward to it.
Regards from Perth
Derek
Useful little video. Thanks for sharing Chris's expertise. And thanks for the explanatory captions. That lavalier microphone hanging from his shirt is useless.
The digital bevel gauge, not listed in Chris' sharpening kit, is THE key here. Though many use the pre-distanced blocking method to get to their 25degrees (or other choice angle, depending on use and preference), the digital bevel gauge allows you to check that everything is square and tight while in the position with which you'll actually be sharpening. This is critical, since you can really mess up an edge without notice QUICKLY if your iron is off. And once you've messed it up, your only option is re-grinding a fresh edge. I think the bevel gauge should be a standard for anyone with an extra $30 who's still using a honing guide.
I want to give a shoutout to the time-tested hollow grind + free hand "ride the bevel" method which is very fast, gives great feedback, and is nearly impossible to unwittingly mess up an edge--if you're off the bevel, you'll know it.
Lastly, glad to see Derek from Perth here. Looks like we're still in good company at FWW.
I know, it's genius. After filming this, I started doing the digital bevel gauge and found it too finicky for me. I did use it to perfectly set up the blocks on my honing jig guide.
I appreciate Chris’s video it’s great but I would have liked to see the mirror finish he had put on the blade before he put it back on the plane! Cheers Dave
Something I've wondered about for a long time. When clamping the blade in the honing jig it gets squeezed on the edges. Wouldn't that make a slight bow in the blade when the gig screw is tightened? It may be microscopic but still...
Really!!! Watching some guy sharpen stuff without any other information is purely unusable. Not worth my time and well below what I would expect from FWW. If you can't be bothered to annotate in ANY way, don't even bother.
ARC13, Text was shown for each step of the process.
Yes, you are quite correct. I should not have said "any annotation." Nonetheless, I felt this to be sub-optimal. Maybe just my idiosyncratic brain.
Thanks for correcting me.
As a professional straight razor restorer and honer, I can attest to the varieties of precision honing. Everybody thinks “their” method is better. Hone your tools with the equipment and technique you have mastered.
Just a point of reference, all antique furniture was built with tools hand honed, likely with out Diamond plates, synthetic high grit hones, honing guides and digital angle cubes, just a natural coarse and fine stone.
Rock on Chris.
I’ve been using a slope to get the correct angle. It is far superior to freehand or a honing guide. It takes me about 10 seconds to resharpen. I don’t have to measure protrusion of the blade, or have to flatten one surface with another. I have a jig in one workshop with a diamond disk and slope and a Worksharp in my main workshop. All this palaver with stones and wheels to be dressed is an expensive waste of time. With a honing guide 10 thou of too little protrusion and you get a secondary or tertiary bevel, 10 thou of too much protrusion and you’ll be at it all day. It’s a doodle to add camber with a Worksharp or my jig.
I loved this video. I hope the negative comments about the lack of audio narration don’t keep you from posting other videos like this. It’s not often that we get a glimpse into a master woodworker’s natural processes. I especially found the timing interesting. Thanks for trying something new!
Thanks for the demo, I need this kind of education
I know this video is about sharpening, but my a-ha moment was seeing how Chris twists his tote hand slightly to the right when drawing the plane back, or when first contacting the work-piece with the plane. See approx 6:08 in the video. Easy, subtle, practiced motion. I await the ensuing debate (not really, but it seems inevitable).
Log in or create an account to post a comment.
Sign up Log in