11 Mortise-and-Tenon Variations
The tried-and-true mortise and tenon comes in many forms.
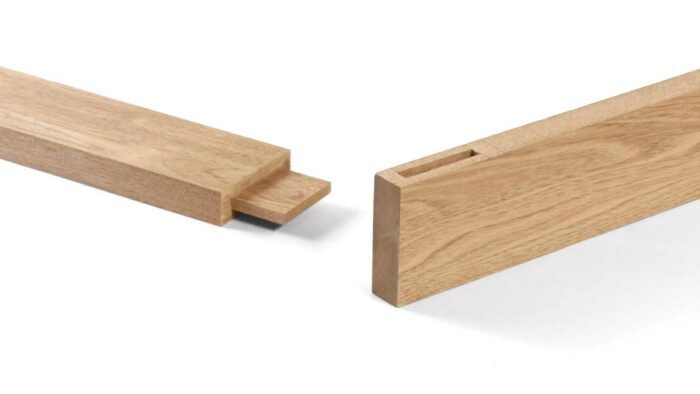
Synopsis: Strong and straightforward, the mortise-and-tenon joint has been securing wooden structures for thousands of years. Here’s a detailed look at this classic joint, from anatomy to layout to cool variations such as haunched, mitered, crenelated, and tusk.
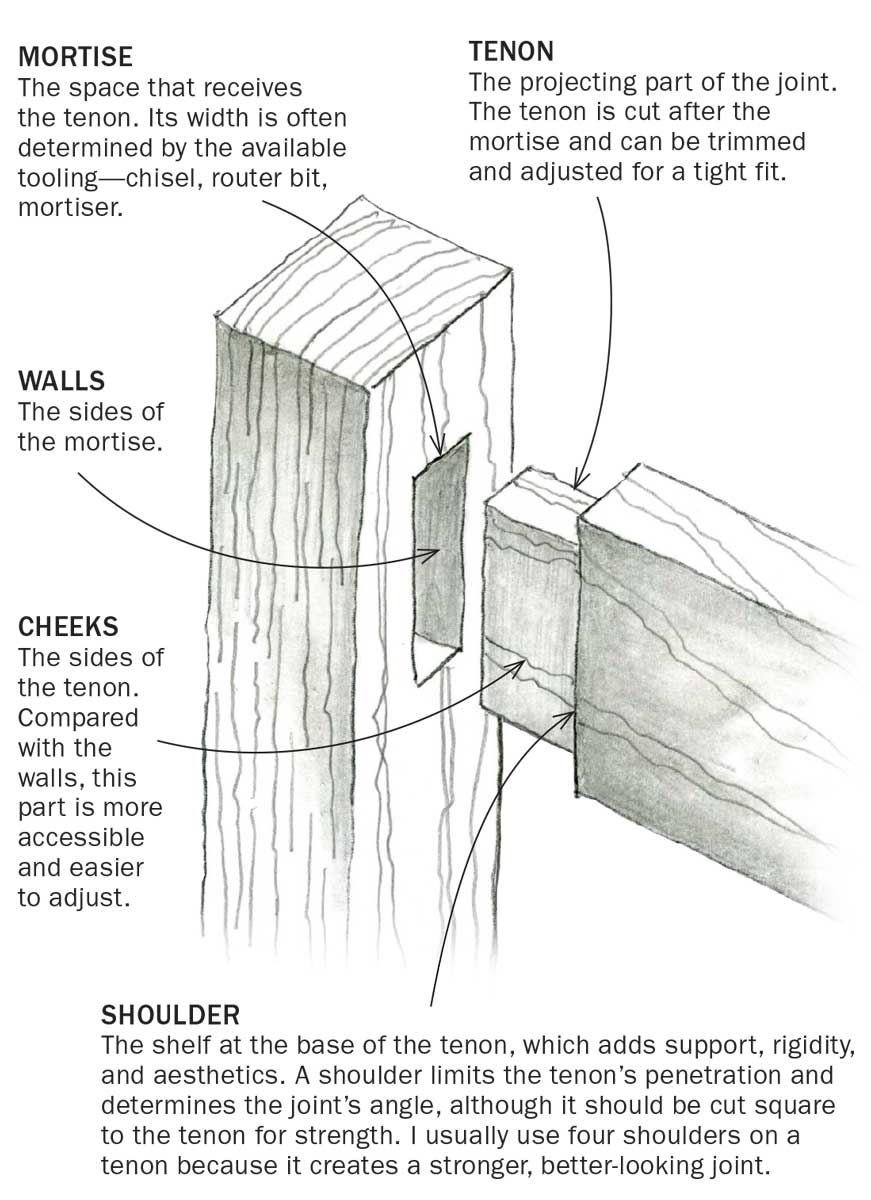
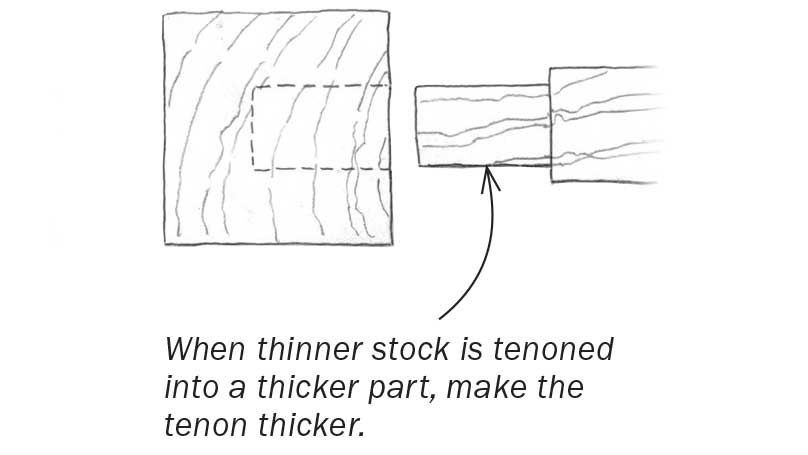
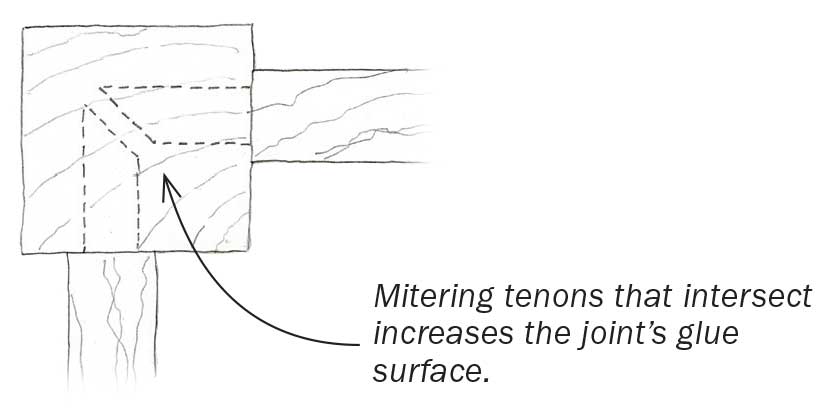
The mortise-and-tenon joint is one of the most dependable methods for joining wood parts of almost any size, configuration, and angle. The joint has been around for thousands of years and is found in many ancient wooden structures worldwide. I once owned and restored an 18th century timber-framed farmhouse and was surprised that it stood perfectly plumb and strong after 200 years; it didn’t lean or creak one bit, all thanks to the mortise-and- tenon. If you’re making a piece of furniture or other project that requires unfailing strength, durability, integrity, and good looks, the reliable mortise-and-tenon is a great choice—but which to pick? There are many variations of this fundamental joint. You can keep it basic, or you can add flair to suit your design. I’ll take you through the basics of the mortise-and-tenon, including its parts and how to size the joint correctly for your projects. I’ll also show you a few fun variations— some of them don’t even need glue.
Anatomy
Sizing

Single tenon
Haunched
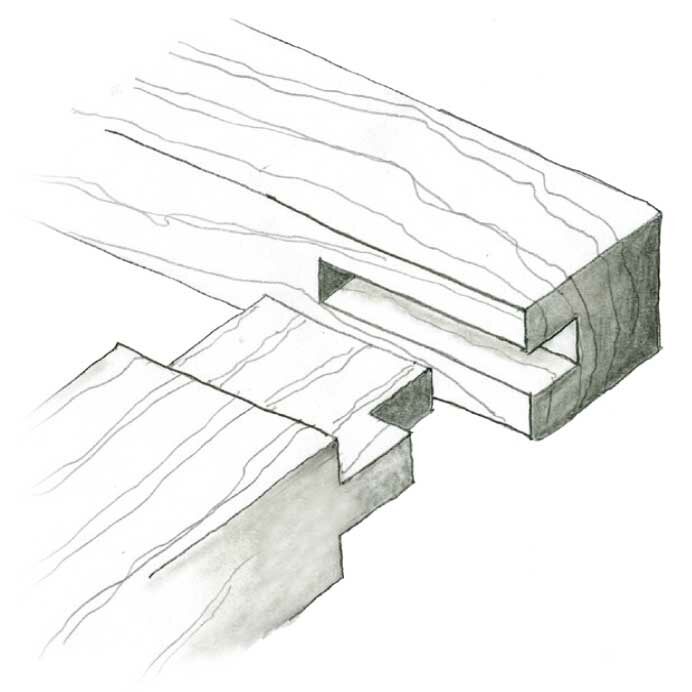
Haunched tenons extend to the exterior corners of the joint. The haunch increases the glue surface area on the cheeks for strength and helps maintain the joint’s alignment. It often is used to hide a continuous groove that would otherwise be visible, as on a paneled door.
Fewer Shoulders
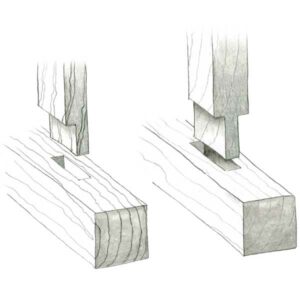
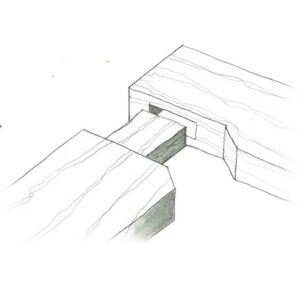
While I prefer mortise-and-tenons with four shoulders, sometimes it’s better to go with fewer. Take, for example, the bareface tenon, which is shouldered on only one side. This allows a thicker tenon to be set into large, thick stock, which can benefit load-bearing constructions like work tables or platforms. I’ve used this joint when connecting rails to legs for a table.
A tenon with only two shoulders may appear in utilitarian woodwork, such as fences and gates. This construction speeds the work, but might expose a portion of the mortise on the completed project.
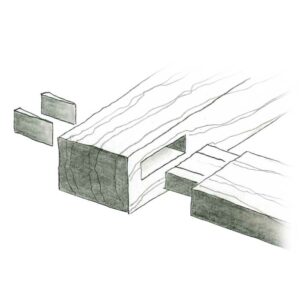
Slip
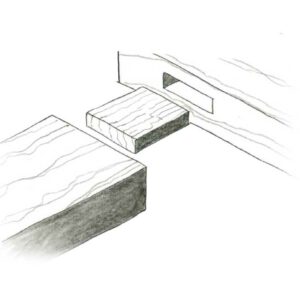
This joint involves cutting identical mortises on both parts of the joint, then joining them with a loose (instead of integral) tenon. With a properly fitted slip tenon, there is no loss of strength. And the ease and speed of construction makes it a great choice. I often choose a slip tenon when there are angles involved, avoiding the need to cut angled tenons.
Multi-tenons
Twin
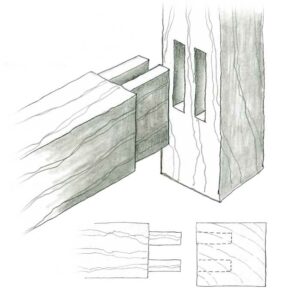
I often use this variation when connecting an apron or rail to a thin leg. By doubling up the tenons, I increase the long-grain glue surface, which provides more strength. |
Crenelated
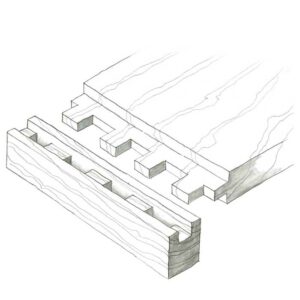
A crenelated tenon doesn’t maintain a uniform length. Instead, it goes up and down, like a castle parapet. It’s shaped like this because a long, wide tenon might create weak walls in the mortise, causing it to separate from the tenon and encourage wood movement within the joint, possibly leading to joint failure. The intermittent shorter tenons preserve the integrity of the mortise. Crenelated tenons are often used on breadboard ends, which help keep tabletops flat. |
Specialty tenons
Mitered shoulder
This is often employed when there is a decorative treatment, such as a bead, running along the inside edge of the frame for a raised or flat panel construction. |
Mitered face
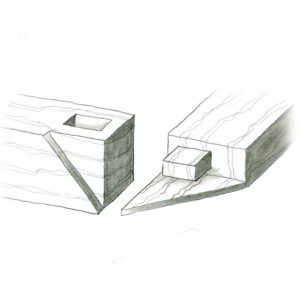
This variation has a thin portion of the face mitered, combining the strength of a mortise-and-tenon with the visual appeal of a miter. |
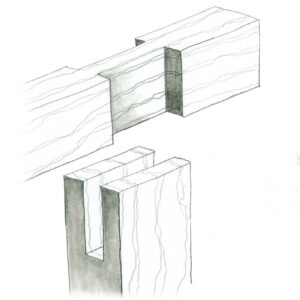
Bridle Joints
With this joint, both halves are open, with one sliding into the other. Once joined, the connection is solid, and can render the joint rackproof. |
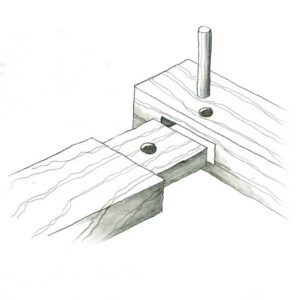
Pegged
This joint is reinforced with a small-diameter peg driven through the joint perpendicular to its face. Because of the strength of modern adhesives, pegs today are often decorative and are not really essential. |
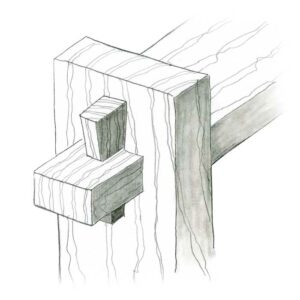
Wedged through-tenon
Wedging the end of a tenon reinforces the joint, closing small gaps and providing a tight fit. With through-tenons, this is also done for decorative purposes. |
Tusk
An extended tenon comes through the mortise, and at the point where the tenon clears the mortise, it is pinned in place by a peg or a wedge. You find this joint on assemblies that can be dismantled and put back together. |
 To view the entire article, please click the View PDF button below.
From Fine Woodworking #274
More on Finewoodworking.com:
How to Cut Mortise and Tenon Joinery by Fine Woodworking Editors
Video Workshop: Hanging Wall Cabinet by Mario Rodriguez
Video: Quick and Sturdy Door by Mario Rodriguez
Fine Woodworking Recommended Products

Jorgensen 6 inch Bar Clamp Set, 4 Pack

Veritas Precision Square




Comments
Enjoyed the Informative article. The "fewer shoulders" and "mitered shoulder" illustrations look the same to me. Should there be another illustration ?
You're right! The PDF should be correct. We'll fix the page.
Log in or create an account to post a comment.
Sign up Log in