While working with some new online students over the last several weeks, the discussion has turned to layers. New users often find layers in SketchUp to be a little confusing at first. Here’s my attempt to clarify things a bit.
In most programs layers are used to separate things and provide some order to the way those things are shown. They are analogous to the sheets of film commonly used in drafting years ago. In fact that’s where the term comes from. In SketchUp, though, layers don’t provide separation between entities. That’s done by making components or groups. Instead, layers are used to control the visibility of entities. SketchUp’s Help files say, “Layering in SketchUp is for display only. Think of them as light switches that illuminate something or turn it off.”
In every SketchUp file you create there will always be the default layer which is called Layer 0. This is the layer that should be active at all times while you are modeling. That means the radio button to the left of the layer name should always be at Layer 0. All edges and faces are created on Layer 0 and should remain on Layer 0. After you select the geometry and create a component or group, you can assign a layer to the component or group. The edges and faces inside the component or group stay on Layer 0, though. To create a new layer, click on the + in the circle at the top left of the Layers panel. If you’re using a web-based version of SketchUp, the + is at the bottom left corner of the Layers panel.
Although this might be a challenge to wrap your head around at first, it’s actually a very easy workflow. In other programs you have to always be concerned about which layer you are working on and as you move the project, you are constantly chasing the layers to make sure you are on the right one. In SketchUp you don’t have to worry about that at all.
Here I’m using the model I created for plans for Michael Robbins’ Contemporary Desk as an example showing how I set up layers in a typical model. The majority of the layers are set up to associate with certain types of parts in the project. 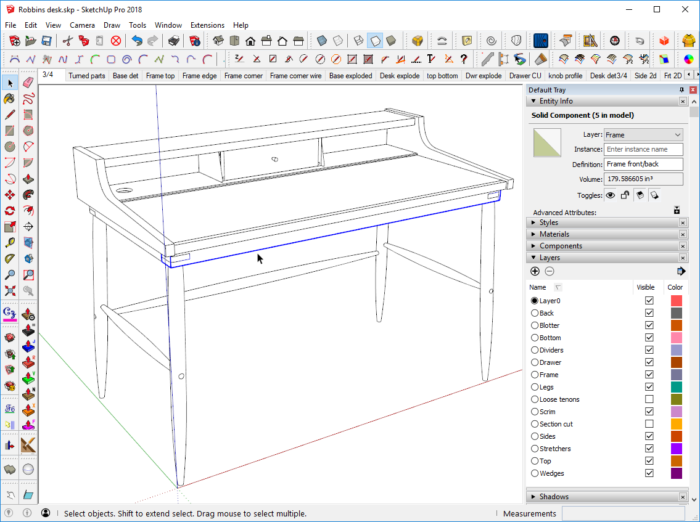
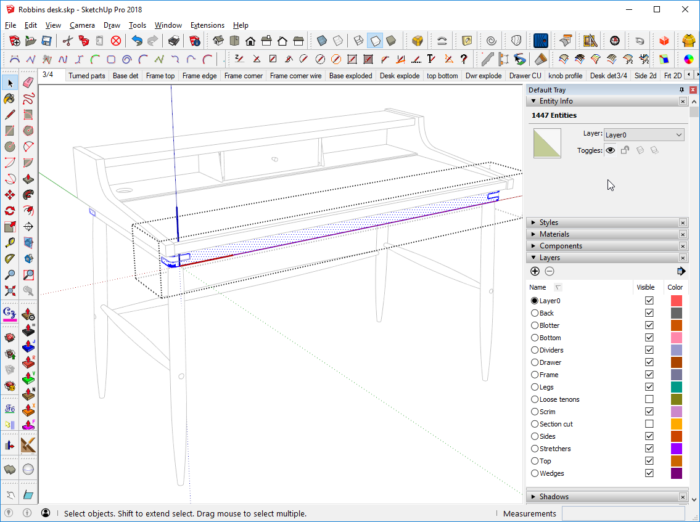
I’ve selected the front rail on the stand for the desk. It’s layer association is shown in Entity Info at the top right corner. In the next screen shot you can see that I’ve opened the component for editing and selected all of the edges and faces. Notice that Entity Info shows Layer 0 is the associated layer.
My general workflow is to create the bulk of the model before I create any layers. While I’m modeling, I’m thinking ahead to how I will want to display the parts in various scenes. I prefer to limit the number of layers I need to keep the model easier to manage as I go through the scenes. Once the model is basically finished, I create my first scene which is a 3/4 view of the model. Then I create the layers I’ll need for the parts. After the layers are created, I untick the visibility boxes and then start going through the model selecting components and changing the layer association in Entity Info. As I do this, the components disappear. When I have a blank model window I know I’ve assigned layers to all of the components. Clicking on the 3/4 scene tab will turn all the layers back on showing the entire model again.
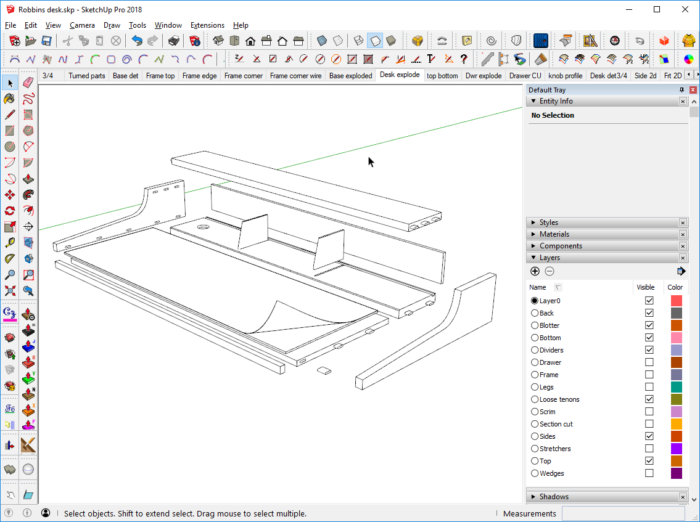
After that id done, I go through the process of creating the various scenes I need so I can show the details of the model. I turn layers on or off as needed for the scene. For example, in this scene showing the exploded view of the stand, you’ll see that the visibility for most layers is turned off. This helps to reduce clutter and simplify the scene.
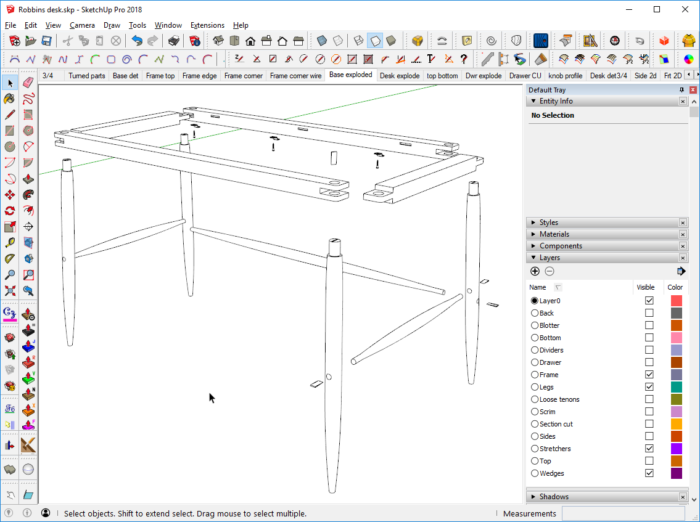
Here, in this scene showing the exploded view of the desk, you can see that the layers for the legs and rails of the stand are turned off and other layers are turned on.
Back to the Layer 0 thing for a moment. With Layer 0 active at all times and all edges and faces left on Layer 0, when you need to go back into a component to make changes to it, you don’t have to worry about what layer the component is on. The layer association for the component doesn’t matter at all. I find this very freeing because it eliminates the possibility of working on the wrong layer.
For those of you working with one of the web-based versions of SketchUp such as Sketchup Shop or SketchUp Free, layers work exactly the same way although the user interface has a different appearance. The eye symbol along the left controls visibility while the pencil icon indicates the active layer.
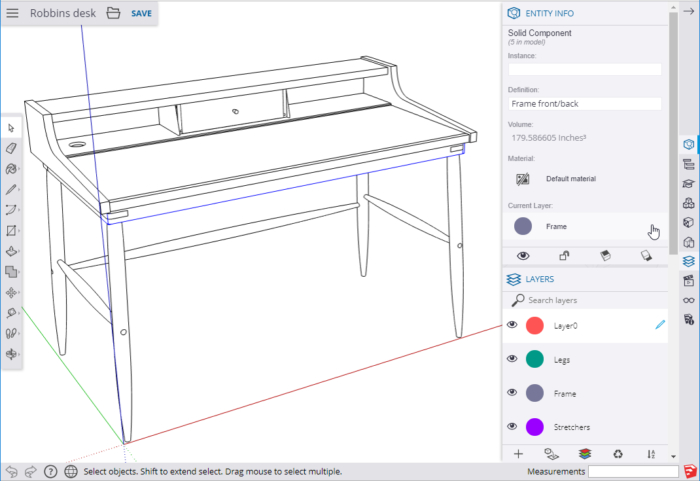
You might be wondering since Layer 0 should always be the active layer, why is it that you can change that in the Layers panel. There has been some argument over removing the option to choose the active layer but there are a couple of reasons to keep that control. If you do your dimensioning or add labels in SketchUp, you might want to put those entities on their own layers. You can insert them initially on Layer 0 like edges and faces and then change their layer association to a Dimensions or Labels layer or you could make the appropriate layer active before you add those sorts of things. It can save you a step later. If you do that, you need to be very careful to set Layer 0 as active before you do any modeling.
There is a case where breaking the Layer 0 rule makes some sense. If you are using SketchUp Pro or SketchUp Shop to create files that will ultimately be used to drive a CNC router, you may find that it is useful to have the toolpath lines on different layers based on cutting depth.
And about the colored patches next to the layer names. There’s an option to display your model with Color by Layer. In the desktop versions this option can be selected in the Details menu accessed by clicking on the icon at the top right of the Layers panel. In the web versions, it is selected by clicking on the stack of colored squares at the bottom of the panel.
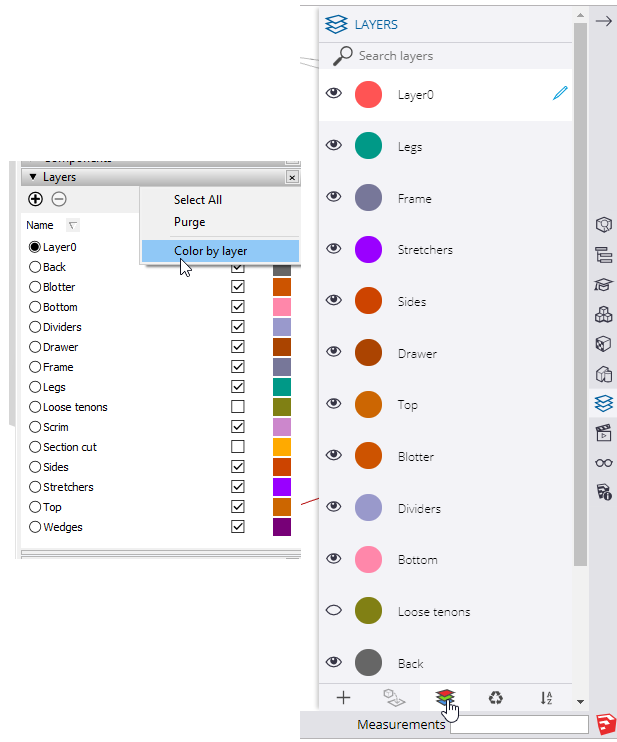
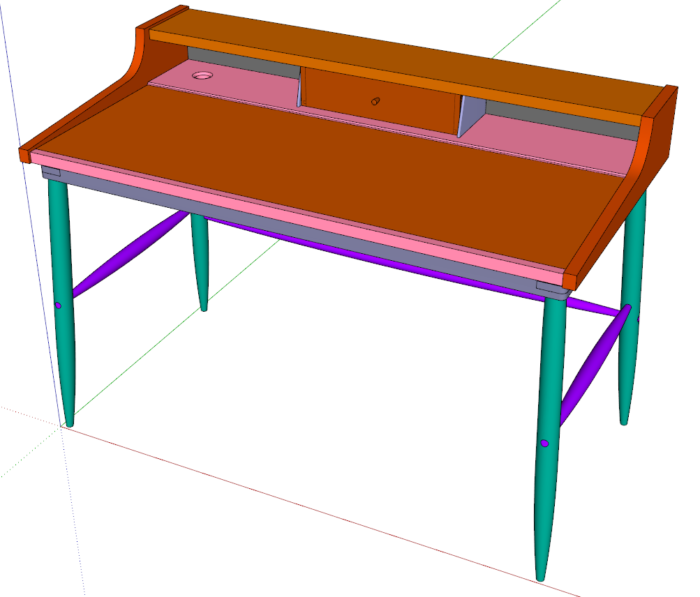
Here’s the desk model displayed using Color by Layer. You can change the colors for each layer by clicking on the colored patch and editing the color.

In my next blog post I’ll demonstrate some advanced ways you can put layers to work.
–Dave




Comments
So.... Read the whole article... Unless I missed something, I still don't know how to CREATE a layer....
Is the Contemporary Desk SketchUp model available so we can follow along with your example?
In response to RAL3Wood, see paragraph 3.
And JamesBo, you can get this model if you purchase the digital plans for the desk, here: https://www.tauntonstore.com/project-plans/contemporary-desk.html
Hi Dave,
How do you show the displaced parts on the exploded scenes, while your main scene shows the parts correctly assembled? My guess is that you have duplicated components that you hide on the non- exploded views. I'm using SKU Pro 2019 on a Mac.
Jim, I make a copy of the model over to the right and behind the assembled version. This copy gets pulled apart to make the exploded view. I don't use Hide for controlling visibility in scenes. Hide is only used as a temporary thing while working on the model.
Log in or create an account to post a comment.
Sign up Log in