Veneering Curved Doors
No-hassle coopering is the core of this low-tech method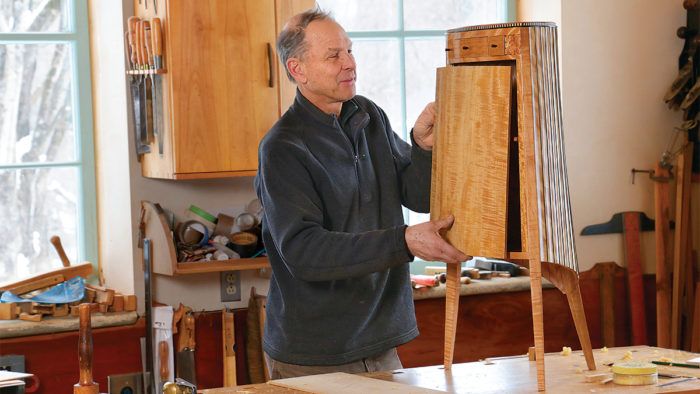
Synopsis: Make a curved door that’s light, strong, stable, and stylish with this traditional technique used by Garrett Hack. He creates a coopered core of solid wood sandwiched between layers of veneer. The coopered core gives the door strength and rigidity, while two layers of veneer on each face, with their grain at right angles to each other, perform like thin plywood to limit the core’s movement. Solid edging is added to conceal the core and make the door even more stable.
A curved door, even one with a slight radius, adds a lot of pizzazz to a piece. I use a traditional technique that gives me consistent results: a coopered core of solid wood with two layers of veneer on each face, their grain at right angles to each other. The result is a curved door that’s light, strong, stable, and appealing without the need for a vacuum bag. And thanks to veneer, any look is possible. I’ve yet to hit the limits of this method. I’ve made doors as large as 40 in. high and 20 in. wide, as well as ones far smaller, and from 1⁄2 in. to 1 in. thick. The technique isn’t just for doors, either. I’ve used it for the curved panels of frame-and-panel doors, for the curved sides of a case piece, and for interesting dividers within. Though it’s more work than a flat door, it’s a small price to pay for some pizzazz.
Video Workshop: Build a Splay-Legged Table
Garret Hack guides you through the construction
of an elegant side table with a swing-out drawer
that will put your skills to the ultimate test.
Build the form
The door is built over a curved form that establishes its shape both when coopering the core and laying on the veneer. I make the form out of white pine because it’s easy to work. I build it up in layers with the grain running the length of the door, and I make the form at least a couple of inches wider and longer than the finished door.
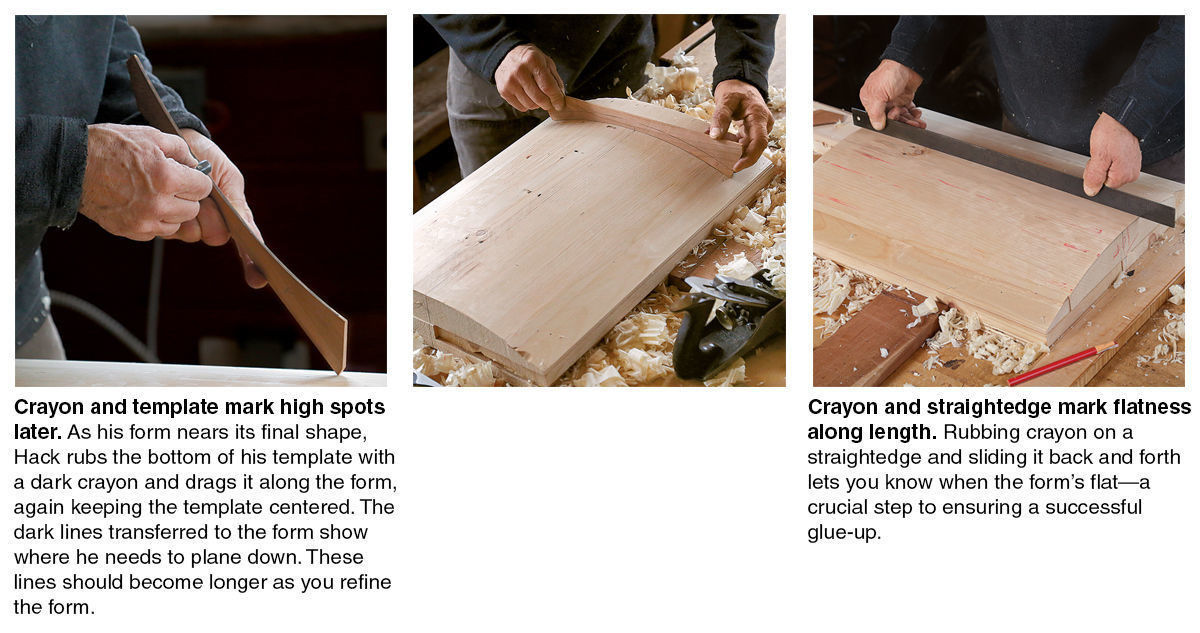
The pine boards vary in width and thickness to roughly mimic the final curve of the form to expedite shaping. After tracing the curve on an end of the form, shape it with a drawknife and planes. Regularly check that the form is flat along its length and uniform in its curve. When it’s done, wax it very well or cover it with packing tape so glue won’t stick to it.
From Fine Woodworking #275
To view the entire article, please click the View PDF button below.
More on FineWoodworking.com:
- Wall Cabinet with Curves by Clark Kellogg #263-Sep/Oct 2017 Issue
- Curved Panels Made Easy by Michael Fortune #210–Jan/Feb 2010 Issue
- Curved Panels for Furniture by David Haig #231–Jan/Feb 2013 Issue
Fine Woodworking Recommended Products
Bessey EKH Trigger Clamps
Dubuque Clamp Works Bar Clamps - 4 pack

Starrett 12-in. combination square




Log in or create an account to post a comment.
Sign up Log in