Workshop Tip: Router Mortising Template Has Interchangeable Spacers
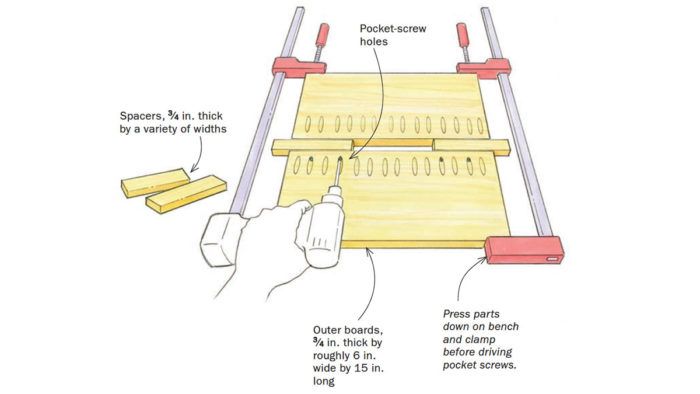
I’ve tried hand-cutting mortises, but I find that I get a much cleaner and more accurate slot using a router template and guide bushing. In the past, I created separate jigs for each size mortise I needed. That meant I had to cut parts for each new jig and then wait for the glue to dry. So I developed a single reusable jig that can be set up for any mortise or slot I need.
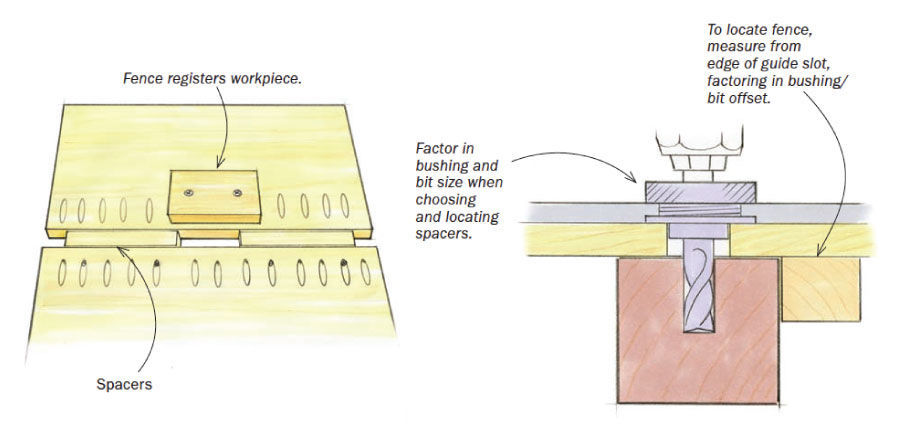
The secret is pocket screws. These let me attach two outer boards to a pair of spacer blocks that go between them. It’s easy to rip or plane the spacer blocks to a precise size and make any number of matched pairs. You can size them to match the router bushing diameter precisely, or use larger ones for wider mortises. When a set of spacers gets chewed up by screw holes, it’s easy to replace them. The outer template boards won’t need replacing unless they warp over time.
To assemble a jig, I flip the outer template boards upside down, add the spacers, press everything down flat on the workbench, clamp the parts together, and drive pocket screws where needed.
With the jig made, I attach a fence on the underside to locate the jig on the workpiece. As for clamping the jig to the workpiece, I make the outer boards large enough to be clamped down without impeding the router. If that doesn’t work, you can attach a thicker fence and clamp that to the workpiece.
—RICHARD ROSS, Longmont, Colo.
Fine Woodworking Recommended Products
Veritas Standard Wheel Marking Gauge

Marking knife: Hock Double-Bevel Violin Knife, 3/4 in.

Double Sided Tape







Log in or create an account to post a comment.
Sign up Log in