Free Plan: Mid-Century Modular Wall Unit
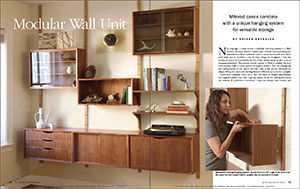
Anissa Kapsales's wall unit features mitered cases combined with a unique hanging system for versatile storage.
Synopsis: Based on a Mid-Century Modern design, this modular shelving system employs a system of angled dowels to secure a variety of cases to the wall. The look of the ensemble can be easily changed by lifting the cases and moving them to different spots on the uprights. This is a big job, but construction is straightforward, using plywood and building the cases with miter joints.
Not long ago, I came across a modular shelving system in a Mid- Century Modern dealer’s warehouse. Danish inventor/designer/ manufacturer Poul Cadovius made a name for himself with these wall units, not to mention a ton of other things he designed. I was immediately taken by it aesthetically, but I was blown away by the unusual hanging technique. The pieces almost appear to float in midair, yet they lock in place with a clever system of angled dowels. You can change up the configuration of the pieces and the look of the whole ensemble by simply lifting the cases and moving them to different spots on the uprights.
Cadovius’s company lived on as dk3, but they no longer manufacture the original system I first saw. I got my hands on an old catalog and made my version of Cadovius’s invention. I kept my design very simple and unadorned, but you can trick out the components in many creative ways. With six cases to build, this is a big job, but the construction is straightforward. I built my cases with walnut-veneered 3/4-in. plywood, mitering the corners and applying solid walnut lipping to the front edges. Each case has a 1/2-in. walnut plywood back glued in, and I felt that this, along with the miters, provided ample strength and rigidity. I’ve built a number of plywood cases this way over the years, and none have failed. For extra security, you may choose to reinforce this joint with splines, biscuits, or l-tenons.
Video: Edging Plywood Made Easy
Five techniques for edging veneer-grade plywood
from simple to elaborate By Mario Rodriguez
Start with the cases
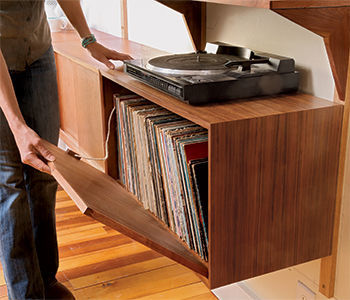
I started by cutting down the plywood for the carcases, leaving the pieces about 1 in. over width but cutting them to exact length. My bottom cases will almost always be lined up together; therefore I cut the plywood so the grain runs across the top of them, which means the grain won’t wrap around each box. Once you cut the case parts, glue on 1/2-in.- thick solid edging. I milled the edging slightly over the thickness of the plywood and, after glue-up, I used a block plane to flush the edging to the plywood. Once the edging was flush, I ripped all the parts to width with the edging against the fence. then I tilted the blade to a 10° angle and, with the plywood edge on the fence, ripped the angle in the solid-wood edge. Finally I tackled the miters. I used a crosscut sled to trim the edging to the length of the plywood, and then I used an L-fence and a push pad to cut the miters. While at the tablesaw, I cut the grooves for the back and cut any other grooves I needed on the interior of the boxes.
From Fine Woodworking #276
To view the entire article, please click the View PDF button below.
More on FineWoodworking.com:
- Fine Furniture from Plywood – Custom thicknesses, matched grain and seams, and solid-wood details beat the plywood box look by Mark Edmundson #157–July/Aug 2002 Issue
- How to Break Down Plywood With a Track Saw – Follow this step-by-step sequence for cutting sheet goods to accurate sizes, all without a tablesaw by Justin Fink
- How to Handle Plywood- Take the backache out of sheet goods and make better cuts, too by Gregory Paolini #208–Nov/Dec 2009 Issue
Fine Woodworking Recommended Products

Blum Drawer Front Adjuster Marking Template



Comments
Really? You're going to store 20 or 30 lbs of record albums in a mitre-glued box? I'm sorry, but I'm skeptical. I'm also skeptical of the life expectancy of such a design. I'd be much more confident if biscuits or hidden splines had been used.
Any idea on how much weight you can put on one of these??
After hearing about all of your adventures making this unit, it gives me confidence that there is hope for me. After 40+ years of woodworking, I still make mistakes; sometimes mistakes that I shouldn't make (or thought I wasn't making). I've have learned that fixing them is really a common thing no matter what level if woodworker you are. One of the greatest values of the Shop Talk Live podcast for me is hearing about errors made and how they are fixed. It has given me a different perspective on my woodworking, hearing that Mike, you (even Matt in the past), and other professional woodworkers make mistakes and must fix them or start over. Great project.
Is there any reason not to use Dominos on the miter corners? I love this project by the way - thanks for sharing it.
Log in or create an account to post a comment.
Sign up Log in