Create Perfect Double Tenons with a Router
A simple template offers accuracy and repeatability for cutting double tenons.
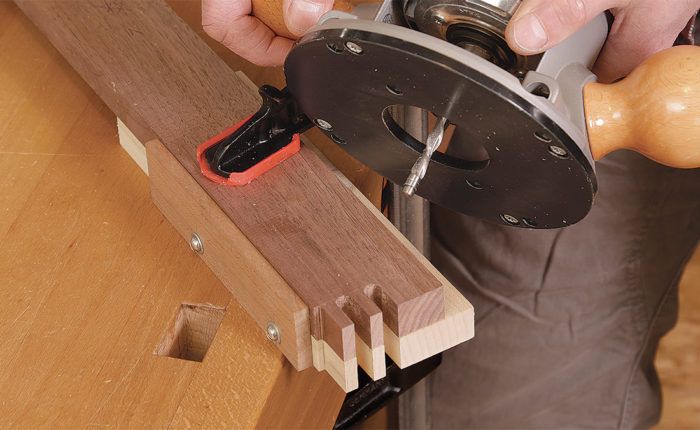
Synopsis: One of the challenges of double-tenon joinery is the many steps involved. Sizing the tenons for a snug fit, spacing them evenly, and keeping multiple parts consistent can be tricky and time-consuming. To simplify the job and keep all the parts uniform, Mike Korsak devised a special router template, milling a series of strips to fit the mortises and the spaces between them, and then laminating the strips to form the template.
On a recent chest of drawers with very long drawer dividers, I used double tenons to join the dividers to the legs for extra strength. One of the challenges of cutting double tenons is dialing in the multiple setups. The tenons must not only fit their respective mortises snugly but also be spaced apart just the right amount. So the cuts that define the four wide tenon cheeks must be very precise. I could have cut the tenons on the tablesaw or bandsaw, but to guarantee uniformity and to simplify working with such long parts, I decided to cut them with a router and a special template. I made the router template by milling a series of strips to fit the mortises and the spaces between them, and then laminating the strips.
Video: Tenons on the Bandsaw
with Tim Rousseau
Cut the mortises first
I started by chopping the double mortises in the cabinet’s legs using a hollow-chisel mortiser. The leg blanks were still square and the inside faces of each leg were my reference surfaces. once the first mortises were cut on all four legs, I adjusted the mortiser’s fence to cut the second mortise in each pair. This ensured that the spaces between the paired mortises would be the same for each set.
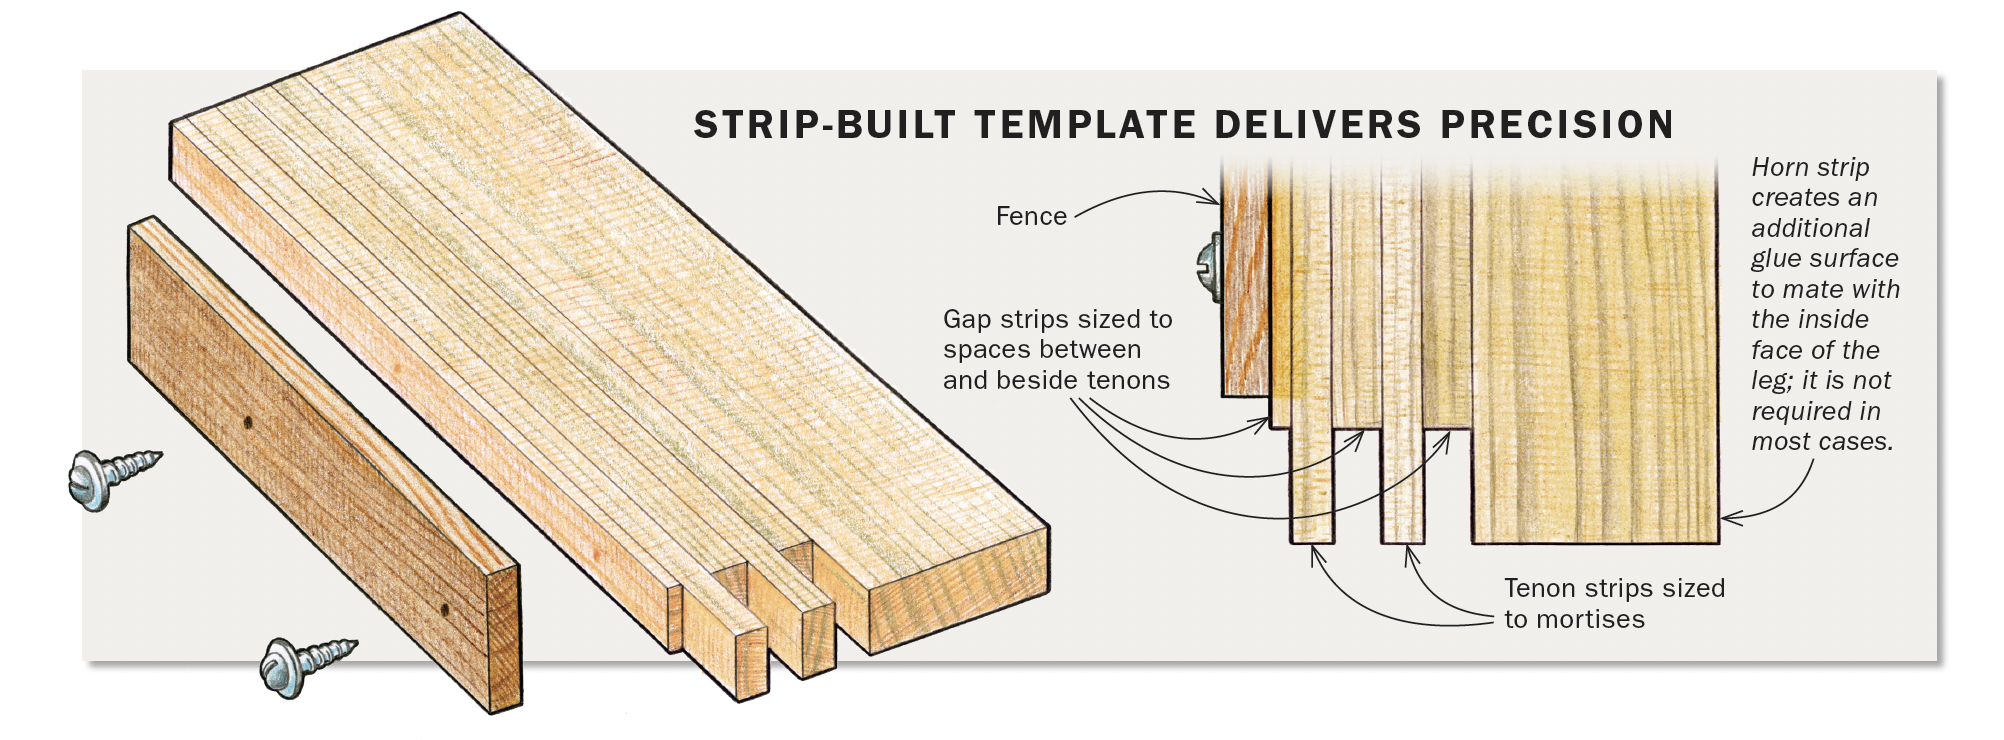
Glue up strips to make the template
With all the mortises cut, I began making the router template: a glued-up stack of strips, each strip milled to fit exactly in one of the mortises or else in the space between or beside the double mortises. I machine-milled each strip slightly thicker than the corresponding space it was to fill, then brought the strips to an exact fit with a handplane.
First I fit the tenon strips. I worked them to final thickness one at a time with a block plane, using dial calipers to be sure I maintained consistent thickness along the length of the strip. I tested the strip’s fit in its mortise as I worked.
Once I had both tenon strips fitted, I inserted them in their mortises and then planed a third strip to fit precisely between them. Then I planed two outside strips. A typical double tenon would require just these five strips; but I needed a sixth, because I had made these drawer dividers extrawide to include a horn that wraps inside of the leg and creates an additional glue surface there.
Sizing the strips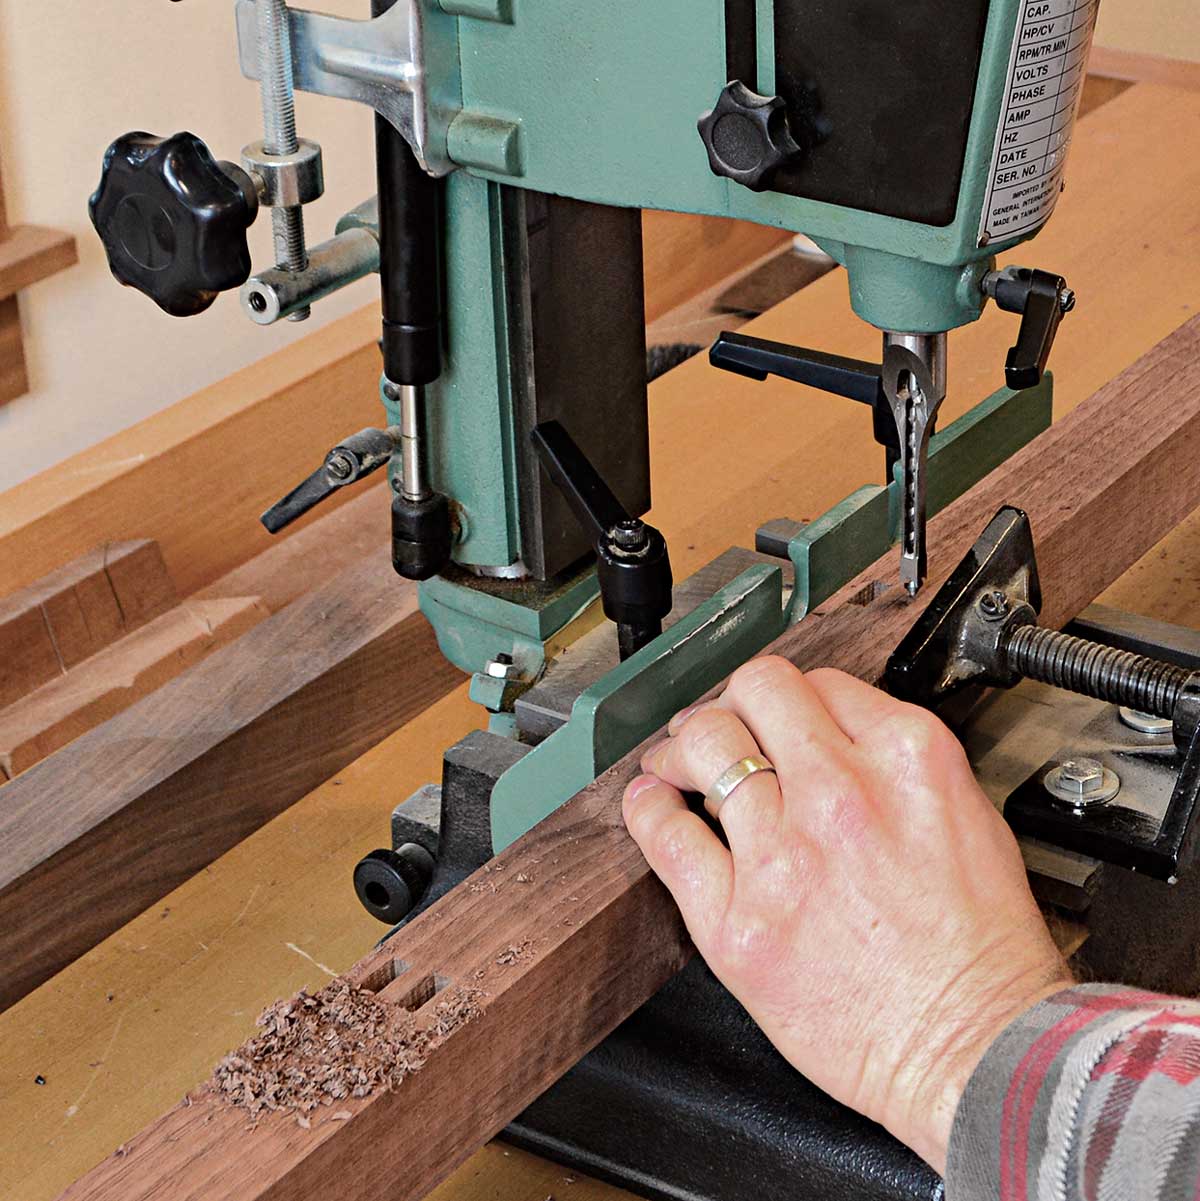 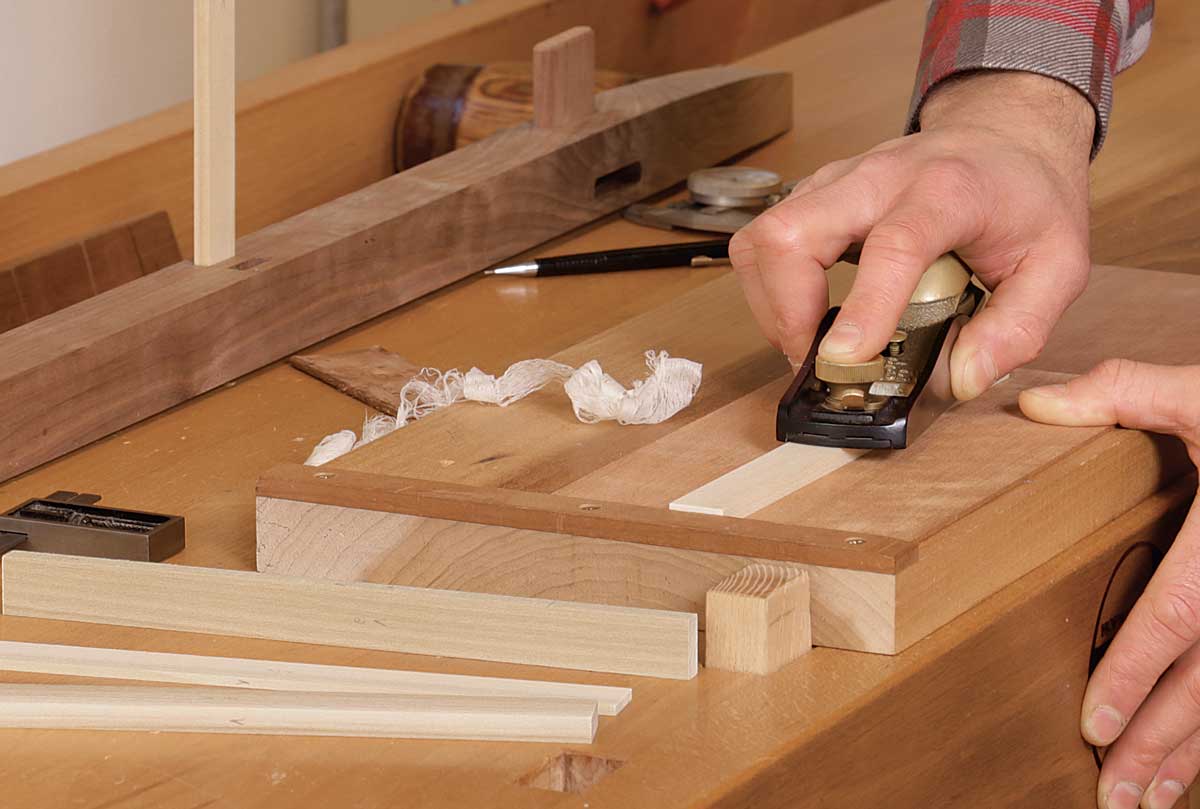 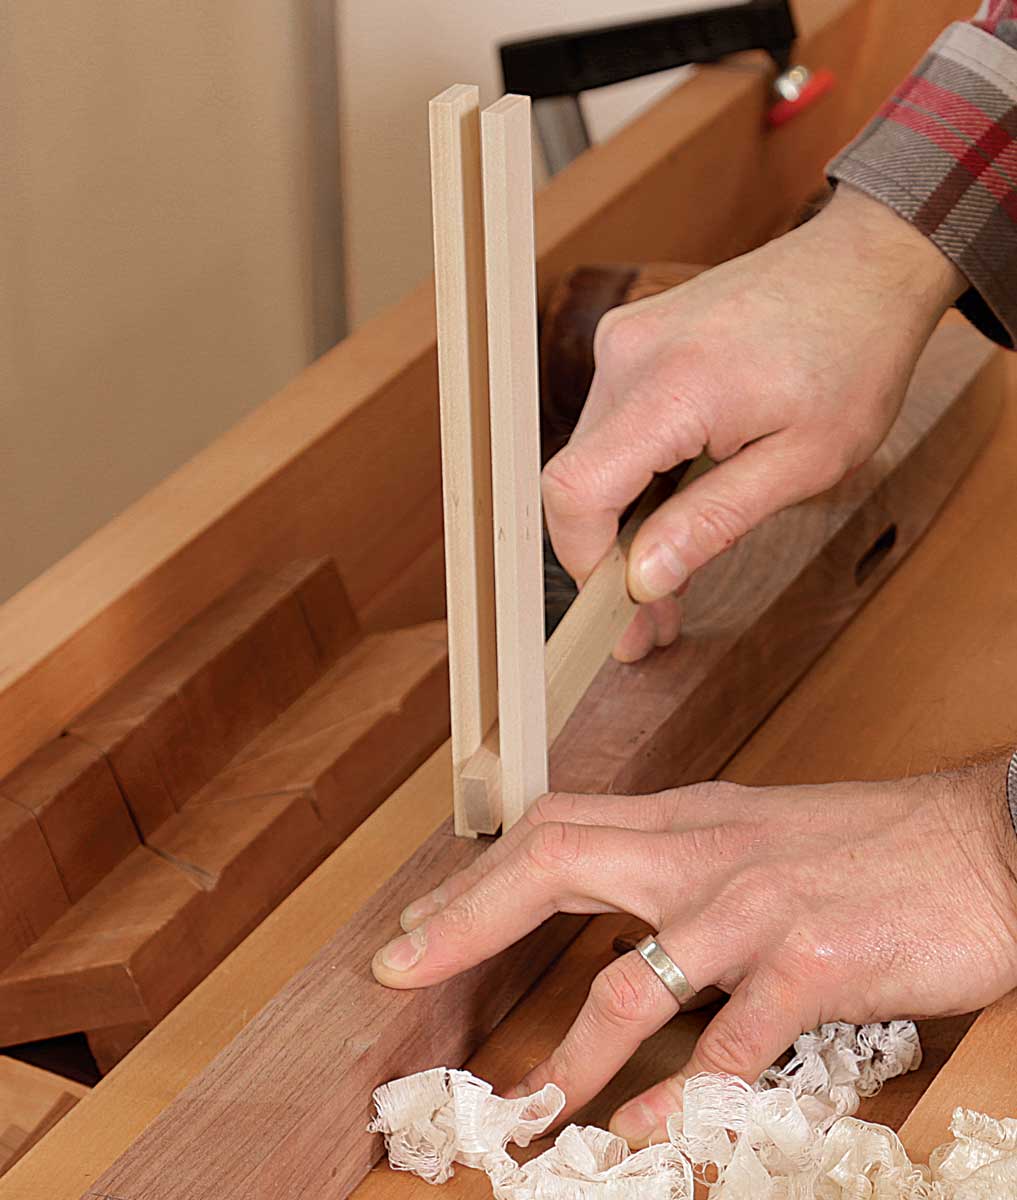 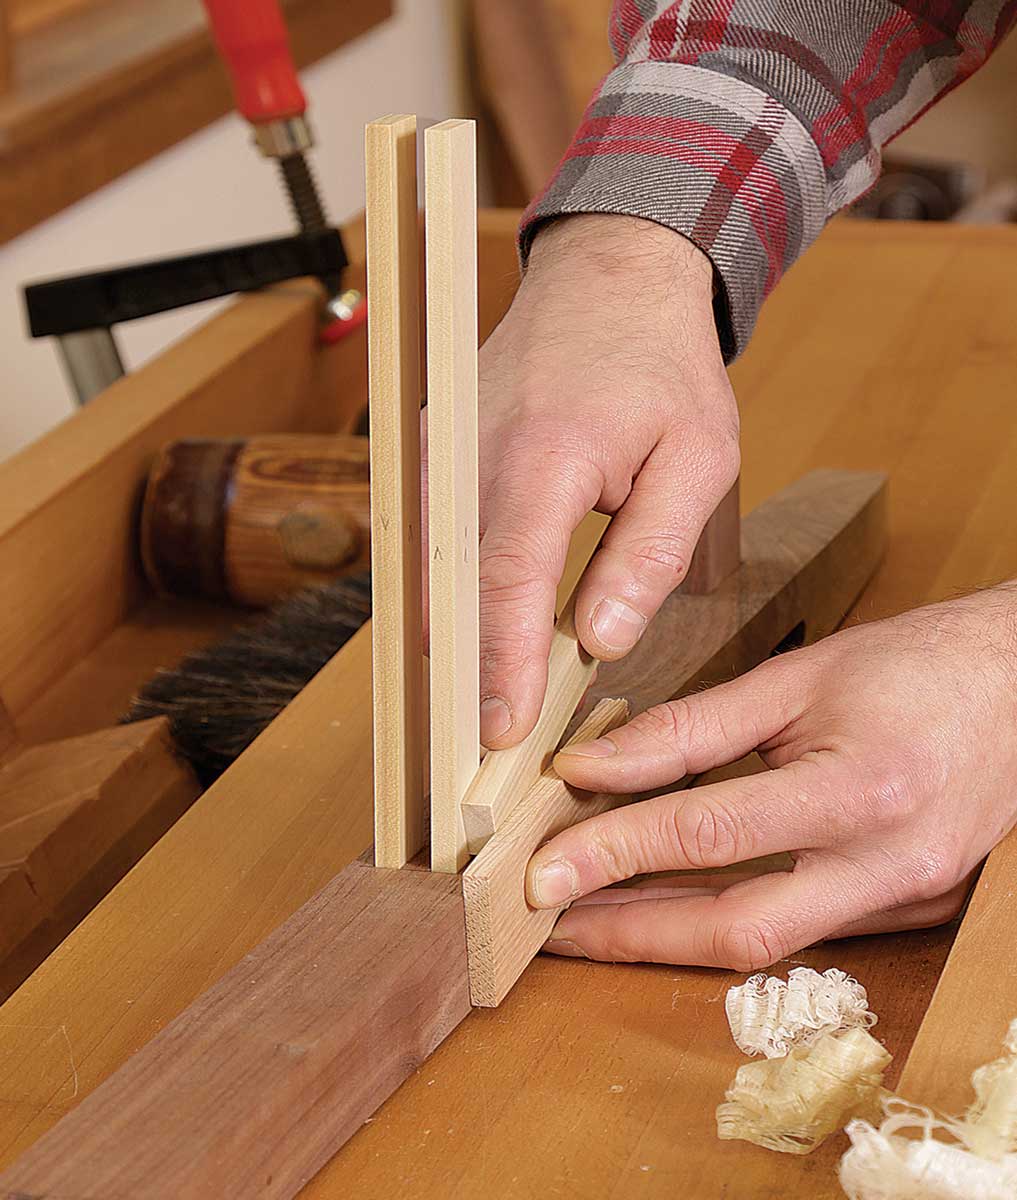 |
More on FineWoodworking.com:
- Powerful New Joint: Housed Double Tenons – Housed double tenons are strong and simple to make
By Brian Boggs – #243–Nov/Dec 2014 Issue - Strong Tenons in Skinny Legs- Get sturdy joints without compromising your design
By Tim Coleman – #236–Nov/Dec 2013 Issue - Stylish Details Enliven a Low Dresser – Frame-and-panel design keeps the look light and the construction manageable
By Michael Pekovich – #248–July/Aug 2015 Issue
Fine Woodworking Recommended Products
Leigh Super 18 Jig

Olfa Knife

Veritas Precision Square


Log in or create an account to post a comment.
Sign up Log in