SketchUp: Modeling a Rustic Chair
Tim Killen needs to work out dimensions and angles from an old Shaker chair pattern, so he uses SketchUp, one of his favorite tools, to fill the gaps.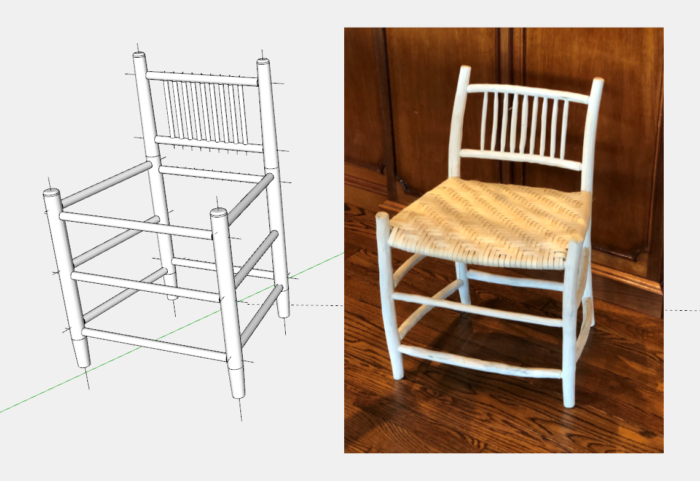
I’m in a new phase of interest – using green wood and my recently made Shaving Horse. It’s quite a change from building museum replicas of mahogany period furniture. My first green wood rustic projects were constructed on-the-fly without design. So there was no need for precise SketchUp modeling with detailed joinery and dimensional details. The size, diameter, shape of the timber were the driving parameters.
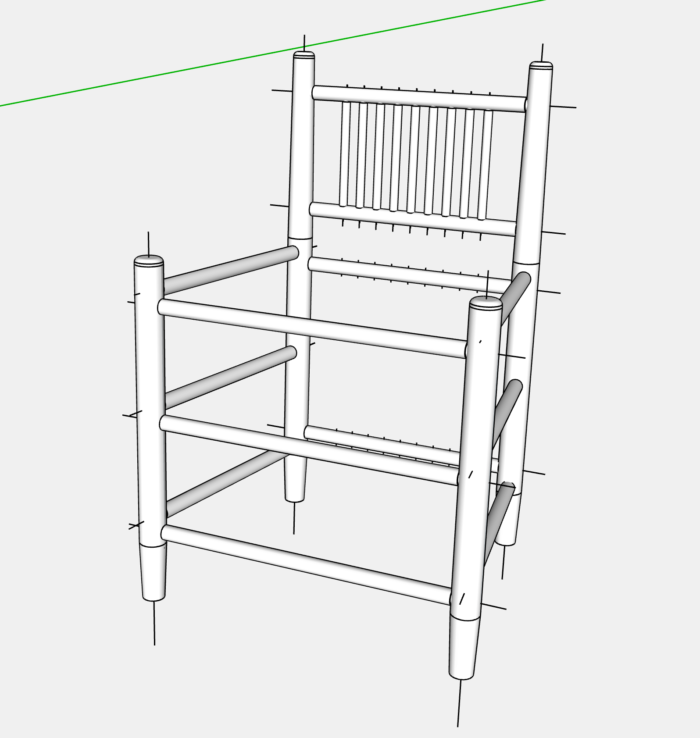
But here I’m making a Rustic Chair and need to know some dimensions and angles. So I’m back to SketchUp in this example of a small chair. The picture above shows the SketchUp model on the left, and my implementation in Scotch or French Broom on the right.
It’s a basic and simple chair, but there are angles that make things more difficult. The Legs are not perpendicular and the Seat is trapezoidal. I used a classic Shaker design as a pattern – a Two-Slat Dining Chair shown by Ejner Handberg in his book “Shop Drawings of Shaker Furniture and Woodenware, Volume 1”. The picture below shows my beginning SketchUp work on the imported image.
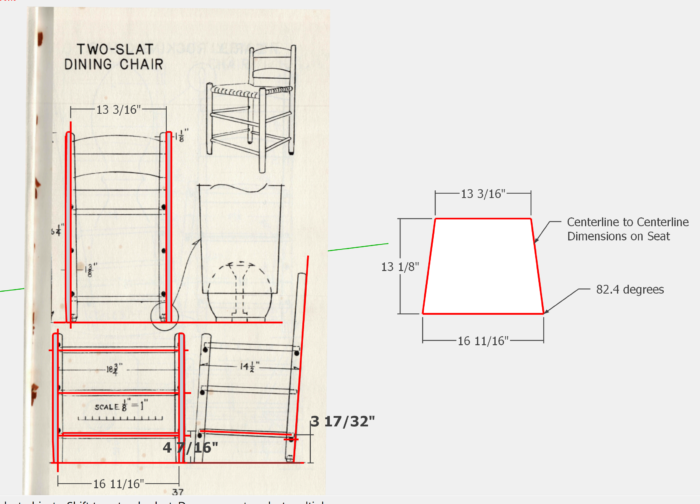
On this scanned image, you can see my red traced lines. Also from dimensions shown in Ejner’s drawing, I could create the trapezoidal shape of the Seat as shown on the right. In the next few slides and the attached video, I show the process of creating one of the lower Stretchers.
As a first step, below I position the Legs on the corners of the Seat pattern
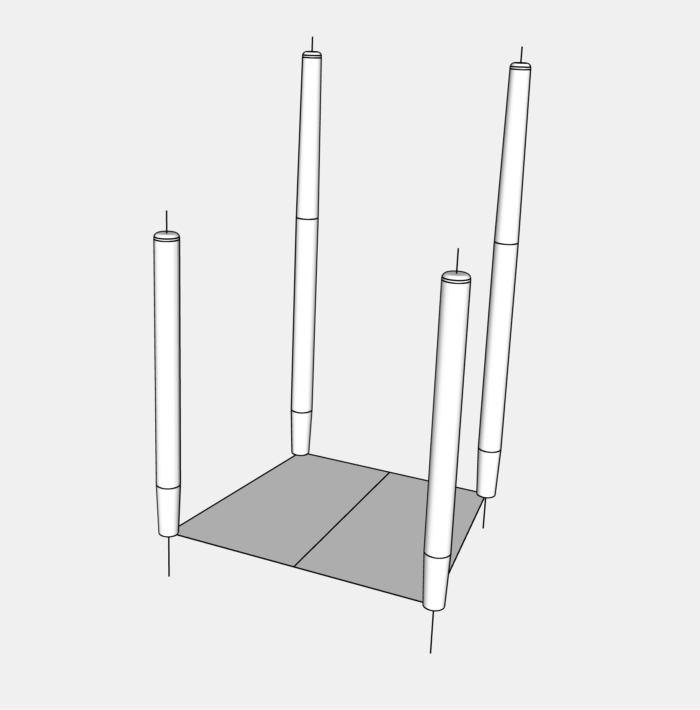
Notice that all the turnings have centerlines included within the Component. These centerlines are perfect for positioning the turned components and making connections to stretchers and other pieces. Below, I’m using the Tape Measure to make a Guidepoint at 4 7/16-in. from the bottom face of the leg. This is the location of the bottom side stretcher as it connects to the Front Leg.
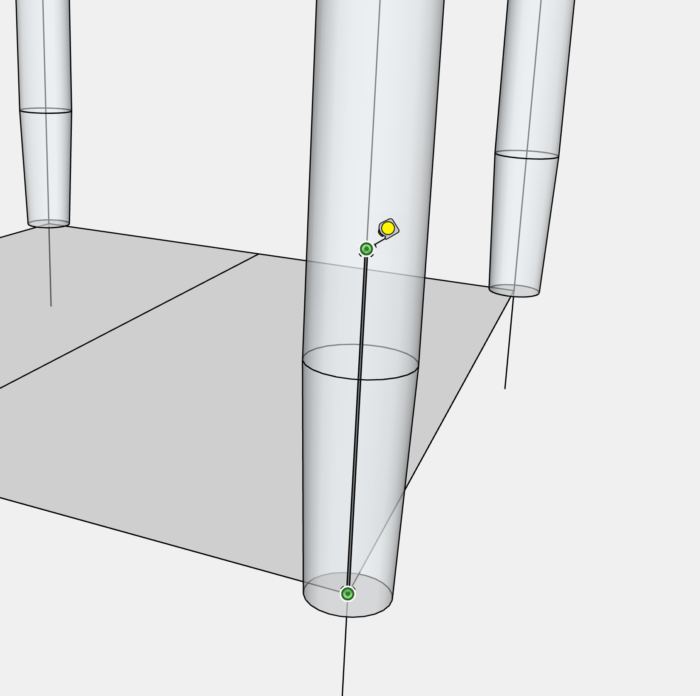
Below I use the Protractor to create a Guideline that will be along the centerline of the Stretcher. The Legs are not perpendicular but slightly angled toward the back as shown in the imported drawing. However, the Stretchers are connected to the Legs at 90 degrees, so the protractor gives me a 90 degree guideline from the centerline of the Front Leg.
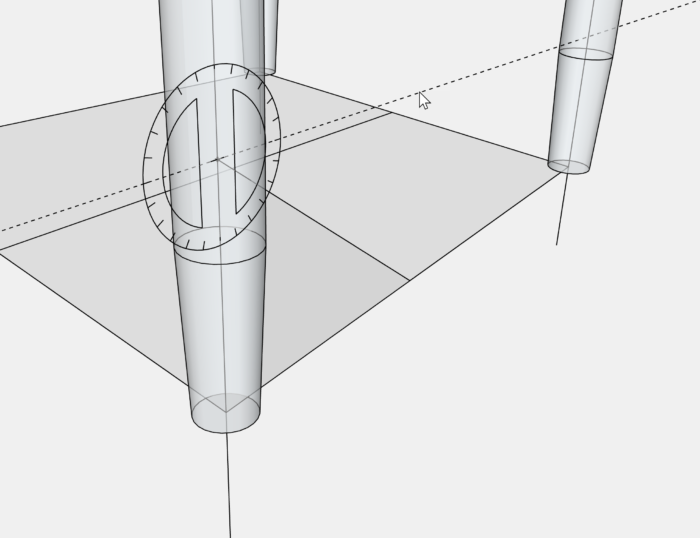
Now I start to make the tubular shape of the Stretcher. I use the Line Tool to trace over the guideline. Then I make a rectangular face that is perpendicular to that line. On that face, I draw a circle with 3/8-in. radius for a 3/4-in dia. Stretcher. This process may be easier to see in the following video.
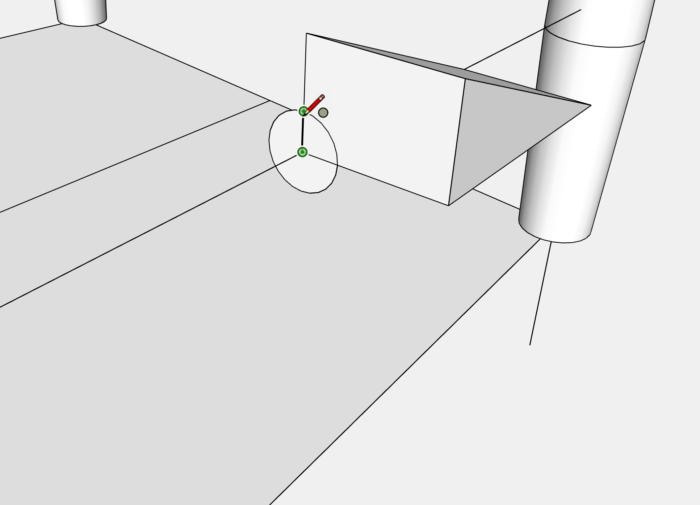
Now that I have the 3/4-in. circle, I can use the Push/Pull Tool to create the Stretcher. I stop the Push/Pull when reaching the outside face of the Legs.
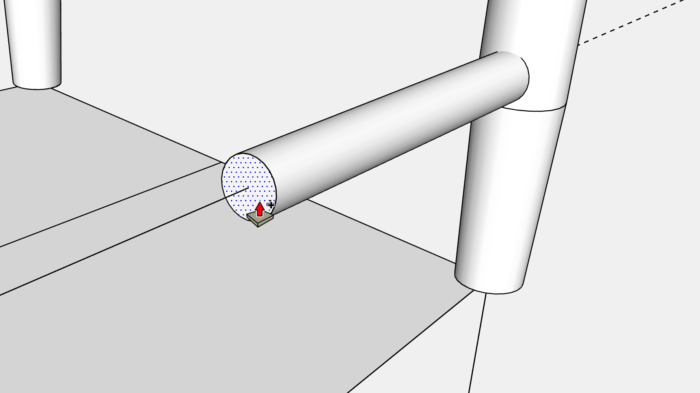
Here is the resulting Stretcher, but without the 5/8-in. dia. tenons 7/8-in. long. In the video, I show making the tenons and finishing the Stretcher component.
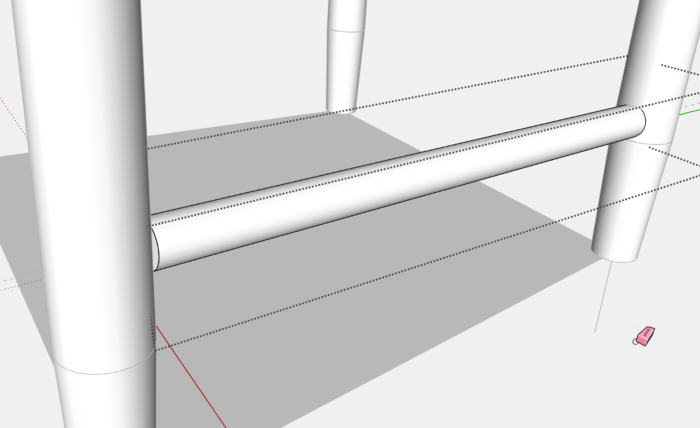
Here is the final model. I changed a few things from the original Shaker design. The major change was replacing the Back Slats with a lattice of small diameter spindles. Therefore, I was able to make the chair completely with French Broom and the Shaving Horse.
Tim
KillenWOOD.com
Fine Woodworking Recommended Products

Sketchup Class

Dividers




Log in or create an account to post a comment.
Sign up Log in