Build a Shaker Berry Box
Christian Becksvoort builds a Shaker classic with minimal materials.
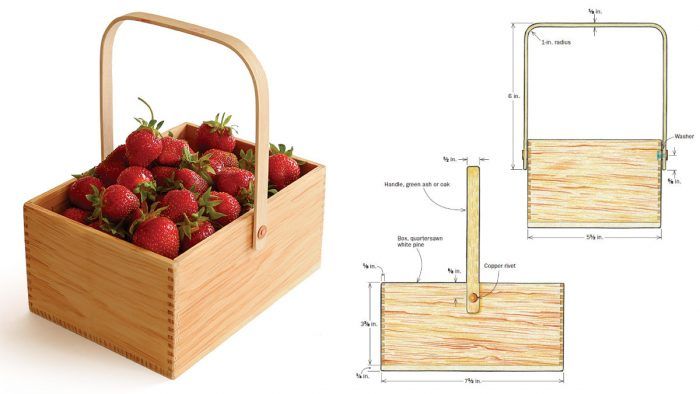
Synopsis: Designed to use for gathering berries, these small pine boxes are also great to have around the house to hold mail or small treasures. The box is built with small-scale finger joints cut on the tablesaw using an auxiliary fence. The handle is bent over a form and can be made from green wood or kiln-dried wood that has been soaked. You can make these boxes in bunches and keep them on hand to use as gifts.
Shakers made these little, clear white pine carriers for gathering raspberries, strawberries, blueberries, and blackberries. When you’re not hunting berries, you can use them around the house to hold mail, trinkets, or any small treasures. The design really lends itself to making multiples. They are fantastic gifts whether they are used to hold treasures or are the treasures themselves.
A basic box
Since the sides are all 1/8 in. thick, you can easily resaw them from thicker stock, using either the bandsaw or tablesaw with a thin-kerf blade. All four corners of the box are finger-jointed, which can be tricky to set up, but once you get the hang of it you’ll love how easy it is and how nice it looks.
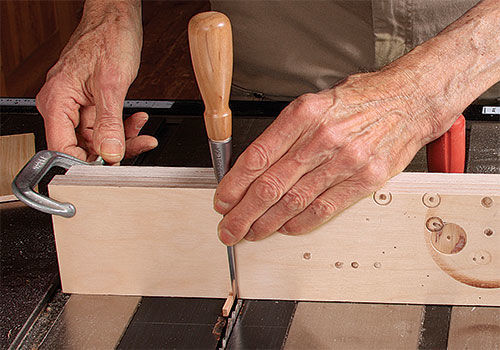
First, to make nice-fitting finger joints you should have a flat-top blade (Forrest WW10401125). Regular alternate-top-bevel blades will leave tiny cat ears on each edge of the cut. Clamp a plywood auxiliary fence to your miter gauge, extending about 4 in. past the blade. Set the blade height to 5/64 in., which will make your finger joints about 1/64 in. proud. Make one cut through the fence, and remove it. Cut a piece of hardwood exactly 1/8 in. thick by 5/64 in. wide by 1 1/4 to 1 1/2 in. long. This will be your registration pin. Glue it into the sawkerf you just made in the fence, positioning it flush in the back and extending forward toward the sawblade. To establish the spacing between the finger-joint cuts, I place a 1/8-in. chisel between the registration pin and the right side of the sawblade tooth.
Video: Senior editor Anissa Kapsales goes berry picking
with Christian Becksvoort while they discuss Chris’s
early days, and what the future has in store for the Becksvoorts.
Next take two test pieces, with the grain going vertically, and tape them together. Hold them upright against the fence, slide them over to the pin, and make the first sawkerf. Now fit the sawkerf over the pin. It should fit snugly, with no play. Make the second cut, and repeat until you reach the other end of the scrap pieces. Remove the tape and see if the finger joints interlock properly. If the fingers are too loose, move the pin away from the blade a slight amount and re-clamp. If the fingers are too tight, move the pin slightly closer to the blade. Once you have it set up, you can make finger joints all day long.
From Fine Woodworking #278
To view the entire article, please click the View PDF button below.
 |
|
 |
|
 |
Fine Woodworking Recommended Products
Veritas Standard Wheel Marking Gauge

Suizan Japanese Pull Saw

Leigh Super 18 Jig


Log in or create an account to post a comment.
Sign up Log in