Making Nested Furniture in SketchUp
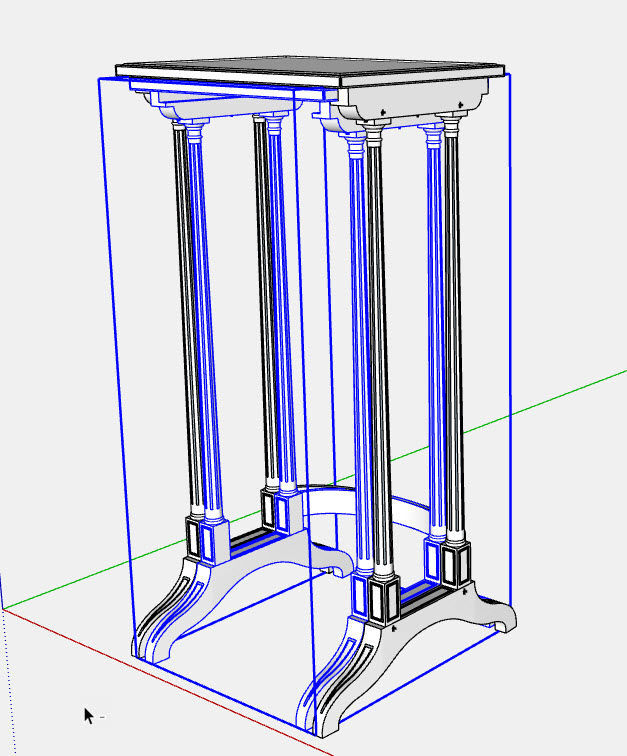
Tim Killen uses SketchUp to model a set of four tables all diminishing in size and fitting under the largest of the set.I’ve begun construction of a Nest of Tables, circa 1800 – the original in the Met in NY. There are four tables all diminishing in size and fitting under the largest of the set. The original design is by the Adams Brothers, famous 18th C Scottish neoclassical architects. Here is the SketchUp model of the Largest Table and the combined set of four. Note the use of ancient classical design with fluted columns.
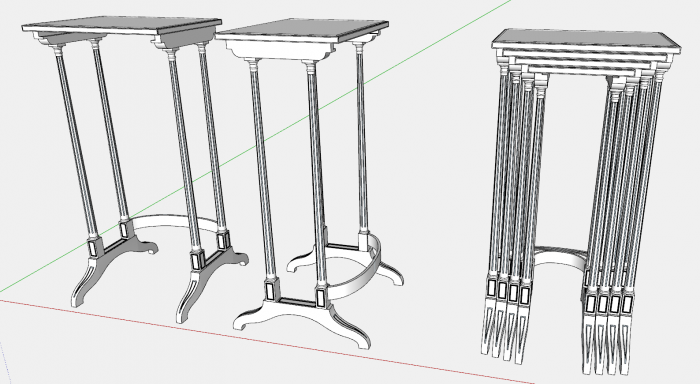
After designing the first and largest table, the remaining versions were a rather straight-forward modification of the first. In this Blog, and in a following video, I show the main steps of the process for converting the First Table into the Second smaller version.
I start the Second Table by copying the Top from the first table, making it a “unique” component, re-sizing with Move Tool, and positioning in the rebate provided in the First Table.
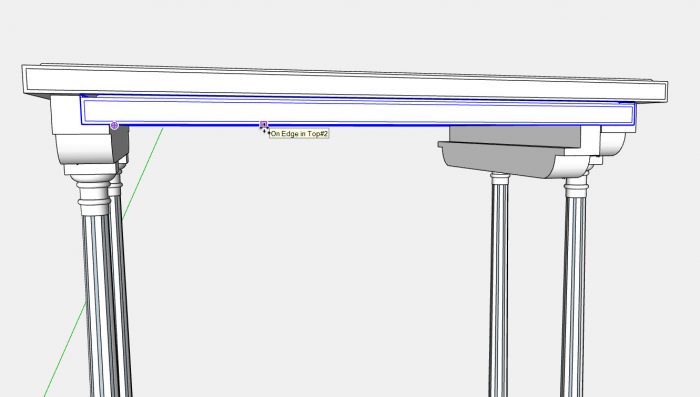
The next step is to copy the Upper Rail from the First Table and position in its place in relation to the new Top #2. This upper rail component is identical for all of the tables, so there is no need to re-size and re-name.
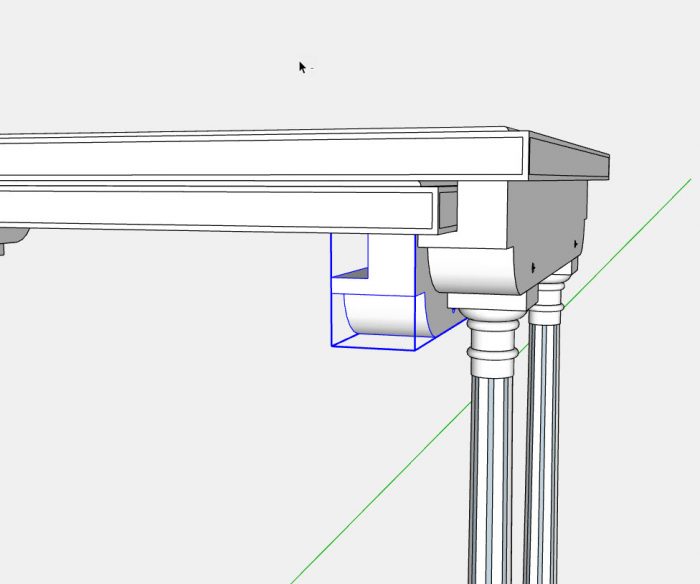
The next step is to copy the Columns from the first table and place them in position on the new second table. However, these columns are too long and adjustments are necessary. I switch to X-ray so I can position the capital of the columns down to the proper location in the second table. Each of the Column Components is made up of 3 Groups, the Capital, Shaft, and Pedestal. The Capital and Pedestal are the same for all four tables. However the Shaft is shortened for each of the next 3 tables. After shifting the Capital down, I can reduce the length of the shaft with the Move Tool. It is easier to see this step in the video.
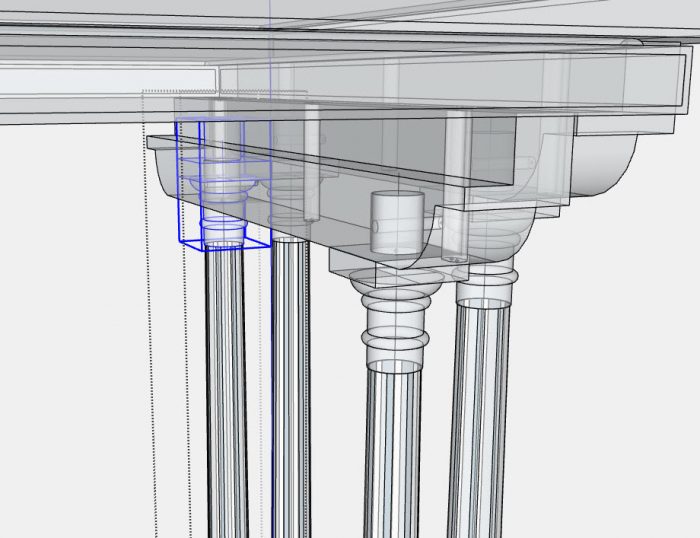
The Feet are identical for all table sizes so I just copy and move them into the proper positions.
The most difficult operation is the making of the second lower curved stretcher. Copying the first stretcher, I create a second smaller version using the Scale Tool. I only changed the red-axis length with this process. With the length measurements known, I can calculate the decimal reduction required. This value is used to make the scaling reduction.
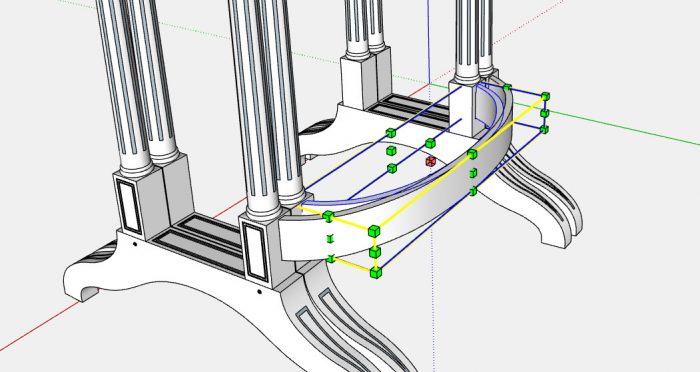
That completes making and fitting all the components of the second table. I select all these components and make a new overall assembly for the second table. That second table needs to be moved forward 1/4-in. to avoid the conflict at the rear curved stretchers.
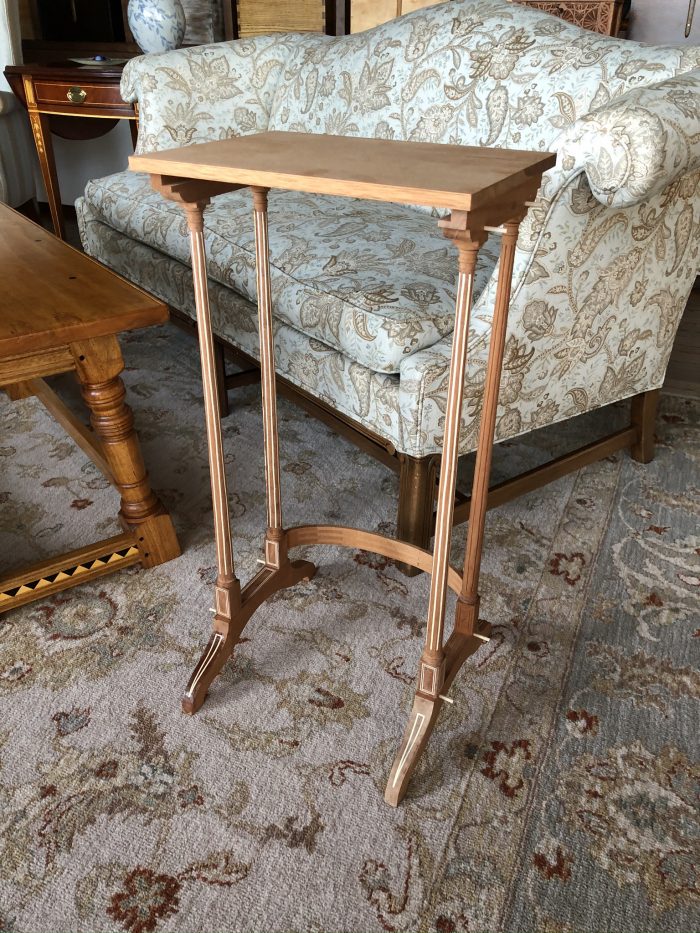
Here is the status of shop construction of the first table (mahogany with holly inlay). Nothing glued yet as there are several more inlay operations required.
Tim
KillenWOOD.com




Comments
Great job, Tim. There's also a story in how you cut the column shafts for the holly inlay. Do you do it at the lathe? How do you prevent the column from flexing as you cut into it?
Best,
dh
David, for the first and largest table, I did all the grooves for flutes on the columns with hand tools on the workbench- carving, and a hand-made scraper.
For the remaining three tables, I made a fixture for the lathe to use a Dremel Tool. To reduce flexing there, I had to tighten the tension from head to tail stock. Nevertheless, the depth of the groove was less precise than with hand tools. But worked anyway.
Tim
Log in or create an account to post a comment.
Sign up Log in