Build an Arched Entry Table
A twist on the Stickley style, Mike Pekovich's arched table features a dovetailed drawer box supported by a trestle base, tapered legs, and drawbored tenons.
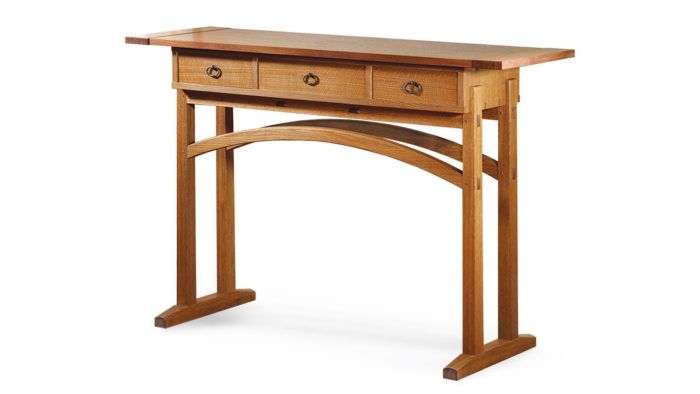
Synopsis: A twist on the Stickley style, this arched table features a dovetailed drawer box supported by a trestle base. Drawbored tenons hold the base together, and arched rails and tapered legs add personality. Mike Pekovich simplifies construction by starting with base parts of the same dimensions, and then adjusting thicknesses and widths to create offsets after the joinery is complete.
‘I’d like an entry table in the Arts and Crafts style, but nothing I’ve seen before.” It was an interesting request from an interesting client—my brother, actually. Up to that time, I had built a number of mostly Stickley-inspired pieces, but hadn’t really pushed beyond that. This was an opportunity to try a more original design while staying true to the basic elements of the style. Since I knew the client, I didn’t face the nerves that typically accompany a commissioned piece. The table I came up with features a dovetailed drawer box supported by a trestle base. The original had tiles inset into the top, but on this version I went for a cleaner look, opting for a solid top capped with breadboard ends.
Work begins with the base
The construction of the base is fairly straightforward. Drawbored tenons hold everything together, and arched rails help give the table its personality. The legs have a subtle taper, thinner at the top, to keep the table from looking top heavy. And the various parts are offset where they meet to create visual interest. While the parts of the base end up with different dimensions, they all start out the same, which makes cutting the joinery easy. Even the arched rails start as a rectangular blank and are then shaped once the joinery is complete.
Access the plans for this table.
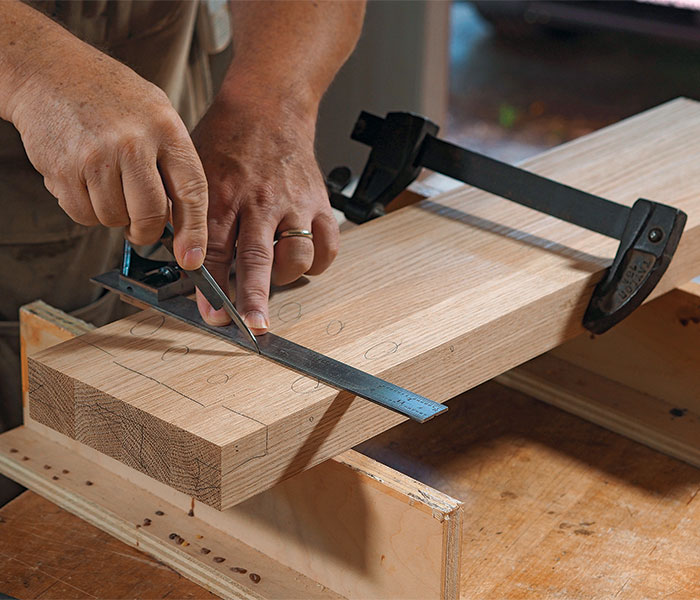
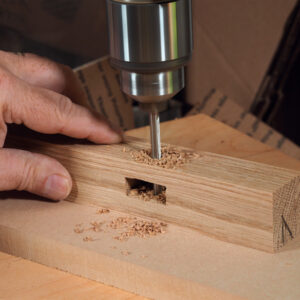
Start by milling all the base parts except the arched rails 1 3/4 in. square and cutting them to length. For the arched rails, make a single 1 3/4-in.-thick by 5-in.-wide blank. From there, turn to the mortises. I mount a 1/2-in. bit in a hollow-chisel mortiser and attack each mortise by cutting halfway in from each face. This prevents any tearout that would result from mortising all the way through the stock. Lacking a mortiser, I’d drill out most of the waste and square up the mortises with a chisel, still working halfway in from each face. The mortises in the feet are the only ones that don’t go all the way through.
Extra: Mike Pekovich has simplified
the task of offsetting drawbore holes
by using an undersize center punch.
In this video, he shows his one-step process.
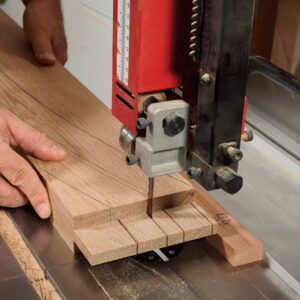
Next, turn to the tenons. The main challenge in cutting them is to keep the corners of the through-tenons from chipping out. To help with this, I cut the cheeks using a dado blade at the tablesaw and fine-tune the fit with a shoulder plane before cutting the tenons to width. Install a 3⁄4-in.-wide dado set and cut the tenon in multiple passes. Set the rip fence as a stop for making the shoulder pass. Aim for a snug, but not overly tight, fit off the saw. Check each tenon in its respective mortise and fit it with a shoulder plane as necessary. The tenons will still be too wide, so you’ll only be able to insert a corner of the tenon into the mortise. After the cheeks have been fitted, head to the bandsaw to trim the tenons to width. Remove the waste with a backsaw and pare to the shoulder with a chisel. Before sawing off the waste, be sure to knife a shoulder line across the edge of the stock so that your chisel will have a place to register when paring.
Adding the arches
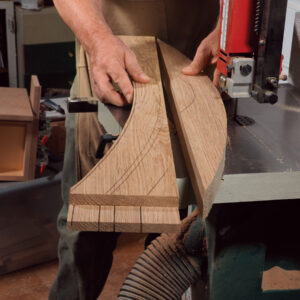
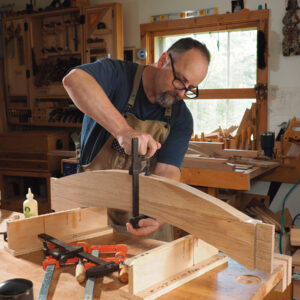
The arched rails are interesting in that you’ll cut the tenons for both rails while they are still part of the same blank. Cut the cheeks with a dado blade and then make four bandsaw cuts on each end of the blank to trim the tenons to width. To begin shap-ing the arches, saw out the waste below the lower arch staying comfortably outside the line. Then glue the waste along the top edge of the blank. This will allow you to cut two arches from a single blank. Plane the blank to final thickness before sawing out the individual arches. There will be a glueline in the upper arch, so I will place that one at the rear of the table. (If you want to avoid a glueline altogether, you can cut each arch from a separate blank and use the waste to make the feet.) I make a template of the arch that I position on the blank and trace, making sure that the tenons are centered on the arches. Bandsaw close to the lines and clean up the curves with a spokeshave.
Shape and drill the base parts
The legs have a subtle taper on the two outer faces. It would be difficult to bandsaw the taper cleanly or cut it on the tablesaw without scoring or burn marks. So I head to the jointer, where I can make a quick taper in two passes. The overall taper is 1⁄8 in. from end to end, so start by setting the jointer to take a 1⁄16-in.-deep cut, which is half of the total taper. Then make a pass starting at the top of the leg and stopping at the halfway point. I place tape on the jointer fence so I know exactly where to stop. Rotate the leg so that the bottom end is facing forward for the second pass. Put pressure on the trailing end of the leg so the front is pivoted above the jointer bed when making this pass. This should result in a continuous taper along the length of the leg. It’s fast and kind of fun once you get the hang of it. Then finish tapering the outer faces of the remaining legs. Finally, to make the legs slightly narrower than the feet, creating an offset, take an additional full-length pass at the jointer on the left and right faces of each leg.
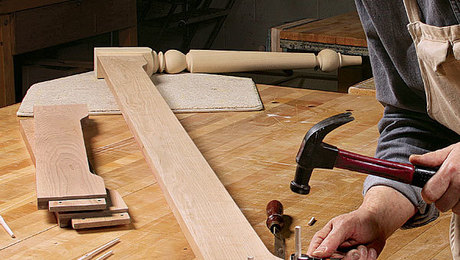
I use the same 1⁄16-in. jointer setting to take the other base parts to final thickness. The upper rails have 3⁄16 in. removed from the outer faces and 1⁄8 in. from the inside faces. The arched rails are thinner than the upper rails for a slightly lighter look. I remove 1⁄4 in. from the outer faces and 3⁄16 in. from the inner faces. The feet remain full width; their ends are tapered at the bandsaw and chamfered with a block plane.
The tenons will be too long once all of the shaping is complete, so I dry-fit the base and use a 3⁄16-in. spacer to mark the tenon lengths. I use a handsaw to cut them to length and add a heavy chamfer with a block plane.
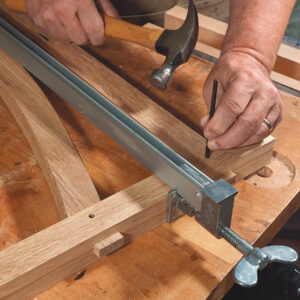
To create the drawbore joinery, start by drilling holes through the mortise locations. Assemble the joints and mark each tenon for drilling. Use a center-finder punch with a smaller diameter than the hole and register it against the inside wall. Drilling at the new mark will yield a slightly offset hole in the tenon. Chamfer the leading edge of the pin so that it clears the offset holes. When the pin is driven into the joint, the parts will pull together tightly with no need to clamp them for glue-up. The drawbore also makes it easy to dry-fit the parts to measure or check the progress of your shaping as you build.
Boxy but good
The drawer box is a simple dovetailed case, but it adds a lot to the look of the table. The long top and bottom and short ends make it tricky to hold the parts while you scribe the pins. To make it a little easier, after you cut the tails run a shallow rabbet along them on the inside face. This will
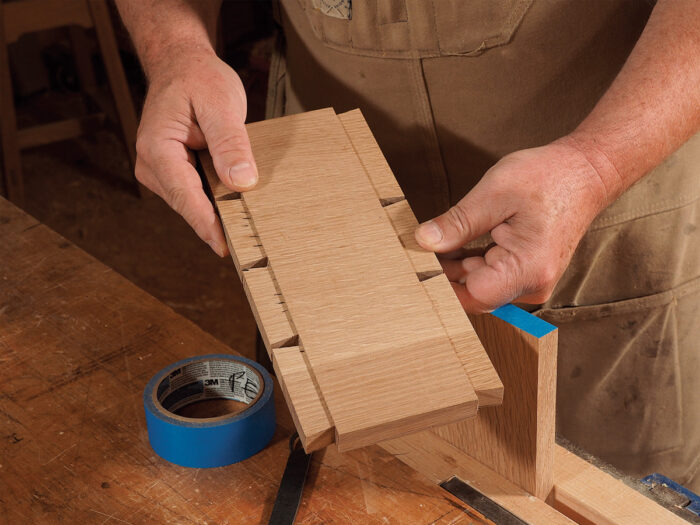
help to register the parts securely when scribing. The rabbet also creates the proud pins on the ends of the case.
The dividers are attached with Dominos. I’ve used a biscuit joiner in the past as well. To ensure that the top and bottom Domino mortises are aligned, I use a spacer sized to the center drawer opening to register the joiner. The spacer has a centerline that I line up with a center mark on each case part. Mark the spacer where you want each Domino and align the joiner to it. Transfer the marks to each divider for mortising. Finally, groove the back edge of the top and bottom for the back panel. The panel is rabbeted to fit the groove and butts against the ends of the case.
Before gluing up the drawer box, clamp the top of the box to the underside of the tabletop and pre-drill the screw holes for attaching the top. The pre-drilled holes make it easier to attach the top once the case is assembled.
Fit the case to the base
The legs are notched to receive the drawer box. To determine where to cut the notches, dry-assemble the base and center the drawer box side-to-side on top of the legs. Knife a line on the top of the legs along the ends of the case. Disassemble the base and cut the shoulder of the notch using a crosscut sled at the tablesaw. Finish the cheeks at the bandsaw.
To secure the case to the base, add glue to the notches and clamp the case in place. Once the glue is dry, I also pin through each leg into the case sides with a dowel.
From Fine Woodworking #280
Download the plans for this table from the Digital Plans Library. Plus, browse 100+ other plans available for members only.
To view the entire article, please click the View PDF button below.
 |
|
 |
|
 |




Comments
It’s not clear to me how you align the arches to the pre cut tenons (p.35)
Is there further detail available for this?
In the picture where he is using a template to draw the arches, you can see that he has short vertical lines drawn up to the surface of the blank. Although I can't see them, I imagine there are matching marks on the template so it is simply a question of aligning the two sets of marks.
At least that is how I would do it. :)
Thanks. I can see the vertical lines however I can’t determine what they are referenced against.
The tenon is centered on the height of the rail. The finished height is 1-1/2 in. and the tenon is 1-1/4 in. wide. It looks likes Mr. Pekovich uses a slightly wider template for the arches and then works the rail down to the final inch and a half.
Am I missing something, a taper is shown being cut on the legs, but the drawings don't show it. The photo maybe shows a slight taper at the top of the leg?
After final shaping there's only 1/16 in. difference between the top and bottom leg dimensions. It wouldn't be very obvious in the small drawing.
The pdf mentions digital plans yet I can't seem to find them anywhere. A search simply refers to this article. A link please.
Sreilly: Seems we're both exploring this at the same time. I also can't find the digital plans, and would appreciate a link if such plans actually exist. This looks like a nice well-designed challenging project, and plans would help.
There's enough information to build it given in the article surely?
Sometimes yes, and the other times it's plain hidden in the text. I've had a number of plan sets that needed detailed explanation but maybe that's me. I'd rather have something that can possibly giver further detail or backup what I'm seeing if it's available. For more experienced woodworkers the article may well be enough.
For you, waterhead.
I know the digital plans exist and they should be available soon. It sometimes takes a little time for them to get packaged and listed in the Taunton Store. I expect when they are Ben will update the link. At least that's what I've seen Ben do in similar cases before.
I read the article in the print magazine and online. I don't see where the wood in the article pictures is identified. Looks like white oak, but could be chestnut???
Looks like white oak but if you were going to build it, you could use whatever you want.
It looked like there would be enough information in the article but I too would like plans if I build it. I'm not surprised we can't find them. I couldn't get on the site for most of the past week.
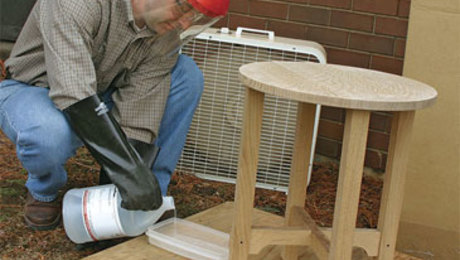
Mike, did you use the ammonia fume method to finish this?
Yes, Mike did fume this table.
Maybe this link will help.
https://www.tauntonstore.com/project-plans/fine-woodworking-s-entry-table-plan.html
Why does FWW continue to feature work from their own staff who are not even full time designers or furniture makers?
Surely you could tap the network of alumni from nearby woodworking programs like Connecticut Valley, RISD, NBSS, MassArt, and various schools in NY. Folks are doing interesting and approachable work in different styles.
It seems like the same people and styles are always featured without any rationale except convenience.
Please highlight different styles and new people.
Beautiful table! With the subtle grain arch across the drawers it’s begging for the lower stretcher to be steam bent or saw from a piece with already curved grain rather than sawn. I think it would be a smoother flow for the arch.
Very little info on attaching the top, just "pre-drill the screw holes for attaching ..". Where are the screw holes (not shown on diagram)? How do you screw from inside the rather shallow box?
It is shown in the digital plans.
https://www.tauntonstore.com/fine-woodworking-s-entry-table-plan.html
How do you screw from inside the rather shallow box?
Stubby screwdriver?
So I'm new to FWW and have a question. Do any of these plans (digital or print magazine (not purchased)) come with a bill of materials or cut list. In looking over a few I've not found any with these.
We generally don't do cut lists. Since most projects are built from rough-sawn solid stock, there is no way of actually doing a cut list because each board is different.
I purchased the table plans and have been slavishly following the guide. However, page nine showing the top details has an error in the measure for fitting the breadboard to the top. I believe the tennon measure is reversed, should be 3/4" on the table top and 5/8" on the breadboard. I would appreciate a confirmation of my thoughts or correction. Thanks.
Arlen, are you referring to these dimensions? If so, they are correct. The breadboard end is longer than the table top is wide. If you feel you need to change the width of the mortise or the tenon to compensate for seasonal movement in your area, you can certainly do so.
-Dave
I purchased the plans and they are very detailed. You get a PDF and a sketchup file which I use. That'll give you a good cutlist but not a layout (because of rough stock). Purchase it, you won't be disappointed.
Hi, Is there any way you can get these plans in The UK. I just get a message that due to privacy issues they cannot trade in the UK. Surely this is not correct??
Thanks
Mark
You're right waterhead. The numbers don't lie. Not enough in sales to justify the overhaul that the EU required.
Mark, if you call the number given, they can take your order over the phone.
There are a few similar dozy businesses that haven't yet done whatever they need to do to sell into the EU and UK via online sales. Highland Hardware is another. It's disappointing for would-be customers, I presume our potential business is not thought to be enough to justify whatever efforts might be needed on FWW's part to overcome such hurdles as exist.
Thanks
Will do
Mark
I have to admit that I am not looking forward to gluing up the dovetailed case. The back and drawer dividers look like they are going to cause some fuss.
Log in or create an account to post a comment.
Sign up Log in