A Stunning Milk-Paint Finish
Elia Bizzarri shows how to layer black milk paint over red to create a rich, layered look on his Windsor chairs.
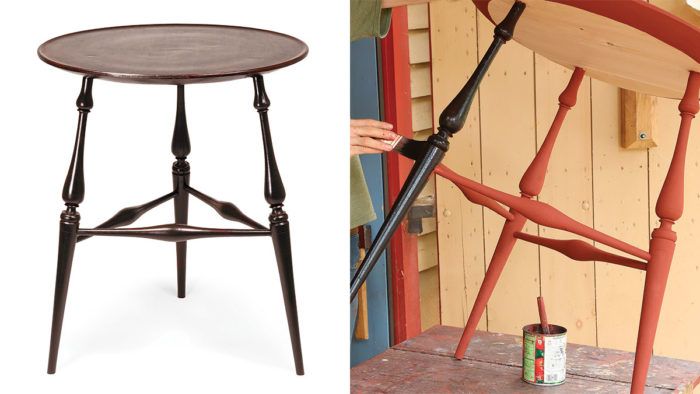
Synopsis: Milk paint, an ancient finish, is enjoying a revival, partly due to its non-toxic nature and versatility. Elia Bizzarri uses it to create a rich, layered look on his Windsor chairs. He shows how to layer black over red to produce a classic finish that not only reveals the beauty of the wood, but also adds a depth and warmth that you don’t get from thicker, more modern paint.
Milk paint is an ancient finish concocted from milk curds, lime, and pigments. By the time Windsor chairs had their heyday back in the 18th century, thicker and more efficient paints had long since replaced it. But in the last few decades there’s been a revival of milk paint, and it’s now often seen on Windsors and other furniture. Why?
If most paints are a wool coat, milk paint is a silk dress. Exceptionally thin, milk paint showcases every pore of the wood. It also allows various layering effects, like the black-over-red treatment I’ll describe here. The red glows through the black, adding depth and warmth. Milk paint is completely non-toxic.
Beware of imitations. Paint companies have jumped on the milk paint bandwagon, producing premixed “milk paints” that are merely flat acrylic paint, lacking milk paint’s thinness. True milk paints come in powder form and once mixed with water they last only a week (and in the fridge, at that). The brand I use is Old Fashioned Milk Paint (milkpaint.com).
Brushing tools and techniques
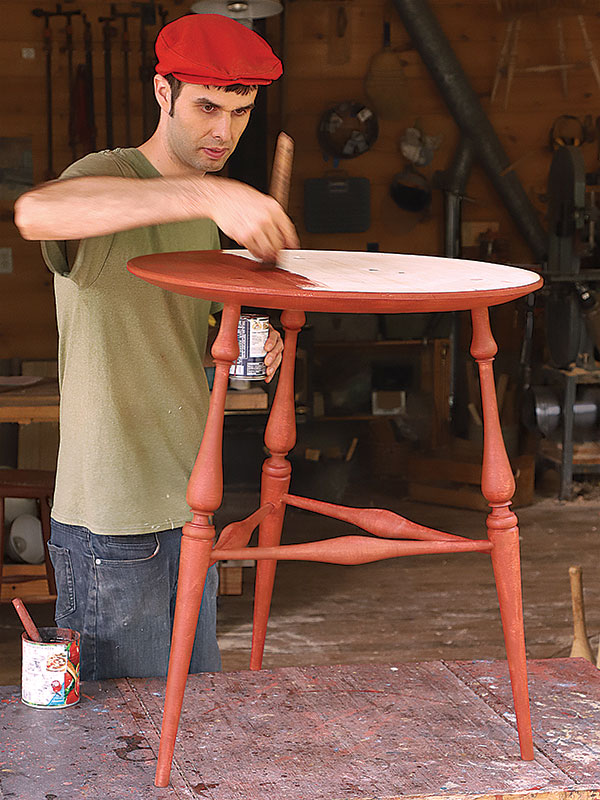
After raising the grain with a moist rag, I lightly sand with fine sandpaper, then begin to paint. I use a 1 1/2-in. Purdy sash brush. The amount of paint on the brush directly affects the quality of the paint job. Too much paint causes drips that then dry into a flaky, crusty layer. A drier brush is a safer (if slower) option. in addition, the smaller the surface being painted, the drier your brush should be. A good starting place is to dip the bristles 1/2 in. into the paint, wiping one side off on the edge of the can. Make sure you have good light; when possible i prefer to paint outdoors.
Start the first coat by painting an obscure portion of the piece, practicing your brushwork technique there before moving to mixing up milk paint more prominent areas. The brush will leave a puddle where it first touches the work, so put the puddle somewhere easy to access, away from corners. Apply the paint in any direction that is efficient. Work the paint out over more and more of the surface until your brush is dry, then go back over the initial puddle. The more you work the paint, the smoother the surface will be. Your last strokes should all be in the same direction, usually parallel with the grain.
Wash your brush, and let the paint dry three hours between coats. The paint exaggerates any surface defects. After the first coat, sand any raised grain and scrape down nicks and steam dents. Cutting completely through the paint to bare wood is common. It usually takes two to three coats of red to completely cover the wood surface.
From Fine Woodworking #281
To view the entire article, please click the View PDF button below.
 |
Accentuate Carving with Colorby Michael Cullen |
 |
Finish Line: Traditional crackle finishby Nancy Hiller |
 |
Episode 6 – Saddle lid box: Finishing with milk paintwith Michael Cullen |
Fine Woodworking Recommended Products

Bahco 6-Inch Card Scraper
Bumblechutes Bee’Nooba Wax


Comments
Out of curiosity, what specific color red and black are used in this article?
Log in or create an account to post a comment.
Sign up Log in