Easy-to-build outdoor bench
This beginner-level project is a great way to get ready for spring and summer. The plans are so simple that it can be finished in a day, and you won’t need any special tools to get it done.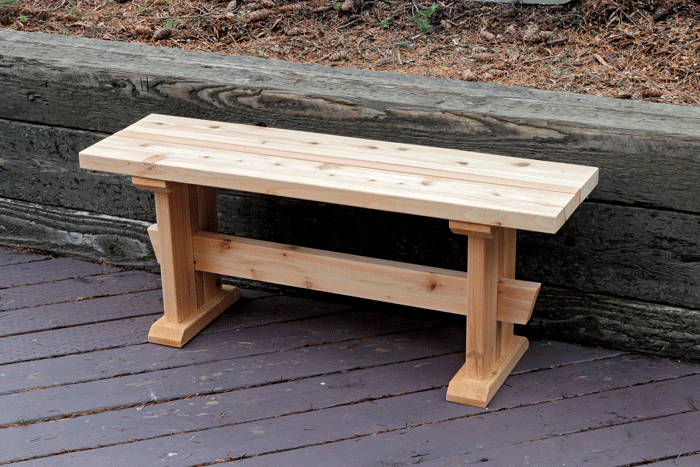
I first saw an outdoor bench like this one a long time ago, at the shop of a pro woodworker in Idaho, Mark Edmundson, who was selling them because they were so quick to make yet so pretty. Ten years later, when I set out to design a little bench for this book, made from standard deck boards and a box of screws, I didn’t intend to copy Mark’s design. But when I finished sketching and prototyping and refining, I realized I had come up with something similar, with the pieces of 2x2s and 2x4s in the uprights combining in a similar way to create the square hole for a long 2×4 beam to pass through. There just aren’t that many ways to skin this cat, and Mark’s method rules, apparently.
Luckily for me and you, Edmundson didn’t mind sharing his great idea (I checked!). Mark is a way better builder than me, and an accomplished author. Check out his book, Pocket Hole Joinery (The Taunton Press, 2014), which covers a simple but strong way to build sturdy cabinets and furniture of all sizes using a simple pocket-hole jig.
This bench would be comfortable on a porch, patio, or deck, on grass or in a garden. It looks so good, I would even let it come indoors. Feel free to play with the size and design details of the bench. For example, you can make it as long as you want. But 18 in. tall will be about right for most body sizes.
For me what makes this bench Asian-inspired is the way the top overhangs the base and also how the beam sticks through the trestles and is beveled on its ends. The real beauty of this sturdy, stylish bench is that it is built with deck boards and deck screws that resist the weather. That’s it. And you have to look hard to see any of the screws.
Clever Construction
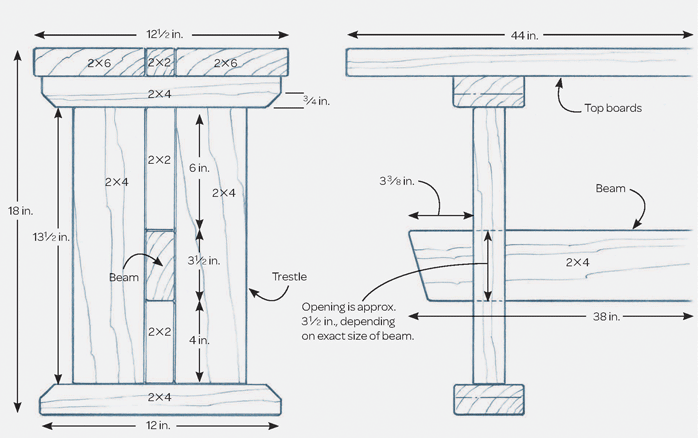
The cool part of this bench is how the four pieces in each trestle are screwed and glued together to create a perfect hole (mortise) for the beam to pass through. As for wood, you’ll need one 2×6 and one 2×2, each 8 ft. long, and either a 10-ft. 2×4 or two 8-footers if that’s all you can find. You’ll also need two boxes of deck screws, one 2 1/2 in. long and the other 3 in. long. The tools needed are minimal: just a miter saw, a cordless drill, and some sandpaper and glue. It doesn’t get much simpler than that.
Cedar is great for the outdoors
Cedar is available almost everywhere in the country. Because it is sold for both deck material (posts, rails, decking, etc.) and fence boards, it comes in all sorts of sizes, both roughsawn and smooth-milled. Still better, cedar isn’t that pricey, it’s easy to cut and screw into, it’s lightweight yet strong, it weathers to a beautiful silvery gray, and like all good outdoor woods, it will resist rot for decades.
There are other outdoor woods that are as beautiful as cedar, like redwood and ipé, but both are pricier and a little harder to find, and don’t always come in the same array of sizes and shapes as cedar. Some other widely available outdoor woods also come from questionable sources, whereas almost all cedar is harvested sustainably these days. If that’s important to you, look for FSC (Forest Stewardship Council) certification.
As with many weather-resistant woods, the heart of a cedar log is the most durable. The heartwood is the dark tan stuff that we all know and love. To cut costs, however, some suppliers sell cedar boards with cream-colored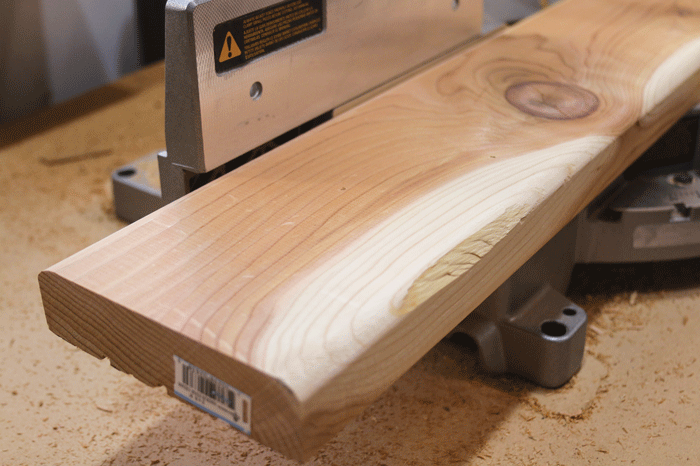
What to avoid. The creamier sapwood of cedar will rot much more quickly than the tan heartwood, so pick through the pile carefully and avoid boards like this one.sapwood in them, from the outside of the log. That part of the wood lacks the chemicals that resist rot and will fall apart in just a couple of years outside.
By the way, you can apply an oil finish to darken the cedar and keep it tan for a bit longer, but ultimately it will weather to a silvery gray just the same. So I wouldn’t bother with the oil.
First bevel the parts
With this design you won’t need to rip any wood to width. All you’ll need is a miter saw to cut parts to length. But you’ll also use the saw to make the bevel cuts on the ends of the trestle feet and tops, as well as the beam. Do this after the parts are cut to length.
There are two ways you can move a miter saw for angled cuts, either tilting it over sideways or rotating it horizontally. It’s easier to cut with it rotated than tilted, but do whatever makes sense for the cut you are making.
BEVEL THE FEET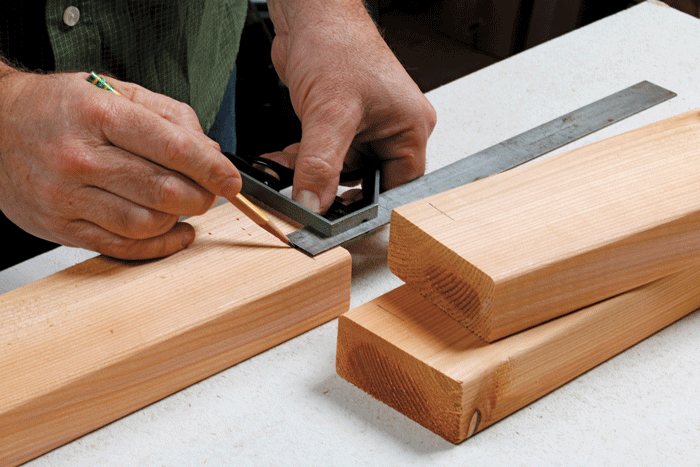
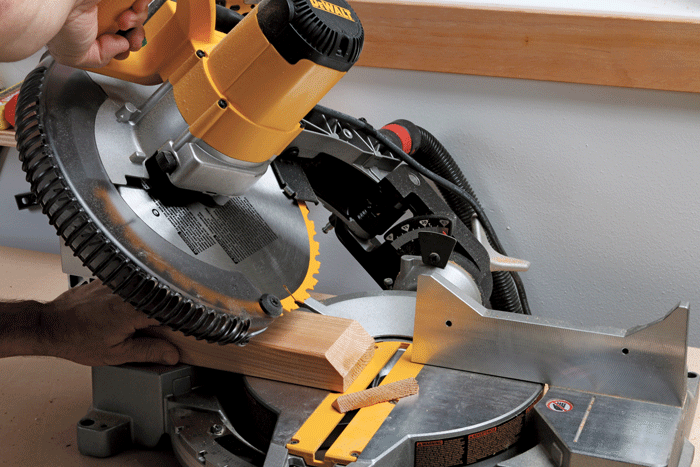
Start by marking a line 3/4 in. from the end to guide your cut (top). Then tilt the saw to 45 °, line up your mark with the inside edge of the blade, and make the cut (bottom).
BEAM GETS ANGLED, TOO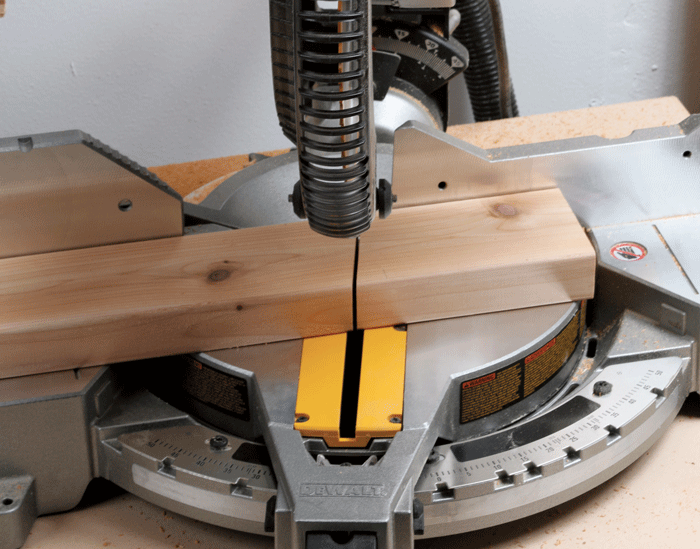
This time you’ll need to pivot the saw table instead of tilting the saw. Mark the overall length of the beam, pivot the saw to 15°, and cut at your mark. Simple.
Now start working on the trestles
By screwing and gluing four pieces together in the following sequence, you’ll create a perfect hole for the long beam to pass through and a pair of strong trestles to support any size person.
CUT AND MATCH THE PIECES
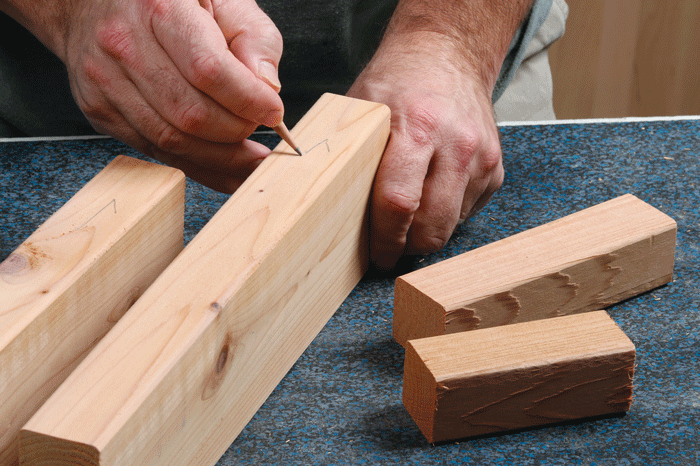
To create an accurate hole (mortise) for the 2×4 beam to pass through, the thickness of the 2x2s needs to match the 2×4 beam. The 2×2 probably isn’t the same thickness in both directions, so after you cut all the pieces to length for the trestle, flip the 2×2 pieces each way to find the thickness that matches the thickness of the 2×4 most closely. Use your fingers to check the surfaces are flush (top). Once you have all of the pieces laid out and flush, mark the glue surfaces (bottom). Check marks are an easy way to keep track of these important surfaces.
Glue together the vertical pieces of the trestles
For an outdoor project like this, your best bet for glue is Titebond III. It gives you more working time than other versions (before it starts to seize up), and it also happens to be rated for both indoor and outdoor use.
SAND FIRST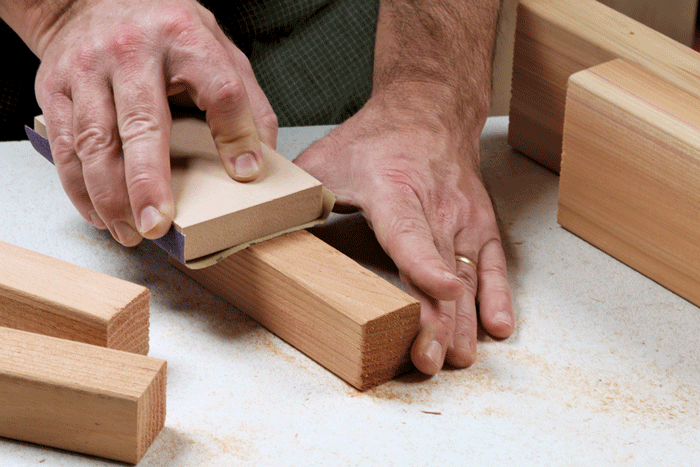
For best adhesion, be sure to sand the surfaces flat. Cedar is soft, so you can start with 180-grit and finish with 220-grit sandpaper. Use a sanding block to keep the surfaces flat.
PREDRILL FOR THE SCREWS AND START ASSEMBLY
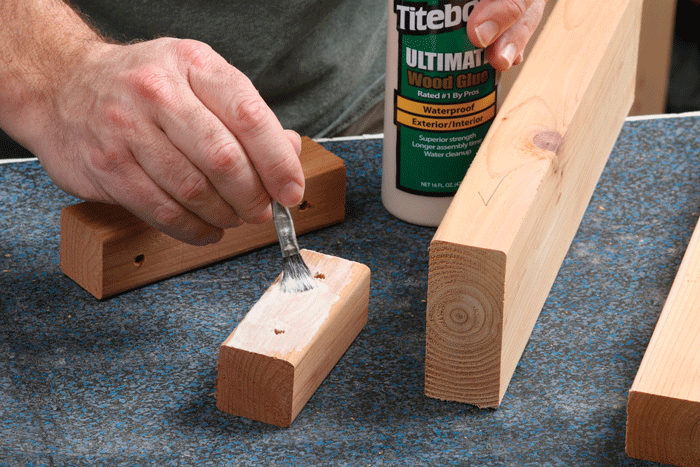
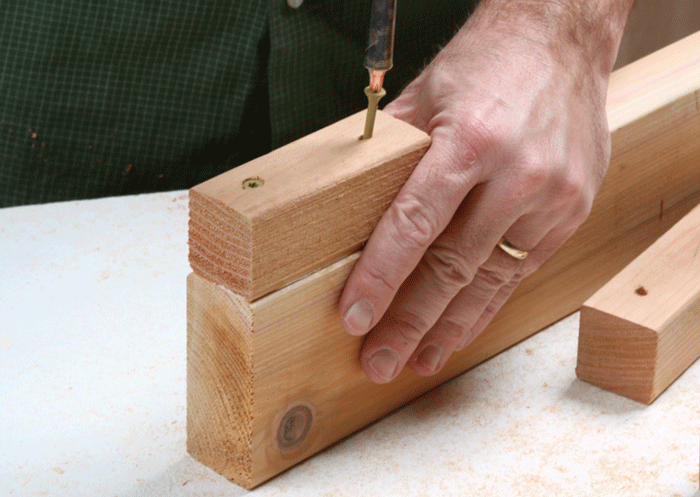
Start the assembly of the vertical sections by attaching the small pieces to one of the longer 2x4s. These small center pieces need clearance holes for the screws. Drill two holes in each piece (top). Don’t go too close to the ends or you might split the pieces you are screwing into. Next, apply glue to both surfaces, spreading it with a brush (middle). Now attach one of the shorter pieces to one end of the 2×4 using 3-in. screws. As you drive the screws, use your fingertips to be sure the ends of the pieces are even with the bottom of the 2×4 and flush with its faces (bottom). You don’t need pilot holes here.
USE A SPACER TO MAKE A MORTISE FOR THE BEAM

What’s great about this design is that you don’t have to do any drilling to make the mortises for the beam. The trick is to use a spacer block. Take a cutoff piece of the same 2×4 used for the beam and use it to space the next piece you are attaching (top). Press that second 2×2 piece firmly against the 2×4 as you screw it on. Use glue and the long screws as before. Remove the 2×4 spacer block, spread glue on the two short pieces, and clamp on the last section of 2×4, making sure it is even with the end of the shorter middle piece (bottom). Try to keep the parts as flat as possible as you clamp them. If they are bowing one way or the other, it might help to put one of the two clamps on the opposite side. Follow this assembly sequence for each of the trestles, then set the pieces aside to dry.
TRIM THE END, IF NEEDED

If the ends of the vertical assemblies don’t align evenly, trim them with the miter saw. Be sure to trim them both to the same length, and to remove the same amount of material from each end. If you aren’t careful here, the mortises for the beam could be misaligned. Trim as much as you can with one thin slice, and if the saw can’t quite reach the end, as shown in the top photo, flip the workpiece over, line up the blade with the trimmed edge, and nip off that last bit (bottom photo).
Now add the feet and tops to finish the trestles
Once you have both vertical sections glued and trimmed to size, you can start screwing on the feet and tops to the trestles. Work should go quickly from here on out.
MARK AND DRILL CLEARANCE HOLES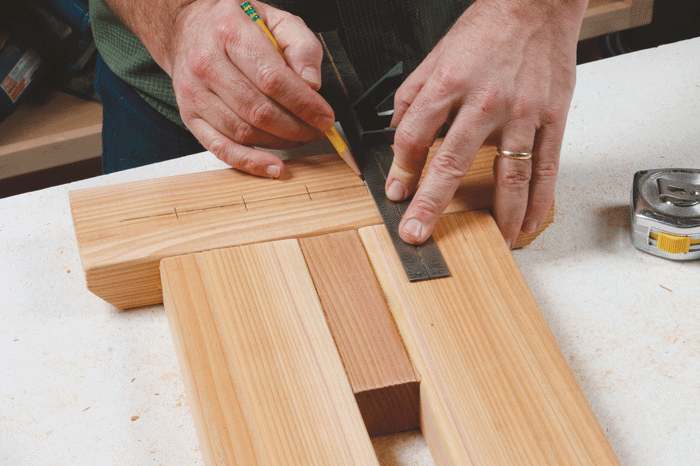
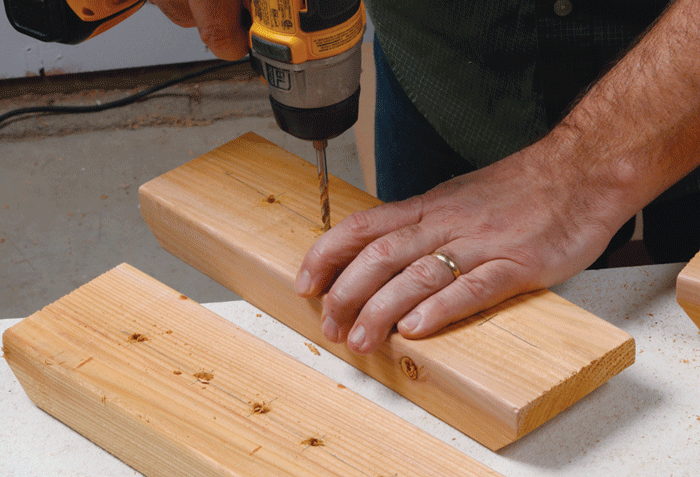
Mark a centerline and then lay the feet flat against the vertical assembly to mark the best locations for screws (top). Don’t put them too close to the edges of the pieces, or you’ll risk splitting them. Then drill clearance holes for the screws.
NOW DRIVE THE SCREWS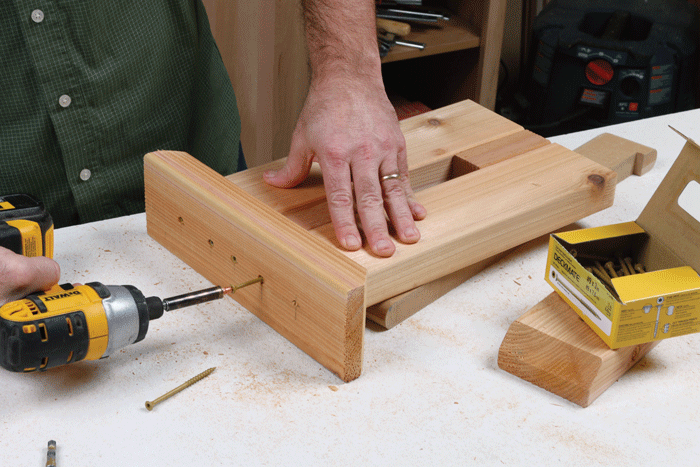
The top and bottom pieces should be centered on the center section. Place a 1-in.-thick spacer of some kind below the uprights to line them up while you drive in the 3-in.-long screws.
SAND ALL OF THE EDGES BEFORE FINAL ASSEMBLY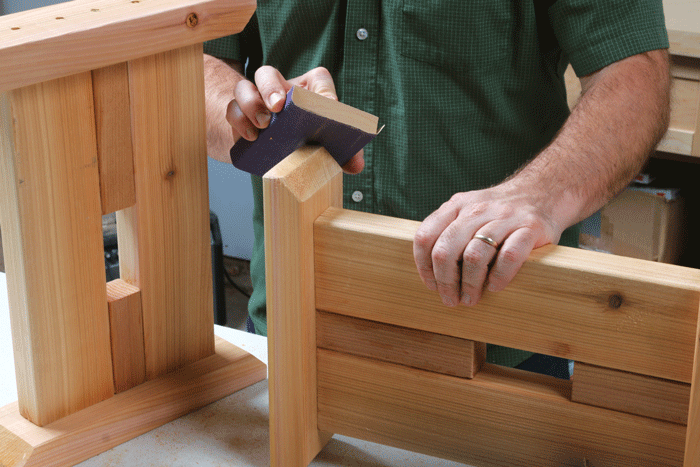
Cut the rest of the parts and pieces to size and then lightly sand the corners with 220-grit paper to round over any sharp edges and remove any splinters. A sanding block makes this easy.
DRILL THROUGH THE TRESTLE TOPS
The top boards are screwed to the trestles from below. These pilot holes will help prevent splitting the top boards. To protect my workbench top, I placed a scrap of rigid insulation under the trestle as I drilled.
Final assembly should be quick
Once you have the trestles prepared and all of the holes drilled for attaching the top boards, it’s time to add the beam and screw down the top. You’re in the home stretch.
INSERT THE BEAM AND CHECK FOR SQUARE

At this point the beam should slide into its mortises easily. If it’s a bit tight, you can sand the end until it fits. Slide in the beam until it projects from each trestle the correct amount (top). Once the beam is in place, make sure the trestles are square to the beam in every direction.
SECURE THE BEAM TO THE TRESTLES

Drill clearance holes on the inside corners of the beam (top), at a sharp angle so the screws will pass into the trestle. Do one hole on each side. Then drive in 3-in.-long screws, burying the heads so the screws are tight. That’s all the grip you need on the beam.
ATTACH THE TOP BOARDS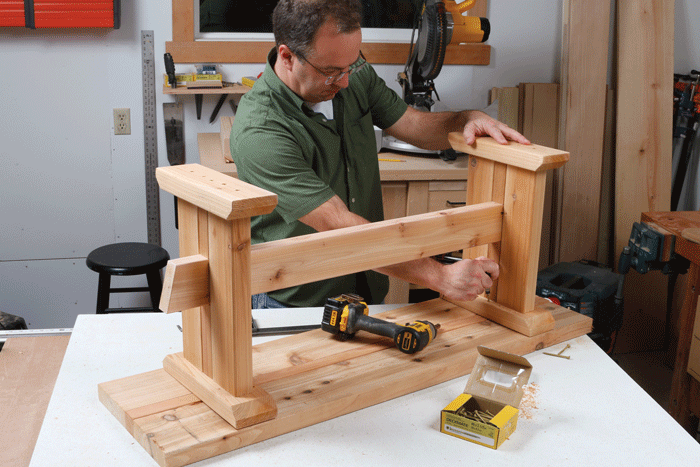
Line them up and measure to be sure the base is located in the center. The two outside boards get two screws each, and the center strip gets one. Use 2-1/2 in. screws here. This was a tight space, so I traded my cordless drill for a stubby screwdriver. Then sand the corners of the top with 220-grit paper, and you’re done. The bench is ready for your garden, patio, or deck. By the way, if you want a quick printout of the plan, click on the pdf below.
 |
This project was excerpted from Asa Christiana’s book, Build Stuff with Wood (The Taunton Press). |
Fine Woodworking Recommended Products

Stanley Powerlock 16-ft. tape measure

Starrett 12-in. combination square

Suizan Japanese Pull Saw


Comments
The instruction say you can use a single 1oft 2x4. There are 140 inches of 2x4 length used, not counting blade thickness of cuts or waste on the board end. People like these. I have made 5 so far, all to give away.
Log in or create an account to post a comment.
Sign up Log in