Decorate your daily bowl
Masterful wood carver David Fisher explains a few of the techniques he uses to embellish small bowls.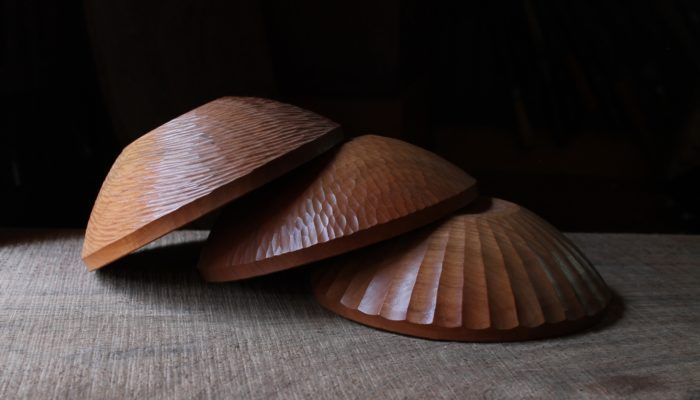
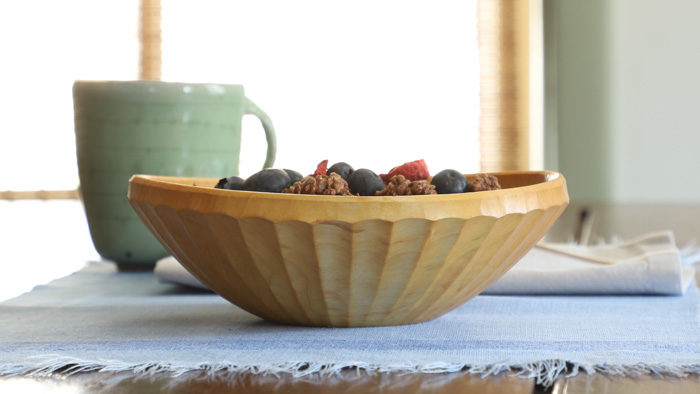
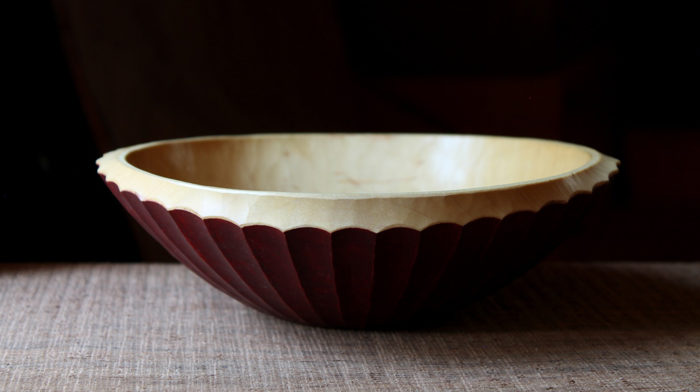
In my upcoming article for the July/August issue of Fine Woodworking, I write about carving a small bowl for daily use. I eat cereal from mine each morning. The article takes you from the log to the finished bowl, all with hand tools. Most of the carving is done with the wood still green. After getting very close to the final shape and setting the bowl aside to dry for several weeks, I finish-carve the inside and often ornament the outside. The outside of the bowl I carved for the article is decorated with flutes, as you see in the photo below. But there are many other possibilities.
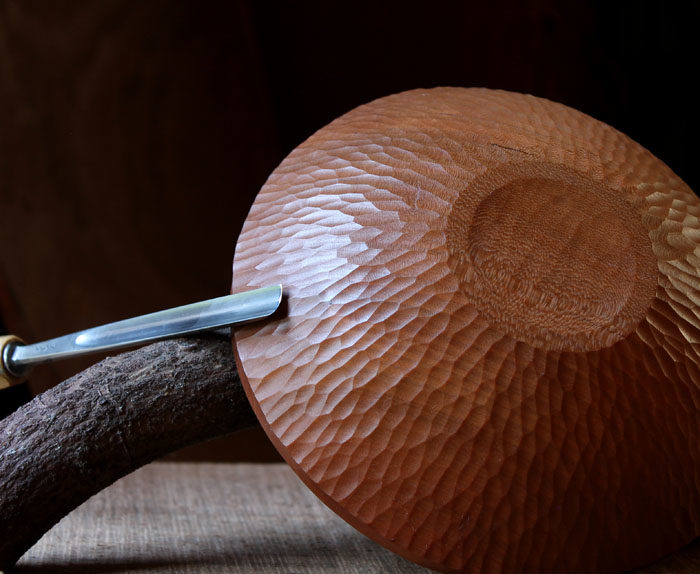
Small bowls like these can be a fun playground for experimenting with texture and color. Here are just a few of the many options along with a brief description of how to achieve them.
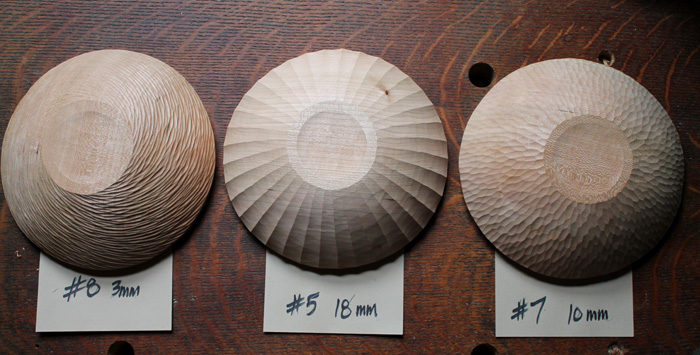
Dappled
In this case, I used a #7/10mm gouge and simply worked from the bottom to the rim, carving short overlapping strokes. The key is to enter and exit the cut cleanly without stopping mid stroke. Work downward and across the bowl’s surface in a loose pattern. By playing with the variables of gouge sweep, width, and stroke length, this general pattern can have endless variations.
Twisted
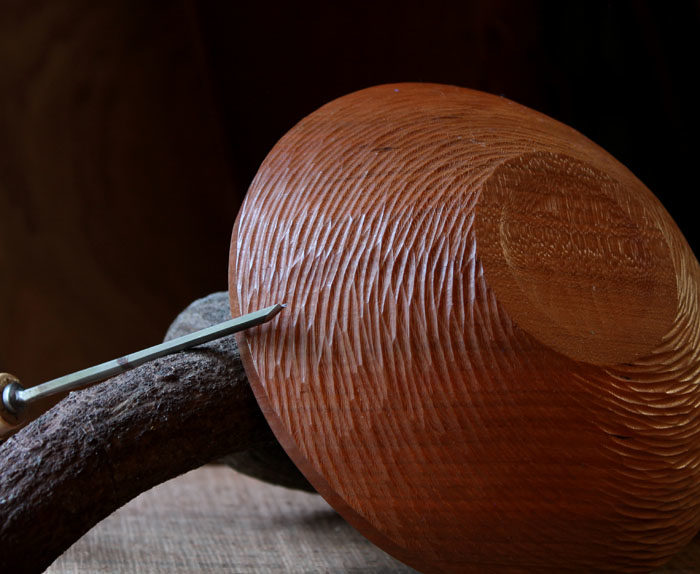
I used a #8/3mm gouge for this one, but any narrow, steep gouge will work. It’s as simple as working the gouge in a loose series of overlapping strokes at an angle that results in a spiral pattern across the surface of the bowl. The hidden challenge is due to grain direction. In order to get the cleanest cuts, the grain direction differences in the four quadrants of the bowl must be taken into consideration. In two opposite quadrants, you’ll work from the bottom down and toward the left, ending at the rim. In the other two quadrants, you’ll start the gouge at the rim and go with the same flow toward the bottom, blending the cuts of the four quadrants seamlessly. And did I mention that these “quadrants” are twisted? You just have to try it; the feedback from the wood and gouge will show you the way.
Painted
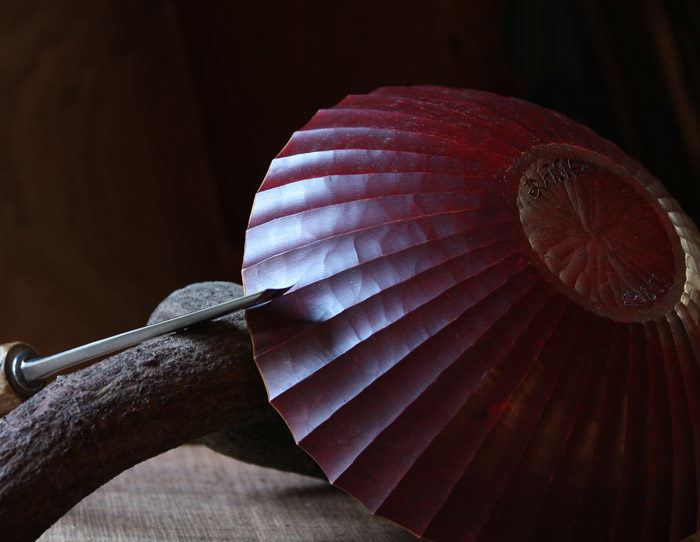
The article explains in detail how to carve the fluted pattern. For this fluted bowl in maple, I added color to the exterior with artist’s oil paint. These paints are in convenient tubes and are simply a mixture of linseed oil and pigment. Squeeze out an inch or so into a dish and add a few drops of linseed oil. Diluting the paint like this (you can also add a bit of citrus thinner) increases transparency, allowing the grain of the wood to show through. To what extent is up to you. Depending on the color, it can take days for the paint to cure, which gives you time to carve some other bowls while you’re waiting. Of course, milk paint, acrylics, and all sorts of options allow you to experiment with color.
These variations are just scratching the surface. Experiment with stamped textures, or why not a rasp?
 |
|
 |
Masters of the craft: The Bowl Carver |
 |
David Fisher’s Snug, Unplugged Workshop |
Fine Woodworking Recommended Products

Sketchup Class

Blackwing Pencils
Circle Guide





Comments
These bowls are beautiful -- just like all of your work.
The techniques you use makes others want to reach out and touch these bowls. Very nice.
Thanks!
Log in or create an account to post a comment.
Sign up Log in