Gilding 101: Finishing with Real Gold
Frame maker Barrie Bryant gives a glimpse into the gilding process and the tools and techniques he uses to create his beautiful gilded frames.
Brought to you by:
This article, “Gilding 101: Finishing with real gold,” by Barrie Lynn Bryant, is from the pages of American Woodturner and is brought to you by the American Association of Woodturners (AAW) in partnership with Fine Woodworking.
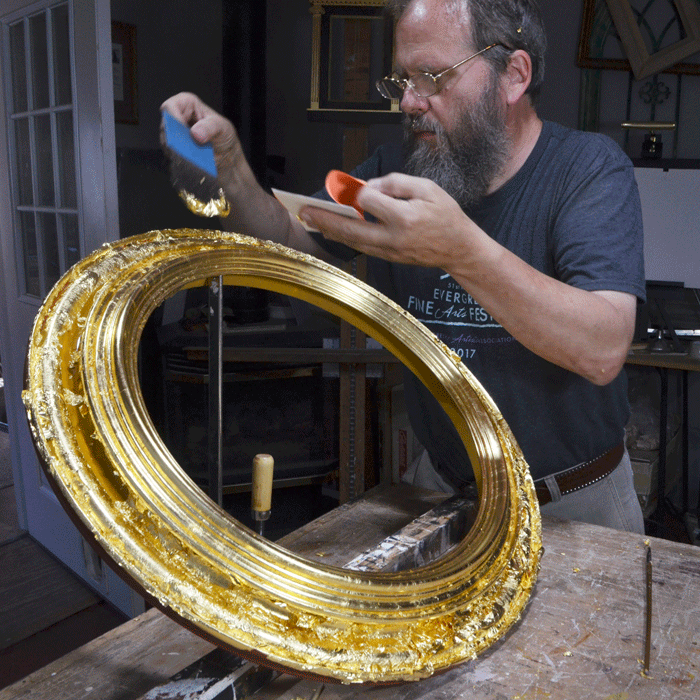
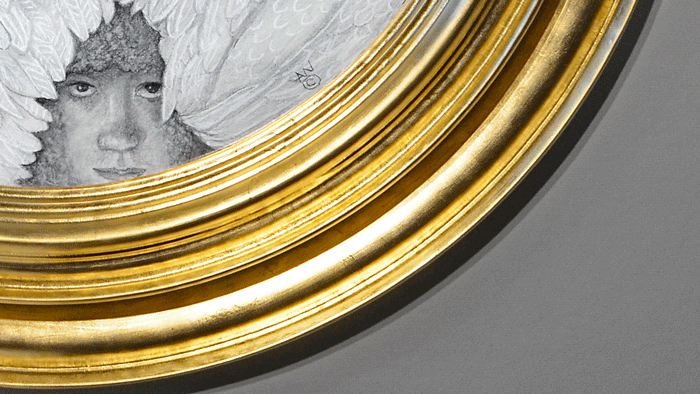
One way to add value and panache to your woodturning projects is to use real gold as an accent or as your entire finish. Several years into my career as a picture frame designer and maker, I got hooked on the beauty of gilding by adhering whisper-thin gold leaf sheets to some of my frames. I soon began studying the ancient art of gilding and discovered how simple and versatile the process is and that it has been practiced for nearly five millennia to beautify and glorify objects.
The real thing
When I discovered gilding in 1999, I called my local arts and crafts store to research gold leaf. I learned that they carried “gold leaf,” but I was only able to purchase base-metal imitation gold leaf, which is essentially brass, as well as copper leaf, fake silver leaf (aluminum), and the ever intriguing but still base-metal imitation, variegated leaf. The store even sold me a quick adhesive white liquid, so I could apply the leaf to decorative objects and to my frames. And the store also stocked a gold leaf sealant to apply over the leafed surface, so the base metals in this brass alloy imitation leaf would not tarnish so easily.
That was all well and good for what it was. However, imitation leaf, no matter how we view it, is so far from being real gold or even looking like it. Imitation gold has a shiny trumpet-brass look to it. Sure, imitation leaf can be toned to look more like real gold, but eventually the base metals will discolor and darken to a browner shade of brass, no matter how well it is sealed. The real thing—precious metal karat gold leaf—will always look like real gold because it is real gold.
Perhaps the main reason precious metal leaf isn’t the first choice for many is that it is available from only a handful of suppliers. Arts and crafts stores mostly handle lesser expensive merchandise to make it more attractive to hobbyists. Further, precious metal leaf costs about sixteen times the cost of imitation leaf. But think of the cost in relation to how you value your woods for turning. We want more interesting and exotic woods with character so that our turning projects aren’t dull. Using real gold and other precious metal leaf will have the same effect as choosing finer quality woods.
Wood for gilding
Just about any kind of wood is suitable for gilding. That doesn’t mean you’d want to cover large areas of a madrone burl with gold. I usually select inexpensive, straight-grained softer woods for gilding, such as basswood or poplar. Both are great choices for spindle and bowl turning, and basswood is especially suitable for carving ornamental details off the lathe. This kind of decoration is especially suited for gilding.
Since I am a picture frame maker, I also use medium density fiberboard (MDF) for turning round picture frames, called tondos. Some might balk at choosing MDF as a turning material, but with proper safety precautions, such as using particulate dust filters rated for MDF, the woodworking experience can still be safe and enjoyable. Because I completely cover the MDF over with gold, it doesn’t matter that it’s MDF. The goal is to use the gilding entirely as the finish.
 |
 |
| Add color under gold leaf. Contemporary picture frame makers often continue the Italian Renaissance tradition of using yellow ochre and oxide red under their gilding. The red is usually applied to the tops of details so that distressing of the gold surface will allow the red to peek through. |
Sometimes red- or yellow-colored woods can be good choices because the natural colors in the wood help the gold radiate more brightly. Historically, gilding has been used over the top of red and yellow clay grounds. Modern gilders mostly follow suit with this practice, unless they are creating signs on glass. Glass gilding is an expansive subject itself, where gold is applied directly to the surface in order for it to shine brightly in perfect golden glory. Otherwise, for the most part, gilders apply gold over surfaces they have properly prepared and finished with a red- or yellow-colored ground, and sometimes a combination of both.
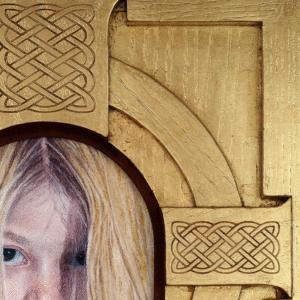 |
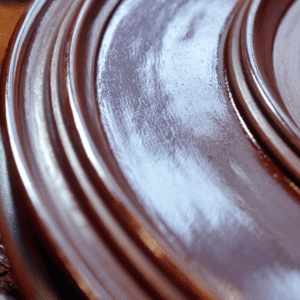 |
| Gilding over oak (left). Gilding directly over oak wood with minimal surface preparation will show the wood grain.
Smooth surface = bright gilding (right). A highly polished and sealed surface of a tondo, ready for gilding. |
Another interesting choice is oak, with its distinct, visible grain pattern. During the Victorian period in England, in the 1860s, the artist George Frederick Watts applied gold directly over the oak grain of his picture frames so the grain could be seen clearly through the gold*. That innovation created another aesthetic trend in gilding and picture framing. Other decorative patterns had been used under gold, but not the distinct oak or other wood grain pattern.
Prepare the surface
For most gilding, we labor over surface preparation in order for the gold to have an ultra smooth surface upon which to be applied. Surfaces that are blemish-free and polished will render the gold at its brightest. Blemishes and unpolished surfaces will create interference beneath the gold, dulling its final appearance.
There are several ways to achieve a good surface, and your chosen method will depend on the gilding type being employed. The longstanding traditional method of gilding is called water gilding. The other, more modern, choice is mordant size gilding with oil-based gold leaf size. In this article, I describe both types but focus in more detail on mordant size gilding since it is the simplest and most versatile approach.
Water gilding method
The traditional method to accomplish the brightest gild possible was defined by Cennino Cennini during the Italian Renaissance in The Craftsman’s Handbook (Il Libro Dell’ Arte) of 1437 (translated by Daniel V. Thompson, Jr., Dover Publications, 2016). Cennini’s process, which gilders have adapted for modern use, involves combining a rabbit skin glue solution with a gilder’s whiting or calcium carbonate to make a fine gesso. After applying numerous coats of gesso, the rabbit skin glue solution is mixed with bole (a fine, compact earthy clay), applied to the surface, and polished. The gilder then floods the surface with water and applies gold directly to it. This is done multiple times, until the gilding is completed. After the surface is completely dry, the gilder can burnish the surface to a mirror finish.
Water gilding might be the method we should all aspire to. It is the finest method but also the most challenging.
Oil gilding method
Mordant size gilding with an oil-based gold leaf size is simpler to accomplish, quite beautiful, and rewarding nonetheless. It is also more versatile than water gilding since it can be used for exterior applications, such as on state capitol domes and outdoor sculptures, on business signs, for pinstriping automobiles, and for naming boats on their hulls. Unlike water gilding, oil gilding cannot be burnished to a mirror finish; it will have a bright matte sheen. But there are techniques to help improve its radiance, and laboring over surface preparation is once again the first step to achieving a brighter oil gild.
The same shopmade gesso used in water gilding can be used in oil gilding, too. I do this often because the gesso works well on larger surface areas requiring superior preparation. Rabbit skin glue and calcium carbonate gesso does this best. You could also use a burnt sienna casein paint in much the same way, as casein also sands smoothly and easily. But for smaller surfaces like woodturned objects, an alkyd oil-based primer such as Dux Paint Company’s Yellow and Red Burnish Sealer will simplify the process and work very well. The Dux products are made for the gilding industry and are especially suited for gilding smaller wood projects, such as small finials and ornaments. Since the Dux Burnish Sealer is an oil-based product, it is necessary to allow for at least four hours of drying time before applying a second coat or moving on to the next gilding step.
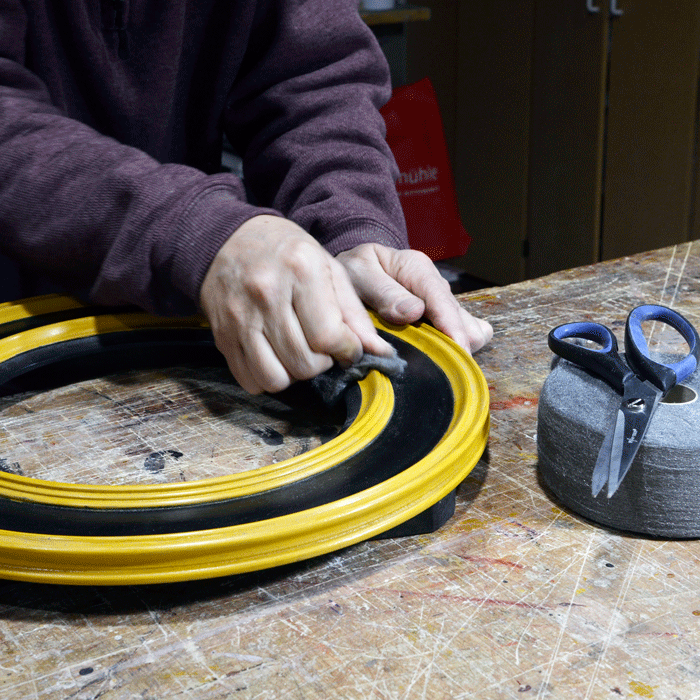
I am careful to avoid smudging the surface during this period, but I do inspect it for blemishes and brush strokes. You can lightly buff the surface with the palm of your hand to smooth it and begin to polish the alkyd paint. Once I’m certain the burnish sealer is dry, I’ll use a fine oil-free steel wool to lightly smooth and polish the surface. A fine mesh sanding screen (like 400-grit Abranet) can also be used to smooth any blemishes.
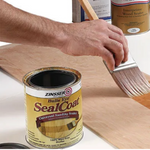
When I am satisfied with the polishing, I seal the surface with a 1-pound cut of shellac. This prevents the oil-based size from soaking into the burnish sealer unevenly. Dewaxed shellac works best, and I often use Zinsser Seal Coat combined with denatured alcohol to make my “cuts.” Shellac dries within a few hours and can be buffed and polished then, but I usually let it dry at least overnight before continuing with gilding.
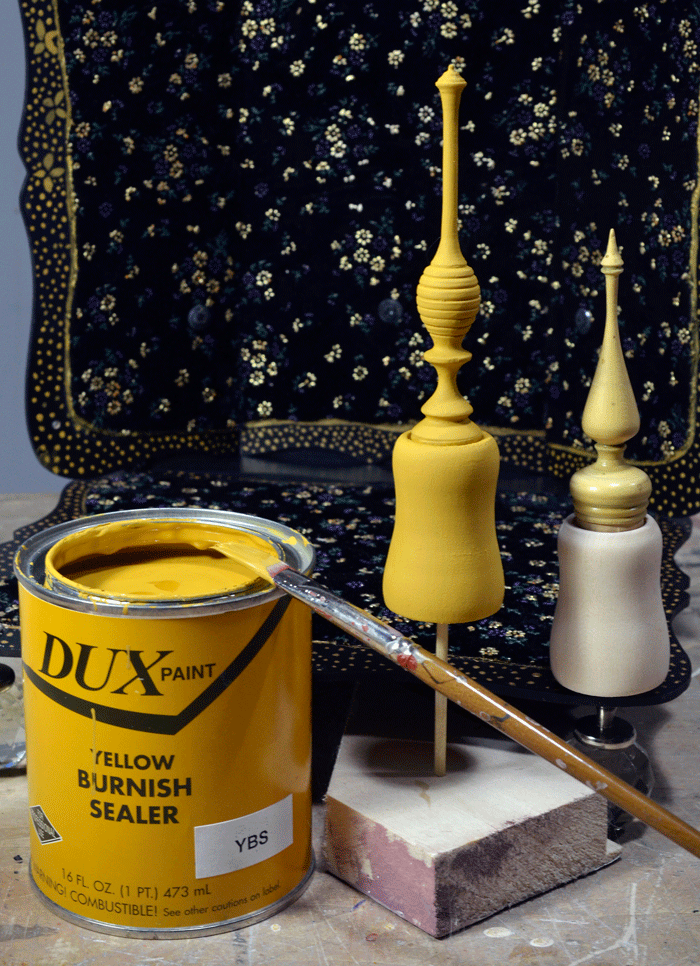 |
Burnish Sealer prepares small projects. Yellow Dux Burnish Sealer is a great choice for surfacing finials and small decorative objects prior to gilding. |
Smaller spindle-turned projects can also be sealed with cyanoacrylate (CA) glue or shellac and polished to a mirror finish on the lathe before gilding. The ability to seal and polish projects quickly at the lathe is a benefit unique to woodturners. It is an advantage in gilding since the more polished a surface is under the gold, the brighter the gilding will appear.
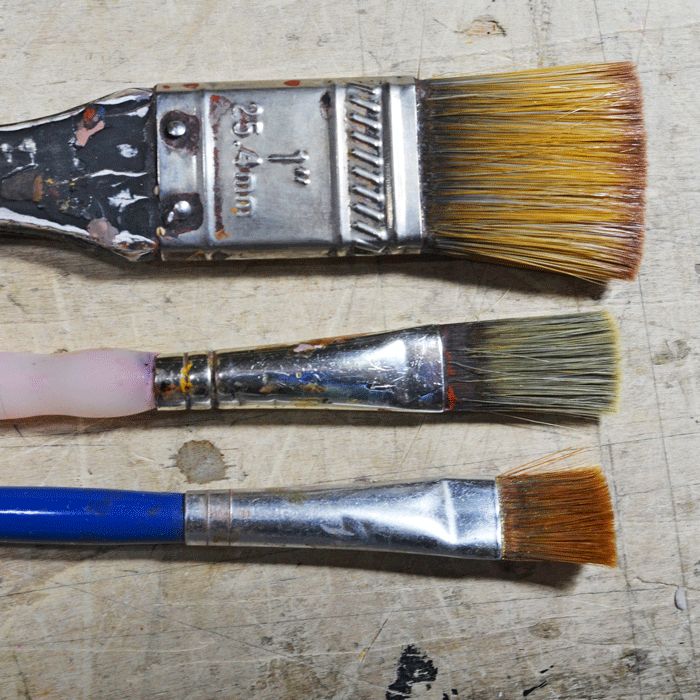 |
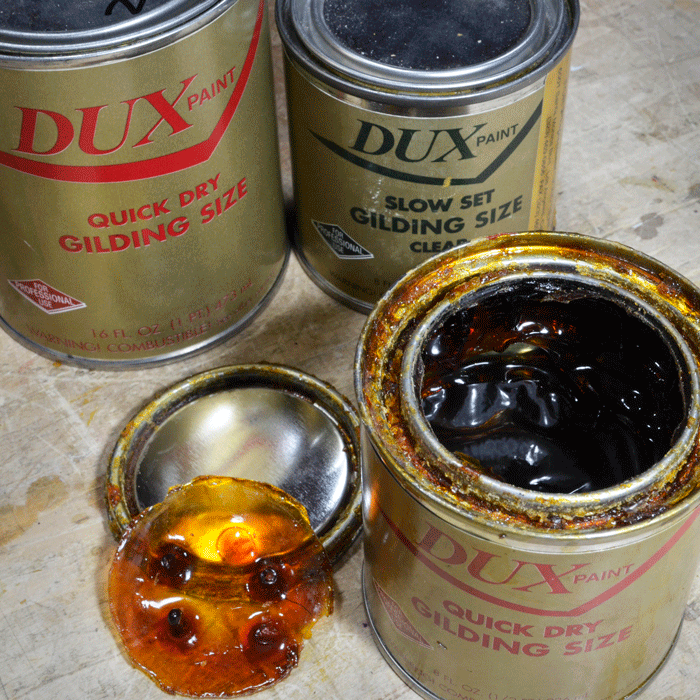 |
| Brushes. Common inexpensive golden and white taklon synthetic fiber brushes, in various widths, are great for gilding (left).
Gilding size. Dux Paint Co. gold leaf oil-based size will gum up around the can opening, and partially full cans of Quick Dry type will usually skin over during storage (right). Remove skin and stir the contents of every can before applying size. |
Oil-based gold leaf size is a type of varnish that, once completely dry, offers a high-gloss sheen. Dux Paint Company manufactures oil-based gilding size, and presently this is the most readily available size in the U.S. In the U.K. and Europe, there are sizes made by Manetti, Wrights of Lymm, and Charbonnel. Recently, Giusto Manetti began exporting oil-based gold leaf size from Italy to the U.S. to the delight of gilders, whereas Charbonnel, after many years of availability, recently stopped exporting to the U.S. Another company, OneShot, which makes products for sign painters, also offers an oil-based gold leaf size. Luco is yet another brand in the U.S. All of the companies make both quick-dry and slow-set versions of oil size, except OneShot, which is quick-dry only. Whichever size you use, always stir the entire can upon opening it to thoroughly mix all the components, which settle during storage.
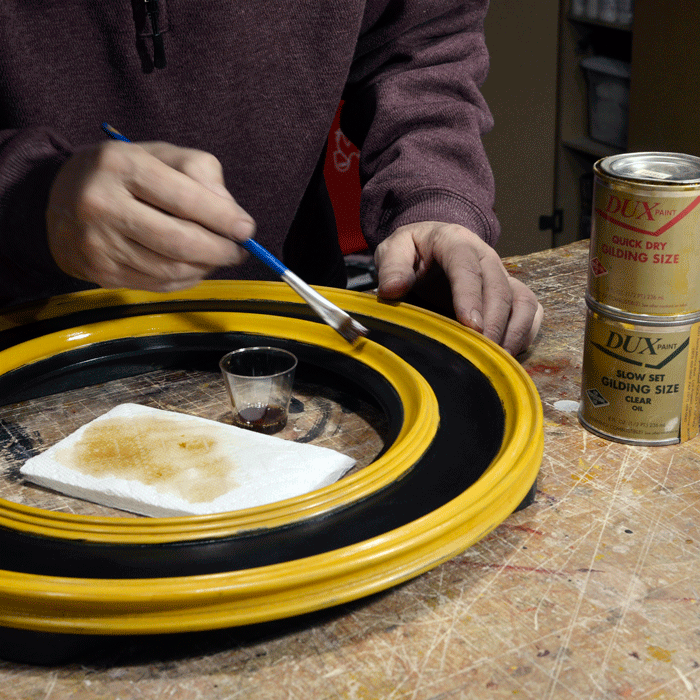
Brush the gold leaf size onto the surface to be gilded as lightly as possible, avoiding any pooling. It seems that the thinner the application of size, the brighter the gild will appear. It can be difficult to see the application of the size when applied to a highly polished surface, so proceed with care.
 |
 |
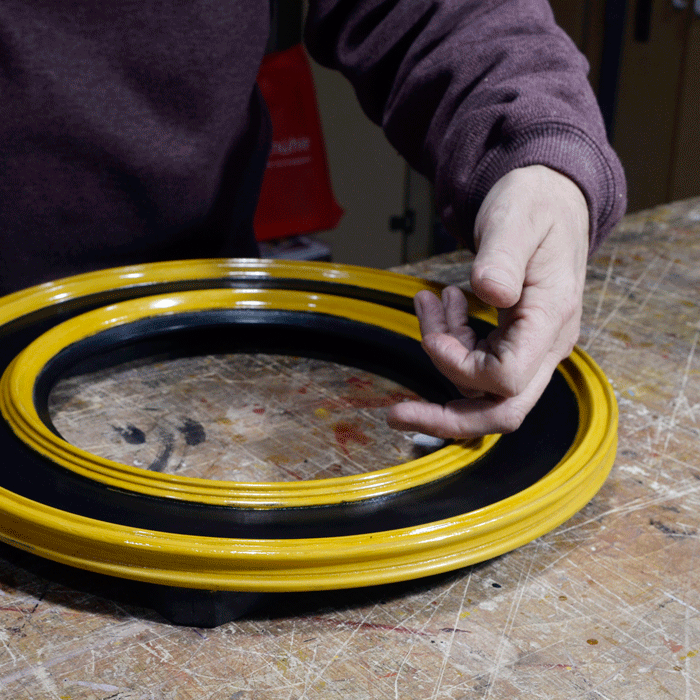 |
| Apply size. Polish the sealed surface with oil-free 0000 steel wool and remove any dust and debris before applying gold leaf size with a brush. Check for proper tack by placing the back of your finger on the surface and slowly pulling it off. |
Before applying size, wet your brush with a little mineral spirits to keep the brush workable and easier to clean later. Blot the brush on a paper towel to remove as much of the solvent as possible. Then dip the brush in the size and blot the brush onto the towel again, to remove some of the size and to charge the brush. Begin applying a light coat of size to the surface you plan to gild. Once you’ve completely sized the surface, set the project aside and wait until the wet sticky size begins to dry to a tacky adhesive state.
Quick-dry size is designed to reach its proper “tack” in less than an hour, whereas slow-set size will take eight hours or more. OneShot reaches proper tack in about fifteen minutes. Humidity and air temperature will affect the tack time also. The best time to apply the gold to the tacky surface is just before the size loses its tack. Be careful not to wait too long, especially if you are using quick-set size, which does not remain tacky as long as slow-set size.
The open gilding time for quick-dry size might be less than an hour. Slow-set size might have an open gilding time of three hours or more. Check for proper tack by using the back of your finger. Lightly touch your finger to the surface and then slowly pull it off. You’ll know if your surface is sticky wet, pretty tacky, slightly tacky, or dry. If you gild over a sticky wet size, the gold will wrinkle and be ugly.
Quick-dry size is mostly suitable for small projects and for patching areas where the leaf has broken apart or where it didn’t overlap when laid down. Gilders call these areas “holidays.” Slow-set size is better for larger projects, and it also produces a brighter gild. Depending on how long it takes to size a project, it might be better to do it in stages. Size and gild one part now, then another part later or the next day.
Selecting precious metal leaf
Precious metal leaf is available in many karats and shades, the most common being 22k or 23k. Pure gold and platinum do not tarnish over time, so they always retain their beauty. Another benefit of high-karat gold leaf is that it does not have to be sealed over with a clear coat. Precious metal leaf is also made in lower karats, but anything below 22k will have to be sealed with a topcoat to keep the base metals from tarnishing. Generally, any clear coat applied over gold will make it look a little less gold. If you find it necessary to clear coat your gilding, do so sparingly. Using leaf for exterior applications requires the leaf to be of very high karat, such as 23.5k and higher.
Precious Metal Gold Leaf Suppliers |
|
Easy Leaf Products |
Sepp Leaf Products |
W&B Gold Leaf |
Sinopia |
The two most common types of precious metal gold leaf are surface and patent. Surface gold leaf comes packaged in books of twenty-five loose sheets, each one sandwiched between thin tissue papers making up the book. Patent gold leaf, also packaged in books of twenty-five sheets, are lightly affixed to a backing of tissue paper. Patent leaf is designed to be used outdoors or in upright situations, where handling surface leaf would be difficult. Both surface and patent leaf are suitable for using in mordant size gilding with oil-based gold leaf size, but only surface leaf is suitable for water gilding.
The standard size of a sheet of precious metal leaf is 85mm, or 3 3/8″. But it is available in larger sheets as well as in 67′ (20m) rolls of various widths. Rolls are patent leaf and can be a good choice for gilding rims on turned objects.
Gold leaf is made through a beating process, historically done by hand with various weight hammers. According to Urban R. Billmeier of W&B Gold Leaf, their hand-beating process starts with a 16 lb. hammer and finishes with an 8 lb. hammer. Established in 1905, W&B is the only manufacturer of gold leaf remaining in the U.S. today. Gold beating now is mostly accomplished by machines worldwide.
Standard gold leaf is sold by the book and by the pack. A pack of leaf consists of 500 sheets, packaged in twenty books of twenty-five sheets each. A typical price for a pack of top-quality gold leaf is around $750, which makes the price of each sheet of gold $1.50. A single book of top-quality leaf will cost $40 to $50.
I prefer to use surface leaf on most of my projects, and handling surface leaf requires the use of a gilder’s tip and knife. The tip is usually a thin but wide squirrel-hair brush about the size of a sheet of leaf.
Laying down the gold
Make sure you begin laying down the leaf where you first applied the gold leaf size. On small projects, this will matter less than on the big ones. Be careful handling the leaf. Even with a gilder’s tip, it can be easy to break the leaf and make a mess. Precious metal leaf is very forgiving, however. It is easy to patch holidays because it is soft and workable.
 |
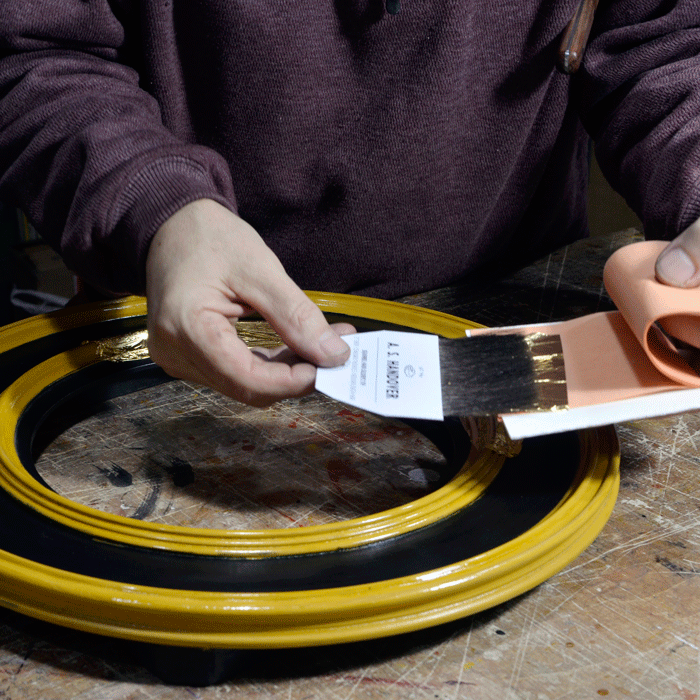 |
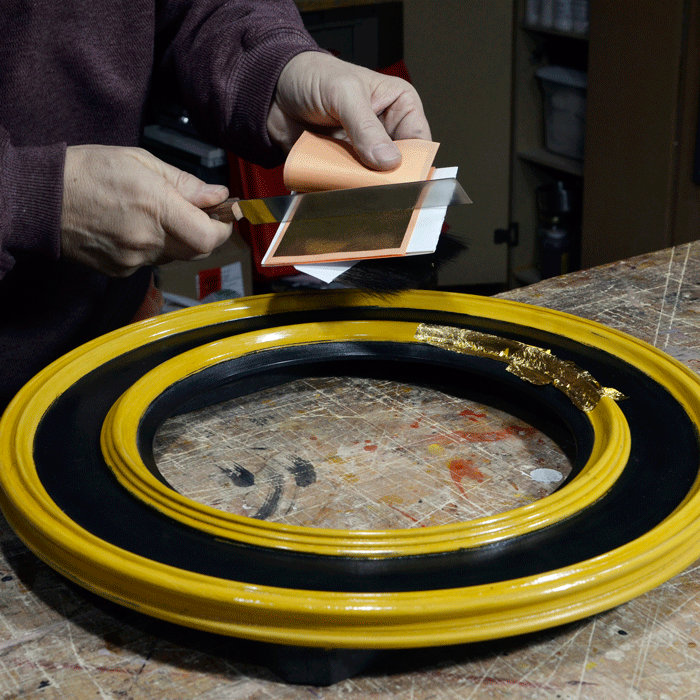
| Apply surface type gold leaf. When using a gilder’s knife to cut surface type gold leaf, place a piece of thin cardboard behind the bottom sheet of gold at the back of the book so you’ll have a rigid surface on which to cut. Work from the back of the book forward to avoid damaging other sheets of gold (left). A gilder’s tip is a brush used to grab and move gold leaf. You can “charge” a gilder’s tip by rubbing it across the oils on your forehead or face. Some gilders rub a scant amount of petroleum jelly on their forearm for this purpose. Lightly lay the tip down on the gold and pull it out of the book (right). |
Apply the leaf all around the work to be gilded. Use a gilder’s knife to cut surface type gold leaf to a smaller size. Then lightly lay the gilder’s tip down on the gold and pull it out of the book. I normally work closely to the project, so I do not have very far to move the gold from the book to the tacky sized surface.
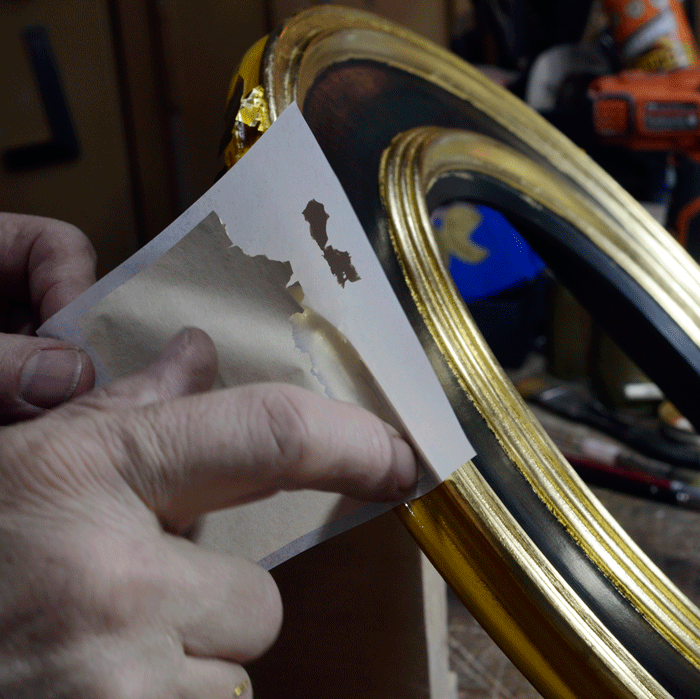
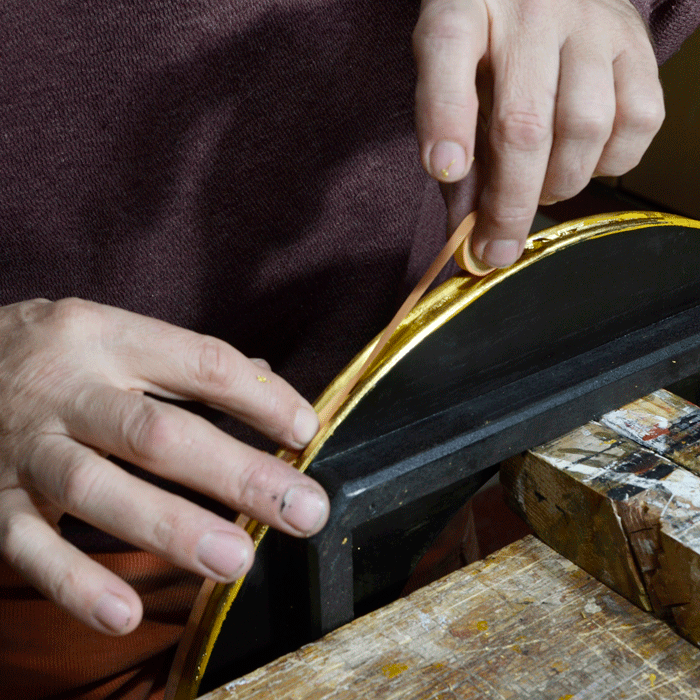
To apply patent type leaf, position the leaf with one hand and apply pressure to the backing paper with the other so that the gold releases onto the surface. Roll gold is rolled up patent leaf, and it can be handy for gilding long flat runs or on small projects like turned finials.
 |
 |
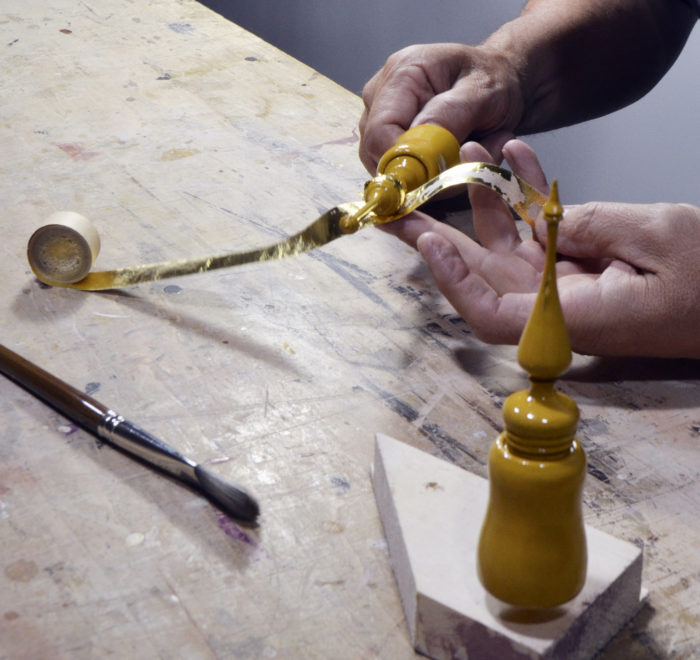 |
| Apply patent type gold leaf. The product comes affixed to a tissue backing (left), but is also available in rolls (middle and right). A long roll is handy for application around a rim or edge and on small turned projects. |
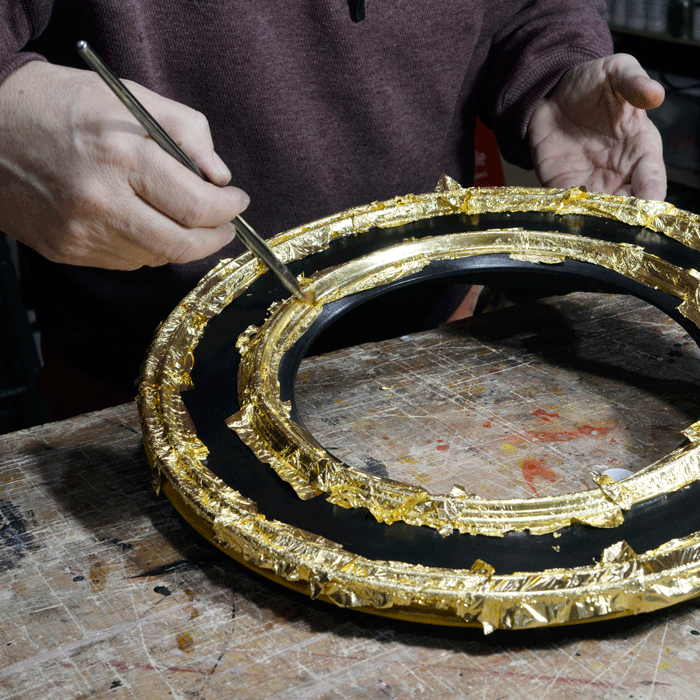
After the leaf is applied, tamp the surface using a soft brush to remove the skewings (extra gold leaf not adhered to the surface) and move them around to cover the entire surface. Work lightly, but ensure you are applying enough pressure to fill in places that might be missing gold. Pick up skewings from the worktable with a small brush and apply them over the holidays. Then with the softest cloth you have, lightly rub the surface, being careful not to scratch the gold. Note that the surface will be especially fragile until the gold leaf size has hardened and cured.
 |
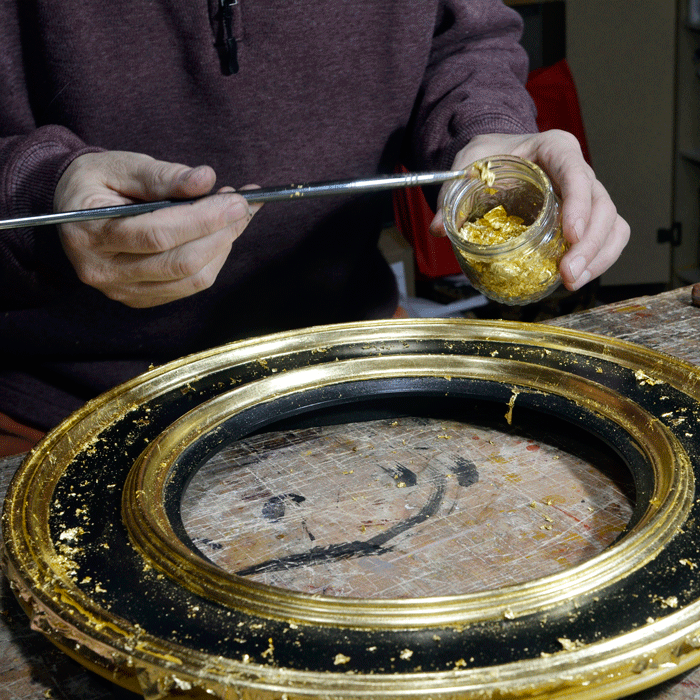 |
| Tamp down, deskew. Tamp down the gold slowly and methodically with a very soft taklon brush to help with the deskewing process. Carefully move gold skewings around the surface and onto holidays. Save excess skewings in a jar for later use. |
When you are satisfied with your gilding, set the project aside to let the gold leaf size cure. Dux Quick Dry Size cures in twenty-four to thirty-six hours, while slow-set size takes at least seventy-two hours to cure. Do not clear-coat your gilding unless the gilded object will be handled frequently or you feel people will be apt to rub their hands over the gold surface. A thin cut of shellac is a good choice to use as a clear coating, but only do this after the gilding has properly cured. Interestingly, exterior gilding normally does not receive a protective clear coating.
Conclusion
Using precious metal leaf on your woodturning projects will add panache and value to them. Woodturners value burls and exotics as much as gilders value precious metals. A madrone or buckeye burl is to woodturners what karat gold or platinum is to a gilder. What’s the point in imitating your gilded finish? Finish with precious metal leaf instead.
Photos courtesy American Association of Woodturners.
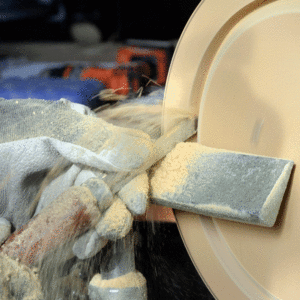 |
How to Turn a Round FrameBarrie Lynn Bryan turns round frames in medium density fiberboard, before covering the frame in gold leaf and paint. |
Fine Woodworking Recommended Products
Foam Brushes

Bahco 6-Inch Card Scraper


Comments
Interesting article on the art of the painted finish. Would like more on water guilding and antiquing once the gold is applied.
Greetings, and thanks for your comment about my gilding article. I look forward to providing more details about water gilding and toning gilded surfaces in the future. The type of gilding I mostly do technically isn't a painting process despite all the substrate preparation and the use of the gilder's tip brush to apply the loose/surface gold leaf to the substrate. Consider that patent leaf is backed by paper, so no brush is involved when we apply it to a substrate. The gold in both applications is only metal with no other binder since gold is malleable. Shell gold, on the other hand, is real gold that has been crushed into a fine powder and suspended in gum arabic, the binder used in watercolor paints, for use in illuminating manuscripts and icon painting, etc., and thus is a painting process. Er, I know...TMI! Warmest regards, Barrie
Nice article. I too started guilding in the mid 90's as I started repairing paintings and frames from the 1800's early 1900. Started out just doing traditional water guilding and fought thorough a lot of trial and error techniques. I was a pureist at that early time and ignored oil size as a medium. Then a friend remarked to me that "hey your not doing the mona lisa frame"! I turned to oil size for 90% of my projects because of the easy application. No "guilding Liquer" to worry about if you had the right amount. Newbies stick to oil size at first you will need to hone your skill with the tip first! Hope to see some more articles from you.
Log in or create an account to post a comment.
Sign up Log in