Recreating a Childhood Memory
Tim Killen brings create plans from a friends decades-old sketches to help a friend build a part of his childhood.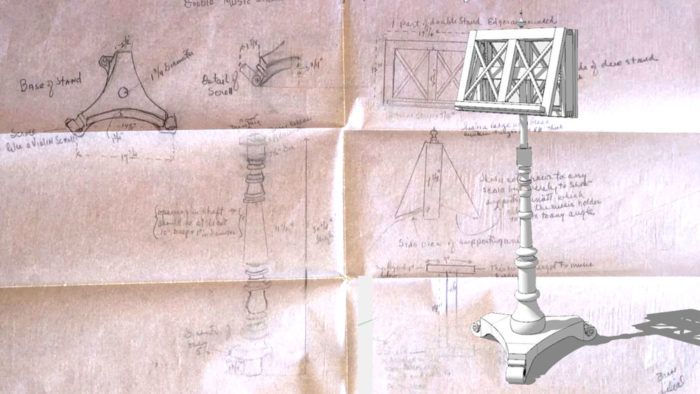
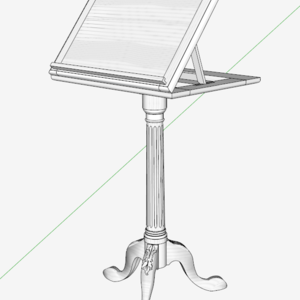
A friend and fellow-woodworker came to me with a challenging woodworking project – an interest in reproducing a Music Stand that was a big part of his childhood memory. My role would be to create a detailed set of drawings with full size templates for his use in constructing the music stand.
His father, a musician, owned an old classic mahogany double music stand. It was an important and prominent piece of furniture in the home. Unfortunately, the music stand was lost to the family. There were no photos, but luckily he had kept a sketch made by his father many years ago. The sketch, shown below, was in pencil on two pages of paper vellum. It was tucked away for years folded in an envelope, knowing that someday this would be useful and valuable.

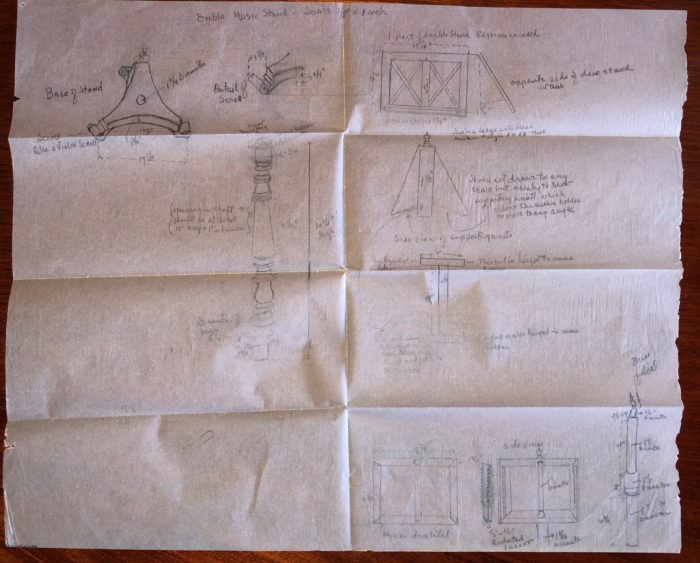
As you can see, the sketches were mainly in perspective 3D mode – unfortunately, there were no scaled or straight-on front, top, side orthographics. Nevertheless, it looked like important dimensions were shown. This was going to be a challenge, especially the upper part with double angle-adjustable music racks. My normal procedure for starting a SketchUp would not be possible. That is, there would be no imported photos or orthographic shapes to trace-over. I would have to interpret these pencil graphics and build the components line-by-line.
I started at the top of the music stand, the adjustable music racks. I assumed this would be the most difficult portion to develop. Below you can see this first stage of design – sizing up the components, but without any joinery. At this stage, I was ignoring how to do the angle adjustment with ratchet teeth. I knew the Music Holder Side assemblies would be hinged to the top of the rectangular Frame. I also knew the Arms would also be hinged and connected to the Music Holder Sides.
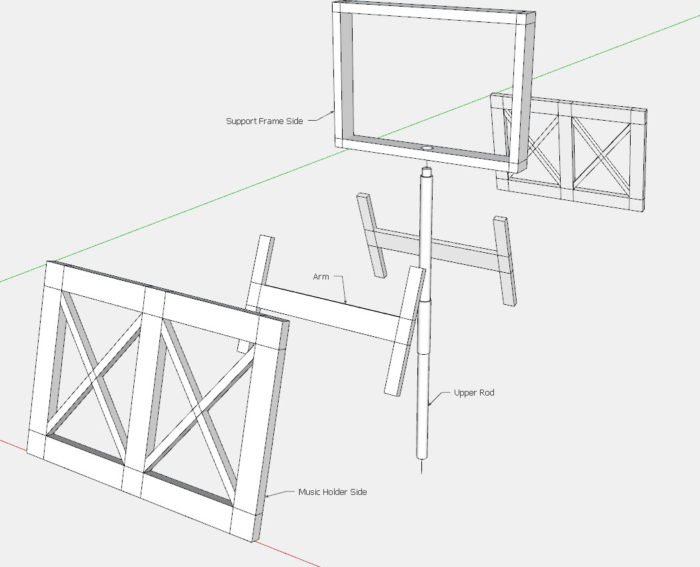
These hinged components would be the most difficult to work out, and SketchUp would help to solve this challenge. As shown below, I set up multiple views of these components side-by-side and rotated at different angles. I also added toothed bracket plates to see the interaction with the Arms.

I set up a Zoom meeting with my friend, and shared the real-time SketchUp file. I could orbit, zoom, and pan around the model to show the problem areas. Online, we were able to sort out a new configuration and location of the Arms to avoid interference.
The next challenge was to work out an acceptable toothed ratchet configuration and location. So I set up another SketchUp Scene as shown below.
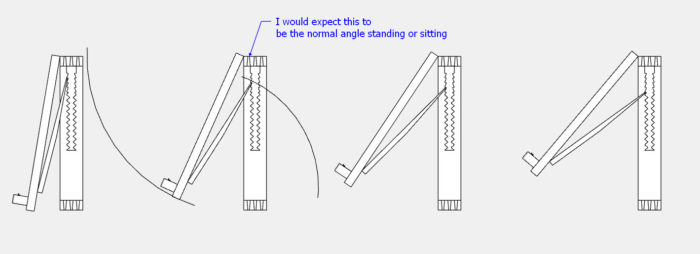
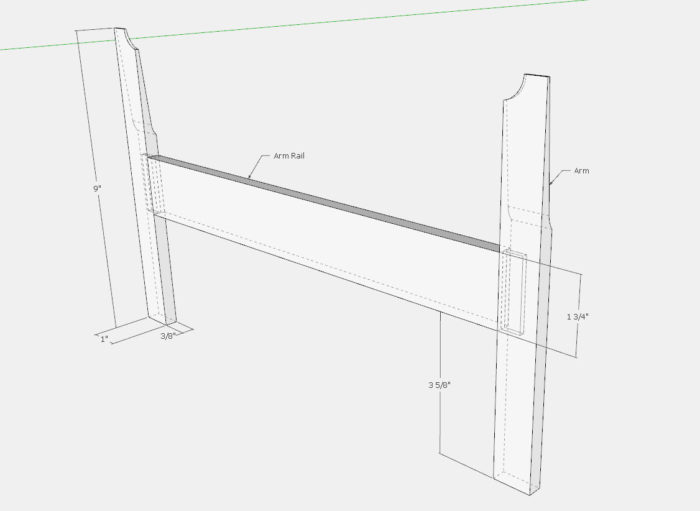
With this configuration, I was able to detail the feathered shape of the Support Rails and design teeth configurations. Here is the resulting feathered Arm.
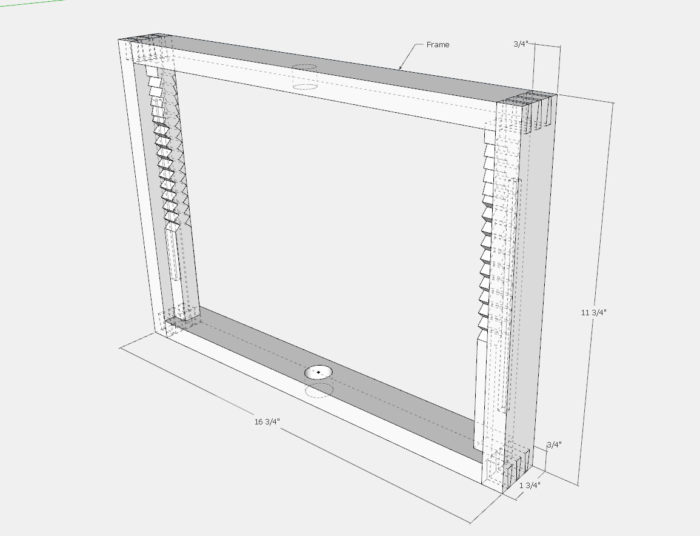
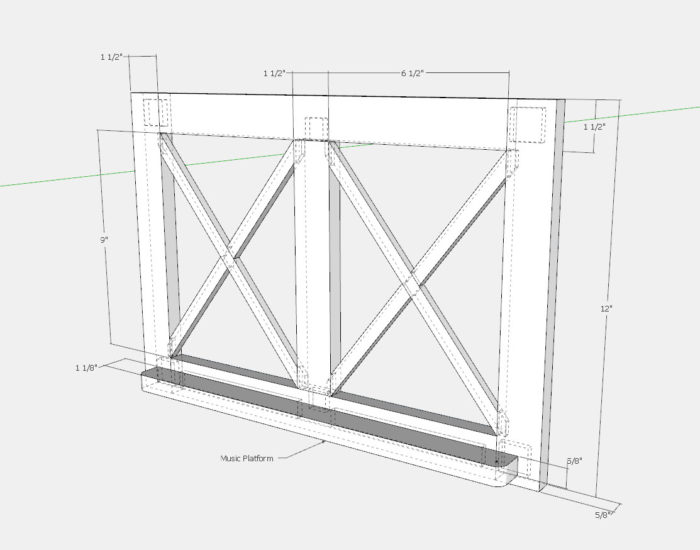
Also, I continued working joinery as shown below with this dovetailed Frame, and mortise and tenon in the Music Platforms.
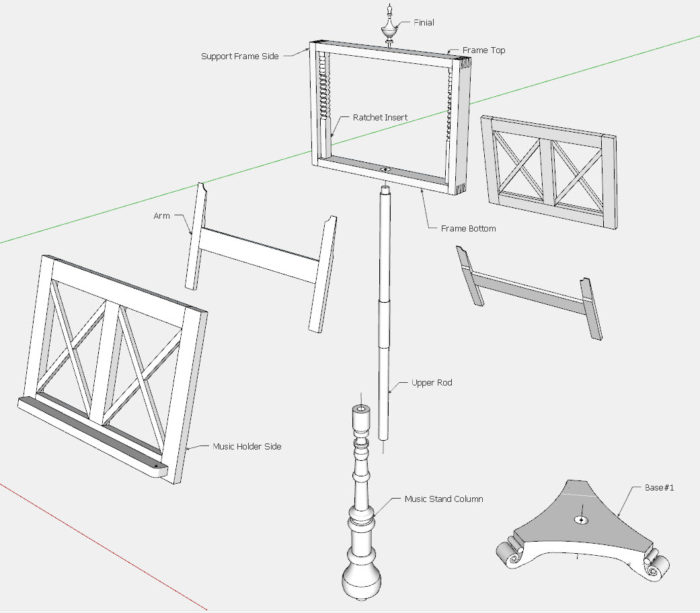
Here is the final exploded view.
And the final Assembly
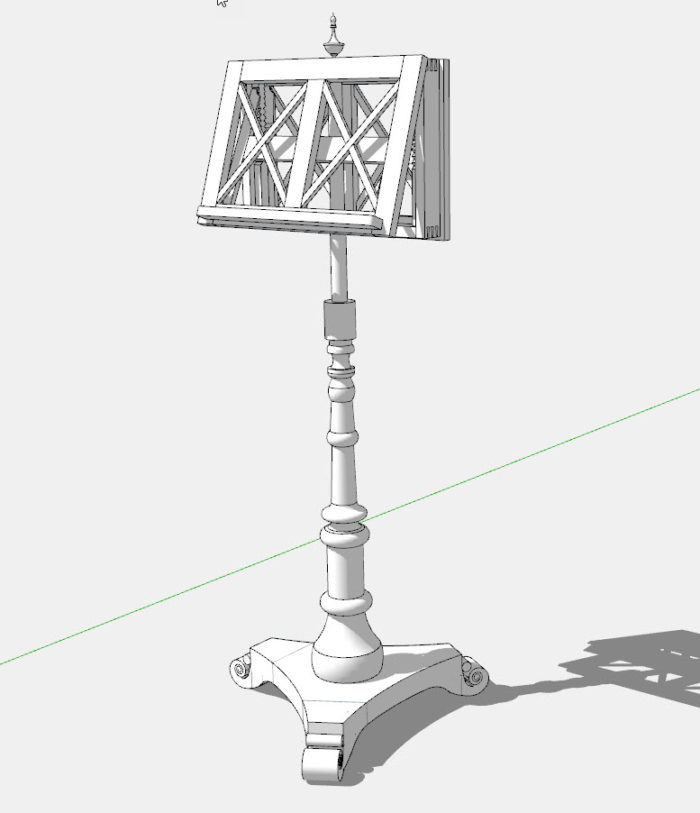
Here’s a short animation of the Music Stand movement.
Tim Killen
KillenWOOD
Fine Woodworking Recommended Products

Sketchup Class

Dividers
Compass








Log in or create an account to post a comment.
Sign up Log in