Demystifying construction details
Through the process of building 3D models, very fuzzy, obscure features in a piece of furniture are exposed, worked out, and visually displayed.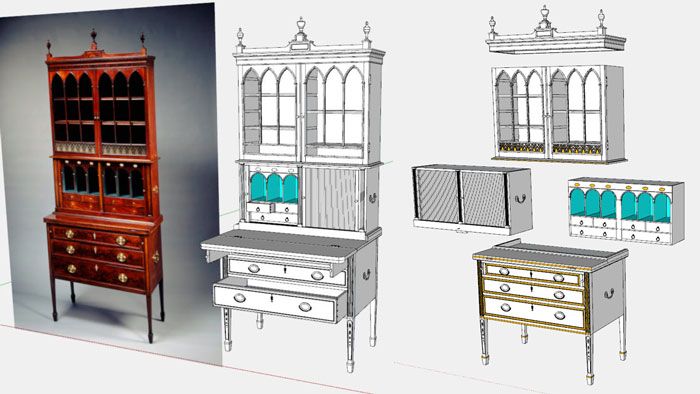
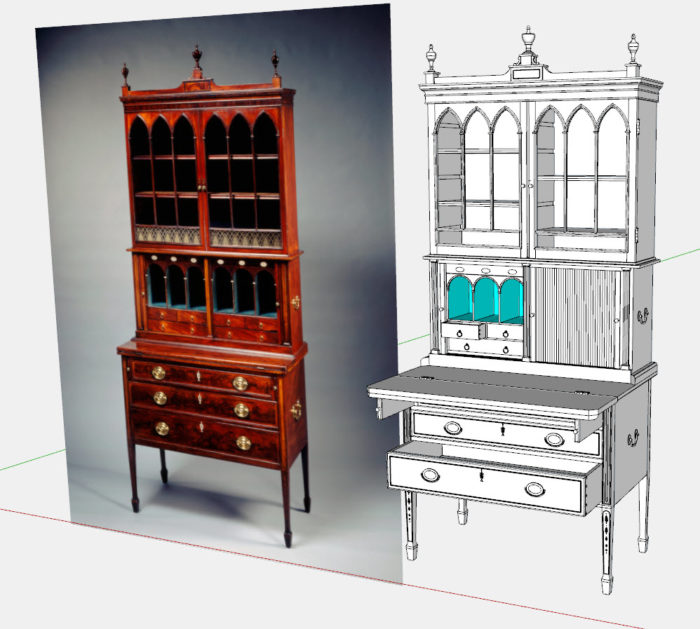
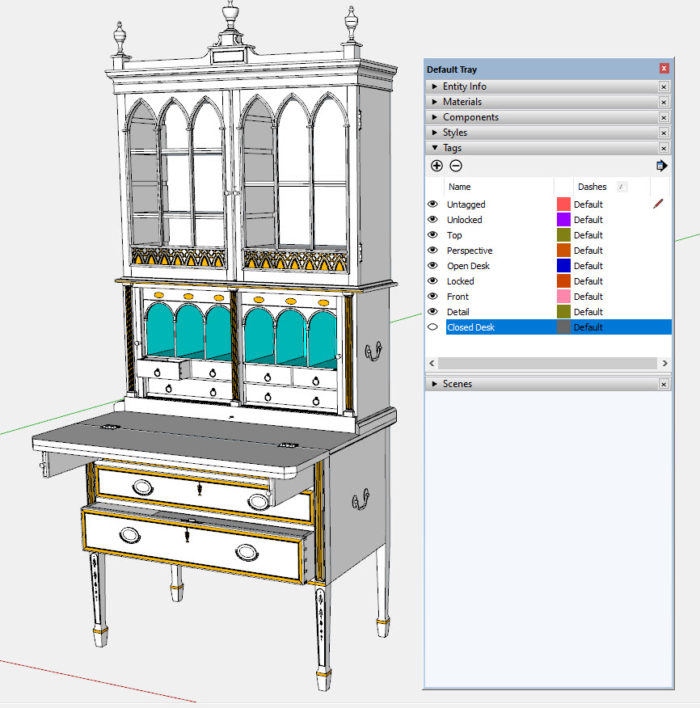
I’ve no doubt said it before – SketchUp demystifies complex joinery and construction. Through the process of building 3D models, very fuzzy, obscure features in a piece of furniture are exposed, worked out, and visually displayed. This has been notably apparent in my current work on a Seymour Secretary Bookcase. This is a large Hepplewhite-style piece built around 1800 by the master cabinetmakers in New England, John and Thomas Seymour. The original is located in the White House. Here is a photo of the original and my current SketchUp model.
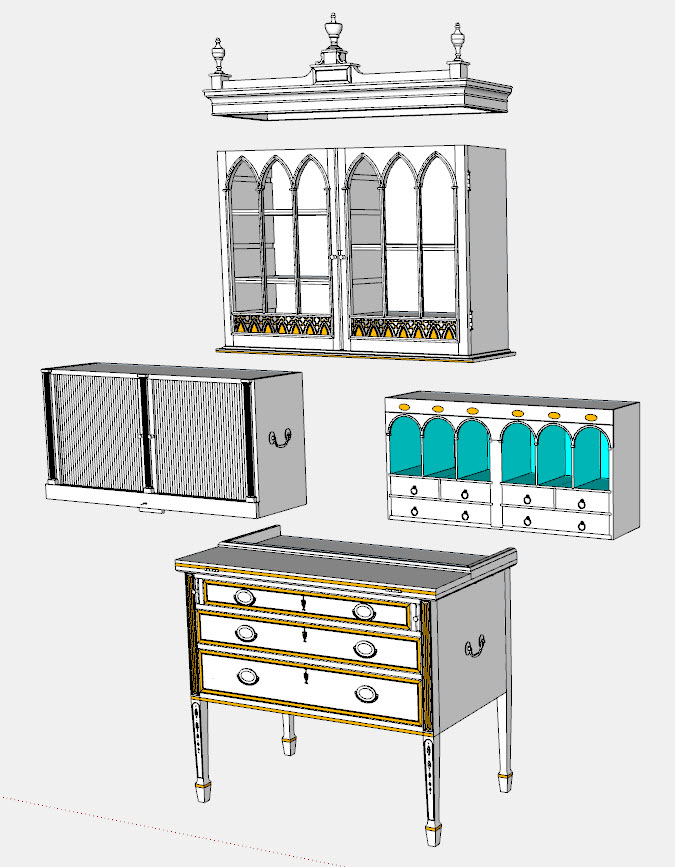
This piece is actually composed of five independent structures – a Lower Case, Tambour Inner Box, Tambour Outer Box, Bookcase, and Pediment. Here is an exploded view of these separate structures.
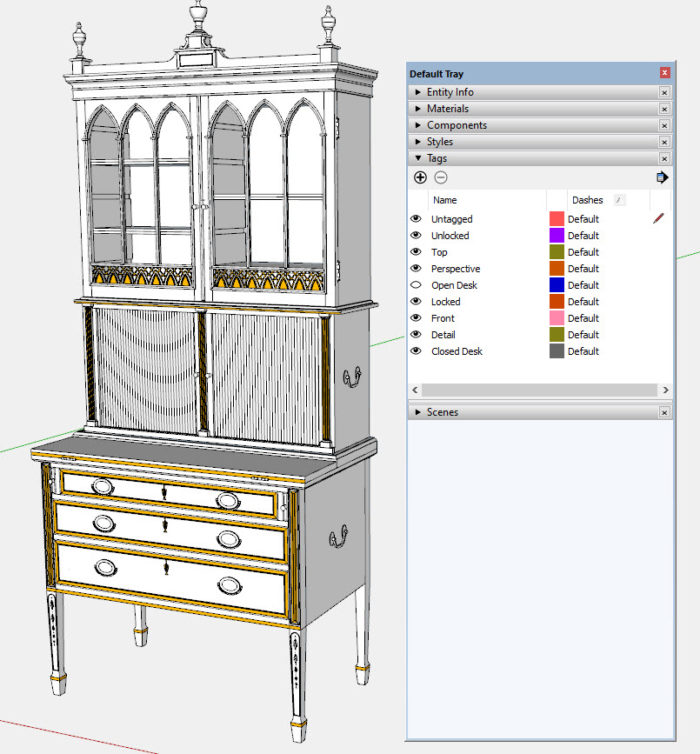
In the first overall picture of the model above, the drawers and doors are open and the writing surface is hinged open. By using Tags in SketchUp, with two mouse clicks, I can show either the open or closed position. In the Default Tray, note the two Tags, Open Desk and Closed Desk. I can turn these Tags on and off by clicking the mouse on the icons, thus creating the separate views. I show this operation in the attached video.
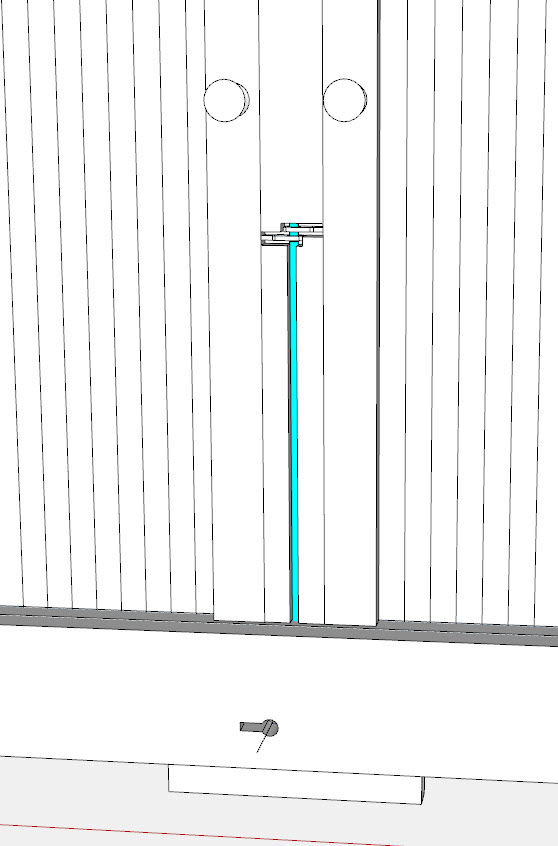
In the closed position, the unique key lock escutcheon for the Tambour Doors is hidden behind the front edge molding on the Writing Surface. In the open position, you can see the key lock escutcheon on the front face of the lower rail on the Outer Box. This locking mechanism is unique to the Seymour cabinetmakers. You only see it done on their constructions. I had no idea how this worked. Fortunately there is a very good explanation of the mechanism in the book “The Furniture Masterworks of John and Thomas Seymour” by Robert Mussey Jr. Also I saw it done on a drawing by Rob Millard on a very different Seymour piece. I can’t be sure that this is an accurate representation of the original, but I think it works as I’ve developed the design in SketchUp.
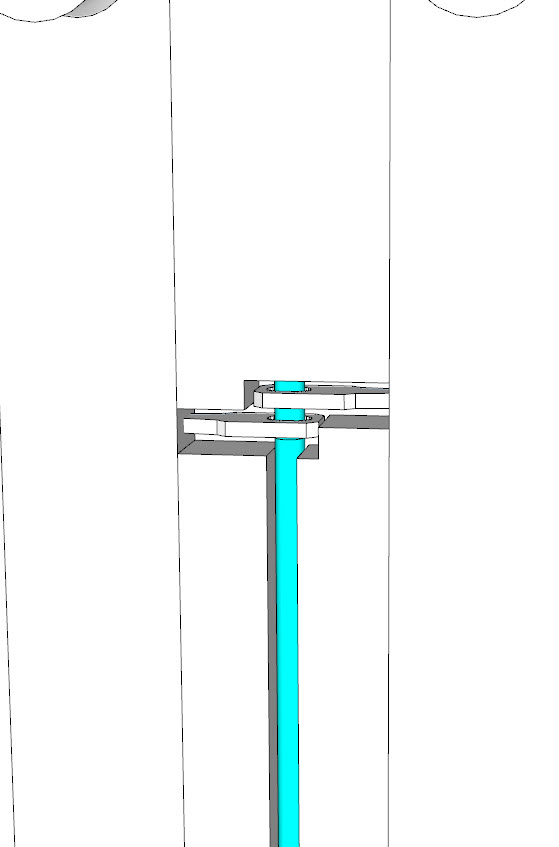
In this first picture, I’ve hidden the column to expose the post behind it, which has grooves and cutouts. The blue-green rod represents a 1/8-in.-dia. brass rod that is connected to a drawer lock located below. That brass rod protrudes through brass capture screws that connect to the tambour doors. So this is showing the “locked” position. There is a zoomed-in view to the right.
And here is an X-ray view showing the drawer lock located on the Register Block that drops into a socket in the top of the Lower Case to hold the Tambour assembly in place.
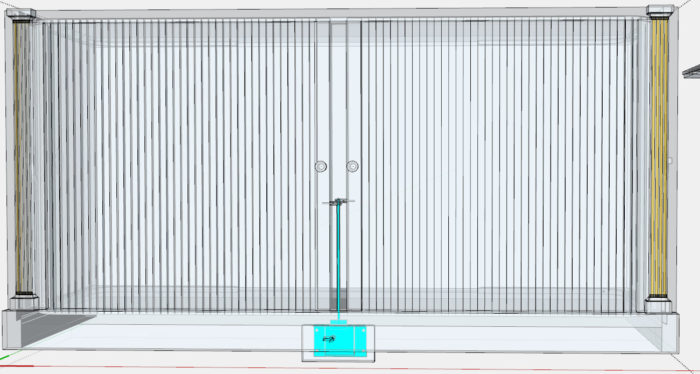
As done with the Open/Closed Desk using Tags, I created Locked and Unlocked Tags to show the positions of the Rod in both positions, ensuring a proper connection with the brass Tambour Capture Screws.
These are the kinds of mysteries that SketchUp illuminates for me. I can go to the shop and have confidence in the construction.
Here is the video.
Tim
KillenWOOD
Fine Woodworking Recommended Products
Circle Guide

Drafting Tools

Sketchup Class





Log in or create an account to post a comment.
Sign up Log in