Curved molding by hand
There's a whole world of carving that fits within the skills of a cabinetmaker.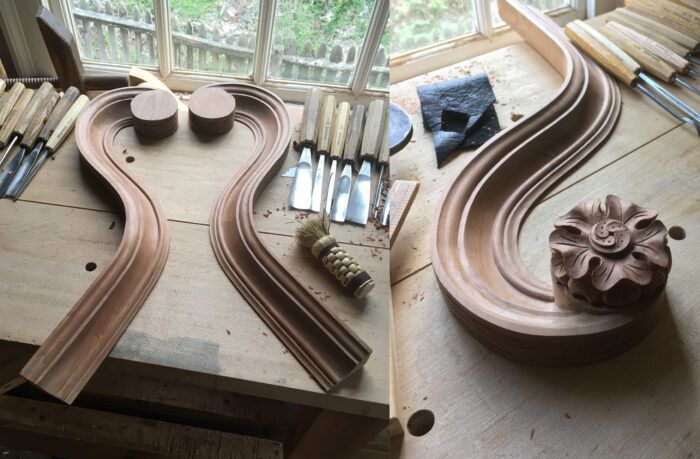
Carving and cabinetmaking are separate trades and have been for centuries. While this hasn’t stopped many woodworkers from crossing over – often with great success – it has probably scared off more than a few from trying something new. I know plenty of cabinetmakers who retreat at the thought of carving and this is unfortunate. Intricate tangles of leaves, scrolls, and shells are certainly intimidating, but there is a whole world of carving, less ornate and more prevalent in furniture work, that fits right in among the skills of a cabinetmaker. I’m thinking of things like cabriole legs, decorative raised panels, and curved moldings (large and small). With a small assortment of gouges and a few basic principles, these sculptural furniture features are within easy reach of any cabinetmaker. Below, I detail the process I followed for reproducing the large, curved cornice molding for this high chest of drawers in the Colonial Williamsburg collection (learn more about the original here – CWF 1973-325). This general approach works well on molding as large as this and on simple curved moldings like rounding the corner of a molded tabletop.
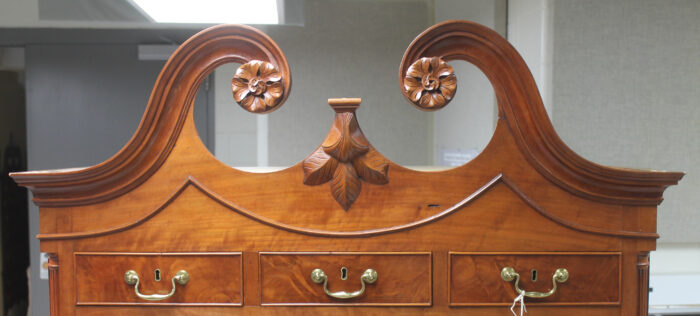
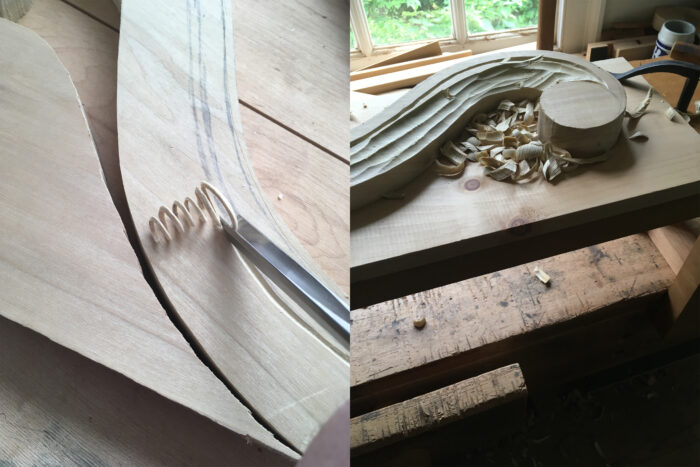
A couple of quick notes: The process photos show work on a poplar sample as well as on the actual cherry molding – different woods, same process. When I refer to gouge sweeps, I am using the Continental numbering system as opposed to the English (most of my gouges are Pfeil).
Step 1: Saw out the overall curve and fair it. Try nesting parts together to minimize waste and maximize grain and color matching. Make sure to save your offcuts; they’ll be needed later.
Step 2: Draw or transfer your pattern onto the end of the stock. This will be your guide. Since this molding terminates with a raised area to hold the rosette, you’ll be able to mark the pattern on one end. Try not to worry about the lack of information on the other end. Remember, that end only has to look good, it does not have to miter into anything else. Elements tend to fluctuate in size and shape on 18th-century moldings, so there is no need for measured perfection. If it looks good, it’s good.
Step 3: You’ll need to create a guide for maintaining consistency in the depth of each element – how far down each is placed from the face of the blank. With traditional runs of straight moldings, this can be done by creating a series of rabbets as illustrated here at A. The rabbets do a lot: they set depth and lateral placement, and guide tools. With a curved molding, I take a similar approach, but making the rabbets is a bit more complex so I opt for fewer. The illustration at B shows the three large rabbets I’ll create.

Step 4: I pencil in the curve for the topmost rabbet. This is the upper edge of the fillet (flat section) that separates the ogee from the large cove. Next, I start to define this area with a V-tool.
Step 5: With a large gouge (I recommend a No. 7 or 8 sweep) I start hogging away as much wood as quickly as I can. This is aggressive, mallet-driven work. As needed, deepen and fair your V-tool cut – first with the V-tool itself and then, as you get deeper, with a shallow gouge (like a No. 2) turned on its side. Judge the flow of the vertical wall you’re creating against the top, outer edge of the molding. Your eye can detect where it needs to be adjusted. During this hogging-off stage, work to remove as much wood as possible, creating a large, beveled surface that matches the overall angle of the finished molding.
Step 6: As you get close to the finished depth of this first rabbet/fillet, slow down and take great care not to go below grade. There is no need to measure your depth. When you find yourself wanting a ruler, grab your router plane instead. Place the offcuts you had set aside earlier in front of your molding and allow them and the top edge of the molding to support your router plane. With this reference surface in place, use the router to bring the fillet a couple of shavings shy of its final depth (the profile drawn at one end will tell what that is). Leaving that little extra protects the surface from errant cuts during all the work that remains. The router will create a smooth surface of a consistent depth, hence no need for measuring. If you use a router with an L-shaped blade, take great care to not undercut the ogee above the fillet. The picture here shows the router in use further along in the process, but you get the idea.
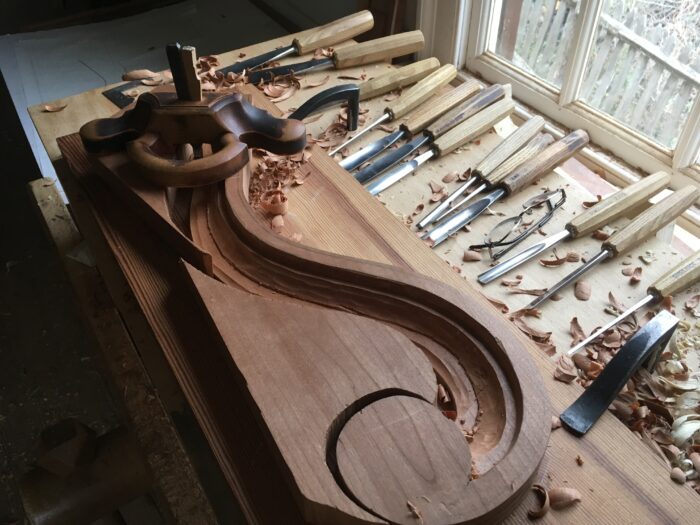
These same three steps (V-tool, hogging out, and router planing) are used to create the remaining rabbets: one that defines the top of the bead and the other that becomes the bottommost fillet separating the bead and cove.
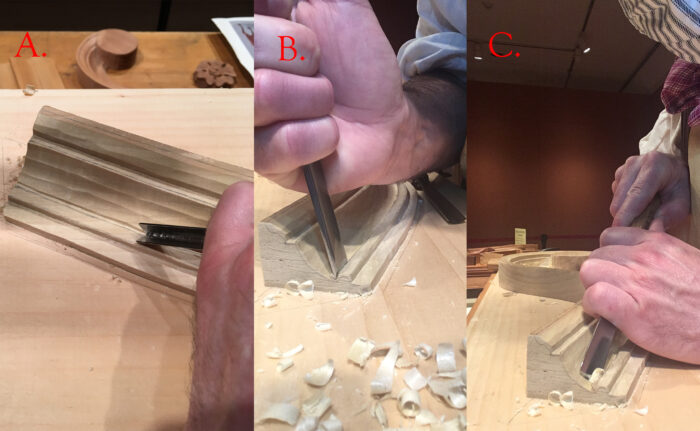
Step 7: Separating the large cove from the bead is the most challenging part of this process. Call on the V-tool to make the initial separation between the bead and cove (A). The V cuts relieve some stress on the bead as you begin to sink the cove below the top of the bead using appropriate gouges (generally No. 5s and 7s). As you get deeper, trade the V-tool out for shallow gouges that be used vertically to refine the bead’s inner edge and cleanly separate it from the cove (B). Alternate between working the lower end of the cove (C) and the edge of the bead. As you work the cove along its curving path, it is very easy to catch the grain of the bead and splinter off wood you want to keep, so proceed with great caution.
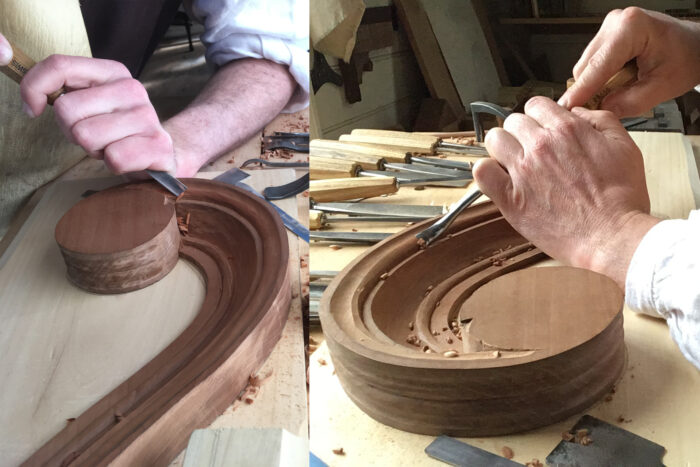
Step 8: Now comes the fun part. The rabbets/fillets clearly define the major elements of the molding. Use them to guide your hand and eye as you create the finished profiles. Bevel off the upper ogee and the lower cove to remove as much wood as quickly as possible. Next, use gouges with the appropriate sweeps (likely No. 7s) to create your lower cove and the cove on the ogee. To begin make a short gouge cut, about an inch or two long. Use that cut to guide your gouge forward a little further and so on. Imagine you are stretching your line a little further with each stroke. Begin with controlled mallet blows and finish with hand pressure to make your cove as smooth and flowing as possible. Work the large cove in this same way. This is a great exercise in following grain.

Step 9: The convex section of the ogee and the bead are next. It’s tempting to carve these with the gouge held bevel up; you can take advantage of its shape this way. Unfortunately, this approach will only get you so far before the tool starts diving down into the wood. Instead, I prefer to use a shallow gouge like a No. 2 to round things over by creating a series of facets. Once I’m close, I’ll grab a back-bent gouge to blend the facets. I find this is a little faster than starting off with the back-bent. Choose a back-bent gouge with a profile that’s a bit flatter than the shape you’re trying to create – I’ve found that one back-bent gouge will handle 95% of furniture work.
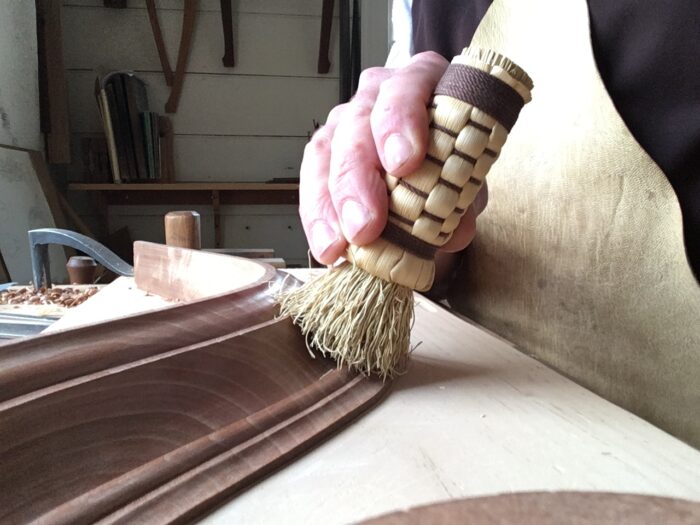
Step 10: A little patience and care coupled with sharp tools will get you a pretty good surface right off of the gouges, but some cleanup will be necessary. Looking carefully at the original and feeling its surfaces, I could tell that they did not make one large scraper that matched the overall contour of the molding. Some folks love that approach, but I prefer to carve and then use a few generic concave and convex scrapers to blend everything together. Finally, I lightly sand and then burnish the surface with a polissoir (here a simple bundle of broom straw).
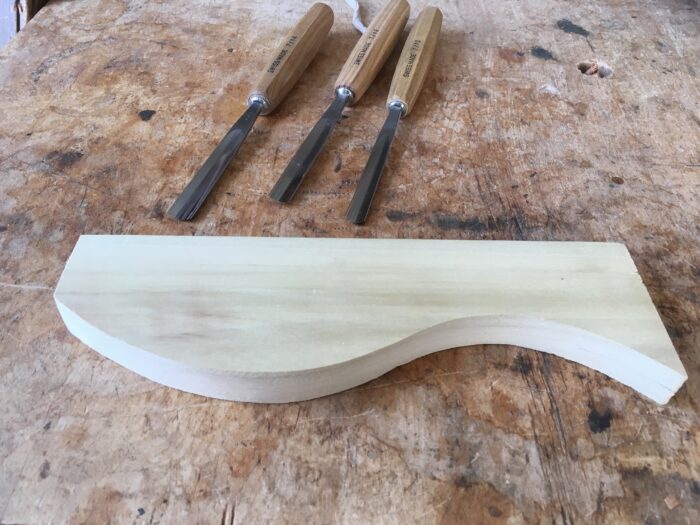
With basic cabinetmaking tools and just a few gouges (a half dozen at most) you can create an iconic molding profile to adorn your next big case piece. The abstract principles pertain to any curved molding: establish key depths (the fillets in this case) and then use your eye and tool shapes to guide you the rest of the way. If this large cornice seems too daunting, try a few exercises first. Saw out a shallow S-shaped profile in some scrap as pictured. Grab a No. 7 gouge and carve a nice consistent cove along this curve. Mark how far into the face and how far down the edge you want the cove to go. In a few minutes, you’ll realize that trusting your hands and eye is the easy part. The hard part? That’s in dealing with the grain changes. Try this same exercise by rounding over the edge as described above and then try an ogee. Sure, a router and a few bits can do this, but its limitations are far greater than yours.
– Curved Moldings on the Router Table by W. Mickey Callahan
– Custom Scrapers for Custom Work by Garrett Hack
– Simple Tools Can Reproduce Most Moldings by Robert S. Judd
Fine Woodworking Recommended Products

Bahco 6-Inch Card Scraper

Olfa Knife
Veritas Wheel Marking Gauge



Comments
Thanks Bill that was fascinating! This would be a great demo at the Williamsburg woodworking conference, or even better on youtube so it could be referenced down the road.
Finally, I would find it very interesting if you commented on the proportions of the molding elements, both to themselves and also to the finished piece. (eyeballed it? or were the a set of proportions laid out based on Greek diameters similar to architecture?) Or was it simply measured and copied off the original? thanks again for the great post
"A little patience and care coupled with sharp tools will get you a pretty good surface right off of the gouges, but some cleanup will be necessary."
I'll add: if your tools aren't sharp, then get sharpening! Very difficult (impossible??) to do this without very sharp tools.
Log in or create an account to post a comment.
Sign up Log in