Cool project: Wood in nearly three dimensions
Inspired by the Penrose Triangle, woodworker T. Ross Kelly creates 2d versions of a seemingly 3d drawing.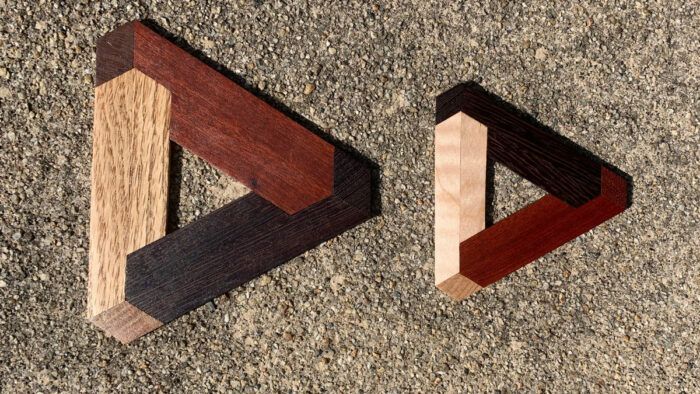
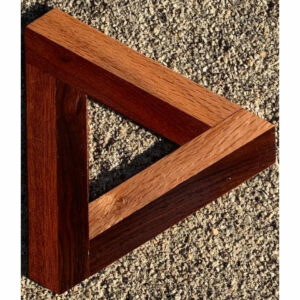
Optical illusions and their first cousins, impossible objects, have beguiled humanity for millennia. Twenty five hundred years ago, Aristotle and other ancient Greeks debated the nature of optical illusions. More recently, Oscar Reutersvärd introduced what has come to be known as the Penrose Triangle (Figure 1). This intriguing creation can be depicted as in the perspective drawing shown, but it cannot exist as a solid three-dimensional object, even though two-dimensional versions in wood exist (see Figure 2, for example). The impossible Penrose design is featured prominently in the works of artist M. C. Escher, of which “Waterfall” (Figure 3) is one example.
 |
 |
 |
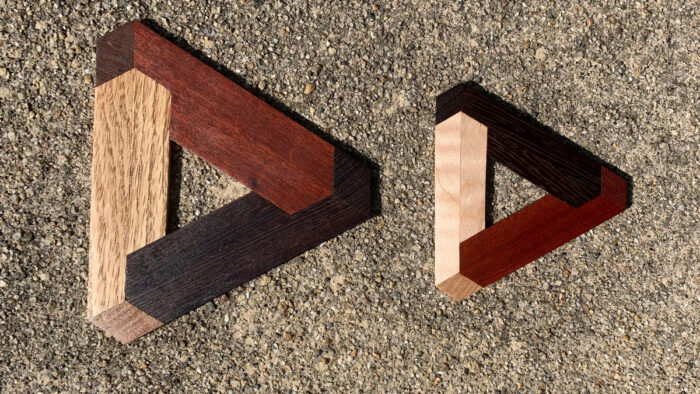
I recently made two versions of what I believe is a previously unknown variation of the Penrose Triangle that is simultaneously an intriguing puzzlement and an unusual woodworking project. To my eye, the new version seems considerably more three-dimensional than standard (Figure 2) examples. Although construction of this new object appears relatively challenging, its achievement is actually easier than it would seem.
Construction details

All pieces were cut from 1/8-in.-thick stock. For the example on the right of Figure 4, the stock was ripped into 11mm-wide strips on a small tablesaw (for the example on the left the strip was 17mm wide). The strips were then cut into individual horizontal lengths (longest side) of 7.0 and 5.7 cm (10.1 and 8.0 cm for the example on the left) using a small miter/chop saw set at an exactly 30° angle. Apart from the three diamond-shaped corners, the six other pieces come in only the two lengths given because of the threefold symmetry of the design. The diamond-shaped pieces of end grain begin as 1/8-in. slices off the ends of boards or turning stock. The slices of end grain are then cut into 11mm (or 17mm) wide strips, one end of which is mitered to exactly 30°. To avoid dangerous proximity of fingers and sawblade, the diamond-shaped pieces were trimmed to final dimension only after they had been glued in place.
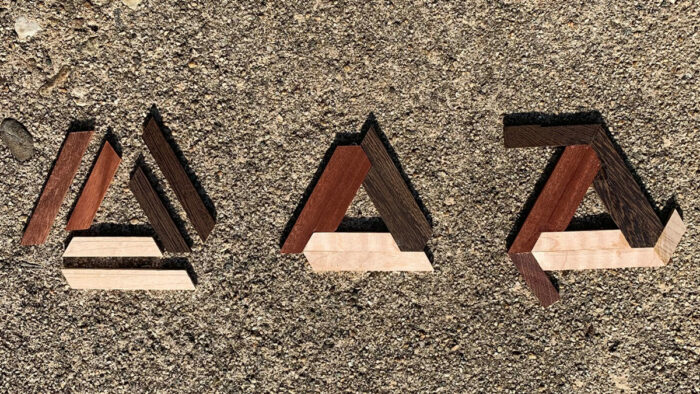
Since slight misalignments seriously detract from the overall impression of the piece, a vertical belt sander was used to achieve perfect angles, dimensions, and fit. Sanding and finishing (Minwax Clear Semi-Gloss Fast-Drying Polyurethane was used in the examples pictured) complete the project.
The author. T. Ross Kelly is a retired (Emeritus) Professor of Organic Chemistry at Boston College. Woodworking has been one of his hobbies for many years. He received the Teacher of the Year Award in 2004 and more than 1,000 of his students have gone on to become physicians. With the collaboration of two undergraduates (now physicians) he created the website “A Scientist’s Curiosity Cabinet (https://sites.google.com/a/bc.edu/curiosity-cabinet), which has attracted >110,000 page views. Kelly has published more than 100 research articles in chemistry, with his main interest being the construction of molecules. He thanks Scot Morris for helpful discussions.
Fine Woodworking Recommended Products

Suizan Japanese Pull Saw


Comments
Nice project. I think it might be ideally suited to cutting the parts on a laser. Perhaps that takes the "woodworking" out of the woodworking project, but it might still be fun.
An alternative, for the hand tool woodworker, would be to use a shooting board and plane to trim all of the parts to size and fit.
I worked at Stars Guitars in San Francisco, CA. as the Guitar Doctor. I was there from January 1977 to June 1980. Our "Logo" was the M. C. Escher Star in red, with permission from his estate, of course. Yes, I made "House Calls" to concerts and recording studios. We were not only warranty repair for Fender, Gibson, Rickenbacker, Guild and so many more, we also made aftermarket brass bridges, nuts, sustain blocks, electronics and so much more.
Log in or create an account to post a comment.
Sign up Log in