Build a Shaker chest of drawers
Years of experience mending antiques led to the methods Tom McLaughlin used on this Shaker chest of drawers to ensure that it will live to be an antique someday, too.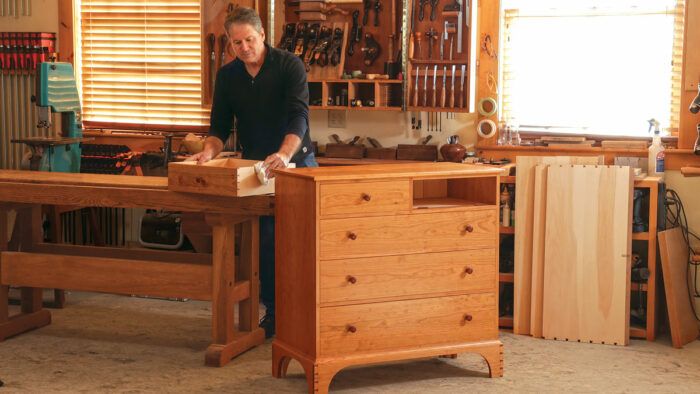
Synopsis: Years of experience mending antiques led to the methods Tom McLaughlin used on this Shaker chest of drawers to ensure that it will live to be an antique someday, too. While the traditional method of using secondary woods such as white pine or poplar is a time-tested method of construction, McLaughlin adds strength to his drawers using hard maple runners and laminating a strip of hardwood to the bottom edges of the drawer sides. This keeps the secondary wood from wearing in these well-used areas.
Building a dresser, or chest of drawers, is immensely satisfying. A dresser is practical, central to everyday living, and quietly anchors a bedroom’s decor. And if made well, it can be passed down and enjoyed for generations. When choosing a design that will endure, it’s hard to beat Shaker style. Esteemed for its minimalist simplicity and clean lines, Shaker furniture is right at home in both traditional and contemporary settings. The design of this specific dresser draws from my explorations of nearby Canterbury Shaker Village; the notebook of my mentor, P.A.”Pug” Moore; and an original Shaker dresser made in Harvard, Mass., in 1844.
The design may be historical, but my construction methods are almost entirely contemporary, including repeatable joinery using the tablesaw and router. And some of the dresser’s construction comes from observations made while studying and repairing antiques.
Master Class with Tom McLaughlin
Follow along with Tom McLaughlin while he builds a
Shaker-style dresser in this eight-part video series.
Mindful stock selection
When milling the parts for your dresser, consider how they will be used. For example, having chosen cherry for the primary show wood in this dresser, I selected the widest boards when gluing up the panels for the case sides and top, for the least number of glue joints and a cleaner look. To spare my good cherry, save money, and reduce weight, I took a different route for the subtop and bottom. The bottom panel will never be seen, so that’s entirely white pine. The subtop is also white pine, but it gets a narrow strip of cherry glued to its front, since that edge will be exposed in the final case. The rear dividers, back boards, and dust partitions are all pine for the same reason. Poplar works well as a secondary wood, too.
This use of primary and secondary woods is common and traditional. With my drawers, though, I use a technique developed after years of seeing worn-out softwood runners and drawer sides on antiques. I future-proofed my drawers by using hard maple runners and laminating a thin strip of maple to the bottom edges of the white pine drawer sides. This gives the best of both worlds: the lightness and stability of white pine and the wear-resistance of hard maple.
Dovetailing the case and drawer dividers
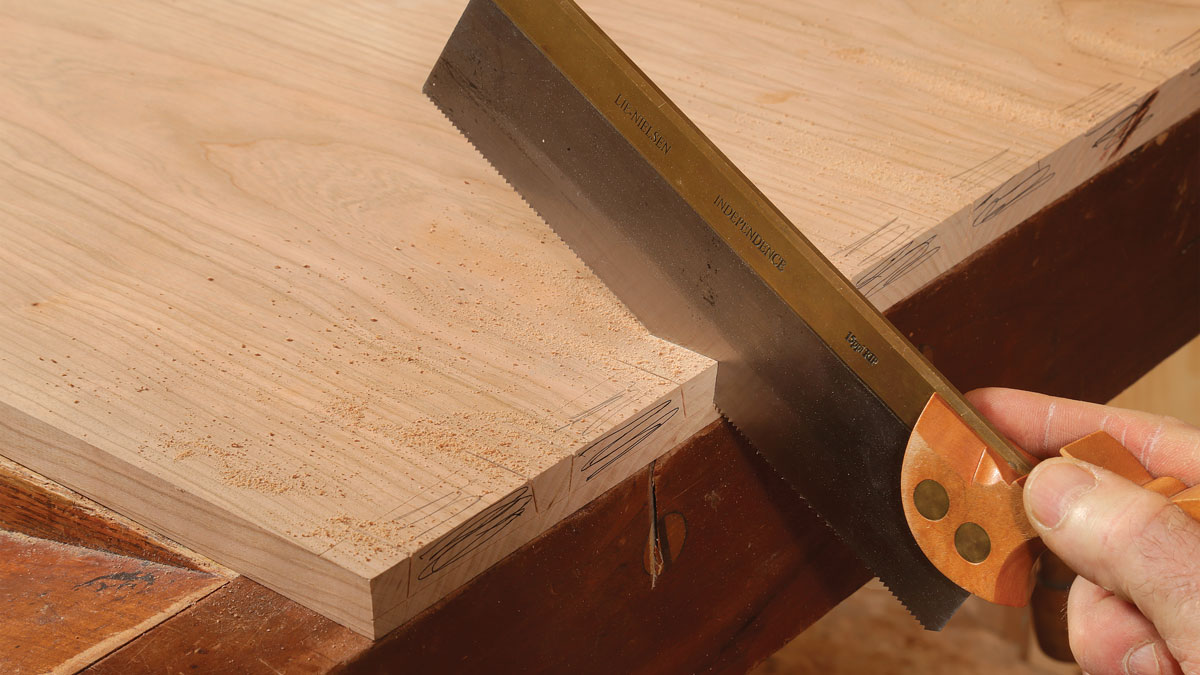
A case piece like this dresser is an intensive in dovetailing. It has three kinds: through- and half-blind for the carcase, base, and drawers, as well as sliding dovetails for the dividers.
The carcase comes first. Begin with the half-blinds. A tablesaw and drill press make relatively quick work of these. After laying out the tails on the subtop and bottom, I cut the tails at the tablesaw using a specially ground blade and a crosscut sled.
 From Fine Woodworking #290
To view the entire article, please click the View PDF button below.




Comments
I've watched the YouTube videos of Tom making this chest of drawers. Now, let me say that Tom and Bob Van Dyke, IMHO, may be some of the finest furniture builder still making saw dust today. But they're not above even my ignorant opinion.
Heh, heh.
While Tom did his usual incredible job of building this piece, from the wood selection to the finish and the making of the drawer pulls, it's the location of those drawer pulls that I find to be a bit..."wonky".
I think the piece would have had a more even appearance if he could have lined all of them up in a vertical reference, centering the pulls on the full-length drawers with the pulls on the top two drawers.
Log in or create an account to post a comment.
Sign up Log in