Video: How to hang DIY floating shelves without special hardware
Black iron pipe is the solution. Just be prepared to patch some holes.My parents recently moved from southeastern Pennsylvania to a little below Tampa, Fla., leaving me the only Dima up north. But I can look past this abandonment because with their outdated condo comes updated renovations, including woodworking projects ranging from DIY to furniture.
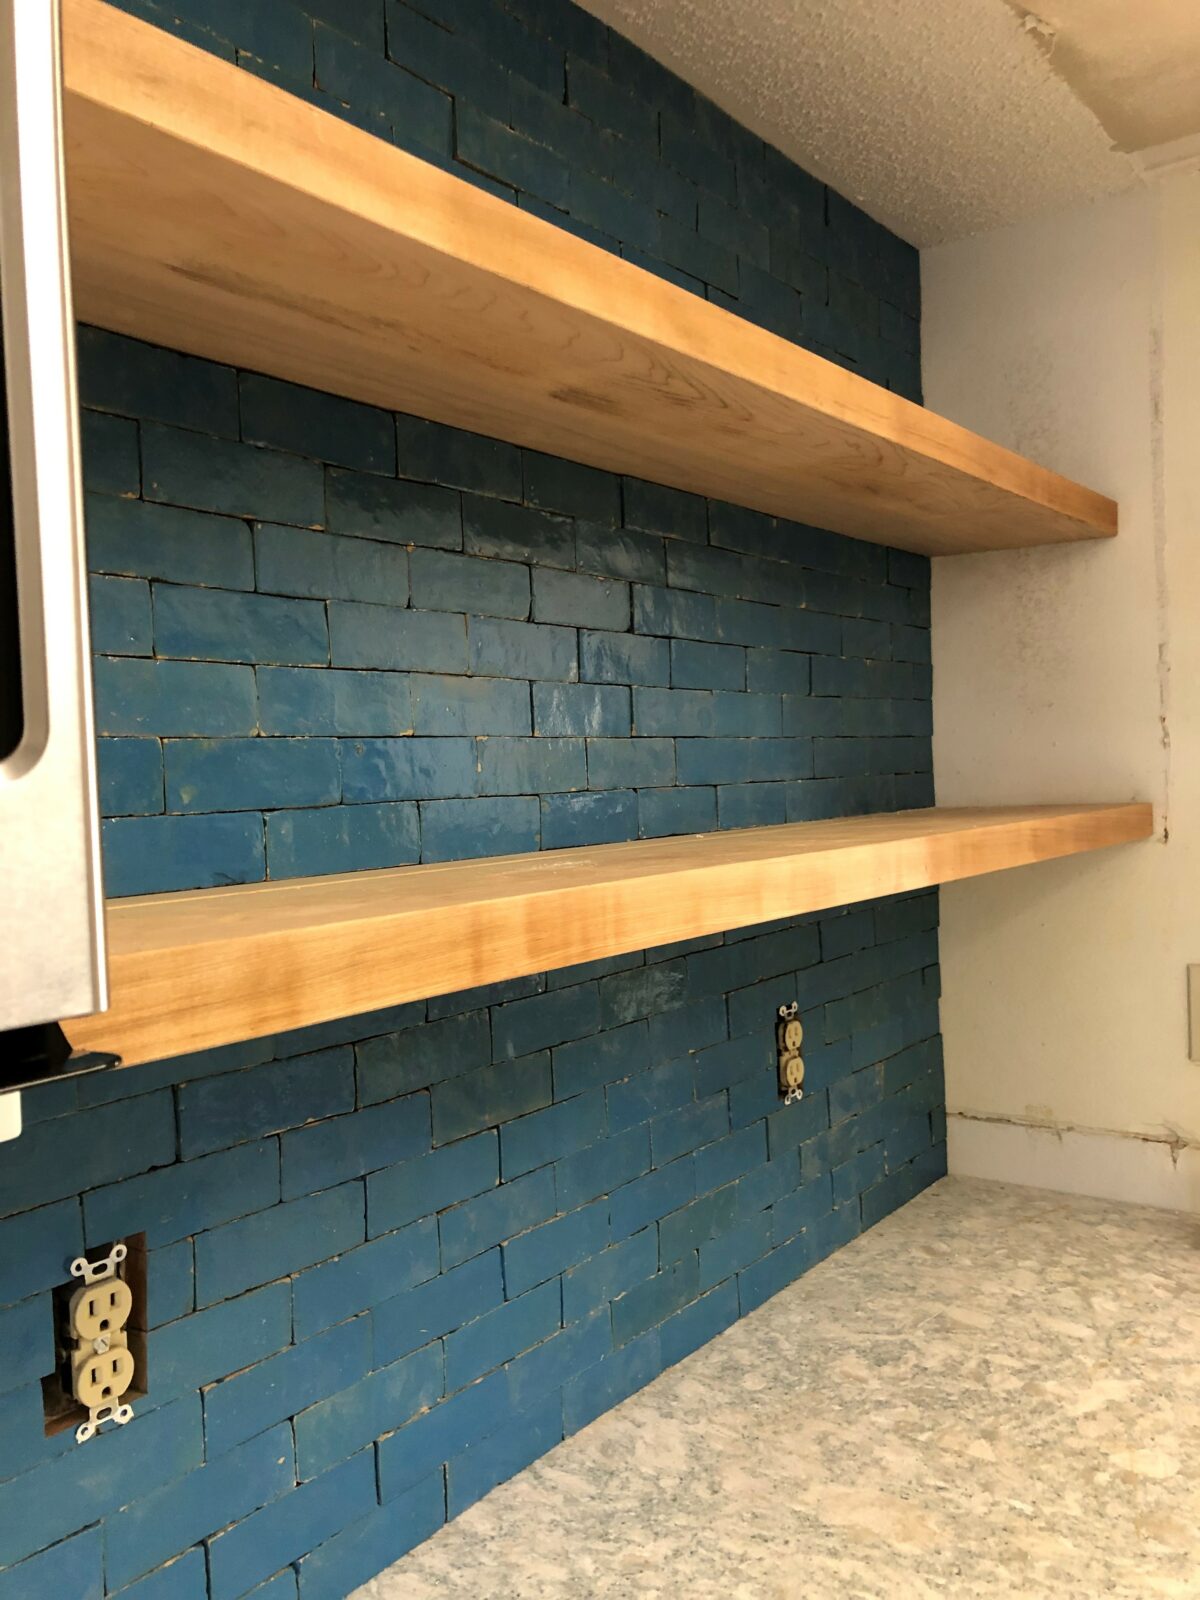
So, on my visits down I’ve been in my brother’s shop (he’s also in Florida) to tackle some of these projects. The first was a set of maple floating shelves. The timeline was tight—more of a single dot than a line—and 2021’s supply chain issues were in full effect. Plus, it was the year-end holidays, so shipping was even more backed up. Because we decided to go with 1-⅞-in.-thick solid maple instead of a veneered skeleton, like Tony O’Malley uses, we needed floating shelf hardware, but we didn’t have the time to wait for it. Fortunately, I found this how-to from DCLA Universe on YouTube. In it, they use hardware readily available at any hardware store: ½-in. black iron pipe and flanges. I’m here to report we did the same, and it worked a treat.

The black iron hardware replaces the specialty hardware designed for floating shelves. It’s as simple as that. The specialty hardware is much slimmer than the pipe, so you can recess the brackets in the shelf. Because the flanges are too big to recess in a shelf of reasonable thickness, they’re mounted directly to the stud, meaning you need to cut out the drywall. For DCLA and my mom, the walls will get tiled, and the tiler will just cover those holes. (DCLA aren’t the only ones to cut through the drywall. Here’s Kelly Concepts, who does it to avoid, he claims, the sag that comes from mounting to drywall. He then just patches the holes with putty.)
It sounds silly to even say, but how well you drill the holes will make or break your results, maybe even literally. DCLA drills them entirely by hand. I started them with a drill press and then finished by hand. Both of us used ⅞-in. bits. Both of us had to hammer the shelves home upon installation. The slop almost seemed excessive at first, but I’m glad it was there. If you go this route, I recommend following DCLA’s cue.
The only other difference between my route and DCLA’s is that I used a story stick. I marked where I wanted to drill on it and then transferred those marks to my shelves. I then popped the pipes and flanges in their holes and shoved the shelves against the wall to mark the wall. It’s up for debate whether this was better—those shelves were heavy—but because I was working off-site, it made the most sense at the time. Also, I work at Fine Woodworking, so I dig story sticks.
I’m not sure this DIY method saved any money; I’m also not sure it was any easier or any kind of hack. But, it was straightforward and let us stay on our (tight-as-a-drum) schedule. Now my mom has a spot for bowls and plates instead of literally any horizontal surface in the kitchen. It’s nice.
 |
Awesome joinery for DIY projects |
 |
Video tour and tips for a small woodworking shop |
 |
From the archive: Build a Wall Shelf |


Comments
Try using lag screws instead of pipe. Use story stick to match holes in wall with back of shelf. Predrill into studs. Cut heads off lag screws. Insert lag screw into drill and screw into hole. Use story stick to mark holes on back of shelf. Drill to depth and inset over lag screws.
Log in or create an account to post a comment.
Sign up Log in