Stress-free veneer glue-up
The next step in your veneering project—you'll need lots of clamps and some patience.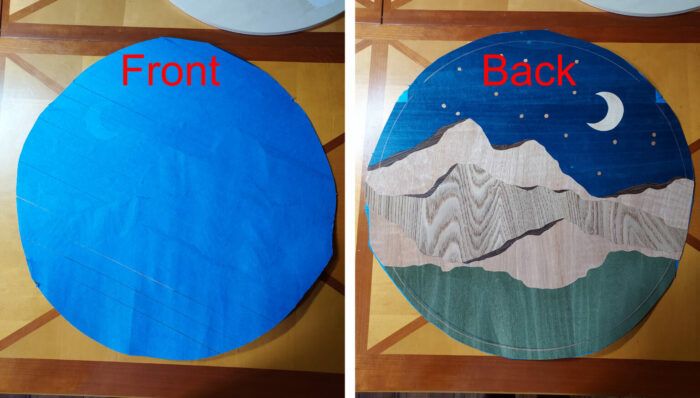
At this point in your project you are going to glue up your veneer creation! This step often feels stressful because there are a few things that can go wrong. However, there are tricks to ensure success.
The front should be covered with an even layer of tape and all the tape removed from the back.
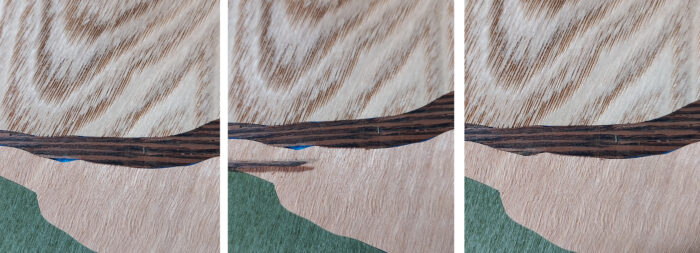
Take a good look at every inch of your project. If you find a large gap, you can fill it in with another chunk of veneer. Make sure the grain is going in the same direction.
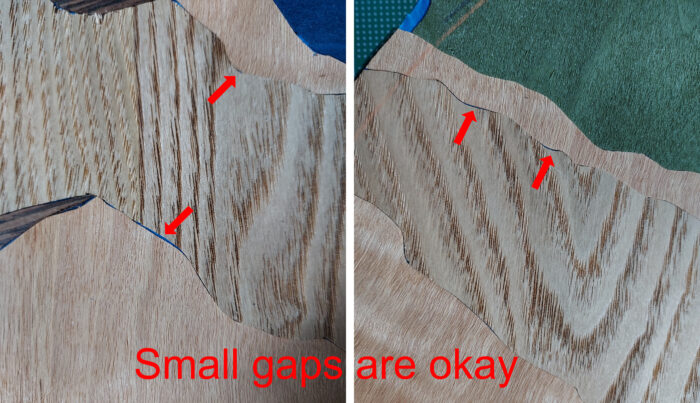
One reason I use Titebond 3 wood glue is because there is water in it and the moisture will swell the fibers. If there are slight gaps between the seams, the glue can sometimes pull those together. Also remember that if you are using contrasting colored woods, a small gap in the seam is not going to be obvious; your eye will travel over it.
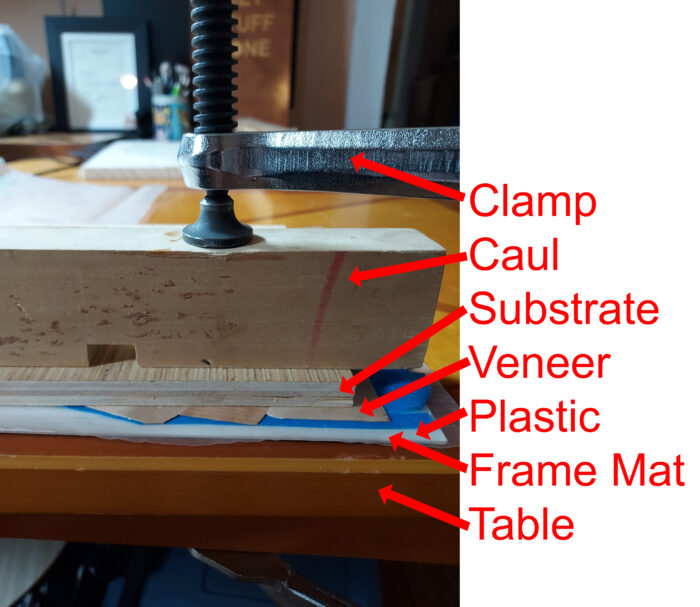
The materials you will need for the glue-up are:
Clamps
It’s impossible to use too many clamps. When in doubt, add another clamp.
Cauls
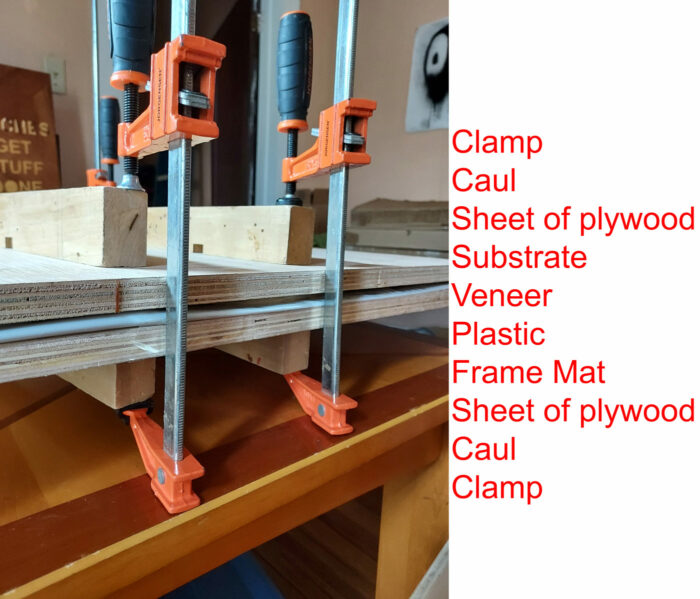
You will need cauls to evenly press down your substrate. If you just clamp the substrate without cauls, it can create dents from the clamps and it can create air pockets so the veneer will not properly glue. If your project is small, you can get away with using a thick piece of plywood as a caul. If your project is larger, you may need plywood and large solid wood cauls.
Plastic sheeting
It should be just slightly larger than your project. You can buy this at the hardware store but it will be a huge roll. If you don’t have access to a small sheet you can use a plastic bag.
Framing mat
This is is not required but highly suggested. If you don’t have the money, you can opt out. It should be slightly larger than your project. You can buy this at a frame shop or craft store. When working with commercial veneer, there is a chance that the different species of veneer can have slightly different thicknesses. When you press your project down it is important to have even pressure on every single inch. If one piece of veneer is thicker than the one next to it and it is pressed against a hard surface, then the thin veneer won’t successfully glue down. The mat has enough thickness to compress and create even pressure.
A flat surface to glue to
Back in the day I used the corner of my kitchen table but you can also use a piece of plywood or any flat surface.
ALWAYS always practice a dry glue-up first. Get your piece prepped and clamped up completely before you even open the glue. A few times I thought I could just jump right in and quickly glue up my work, however, that was a mistake. I didn’t have enough clamps on hand or my cauls were not large enough which leads to a lot of swearing, running, and sweating to get everything clamped before the glue starts to set.
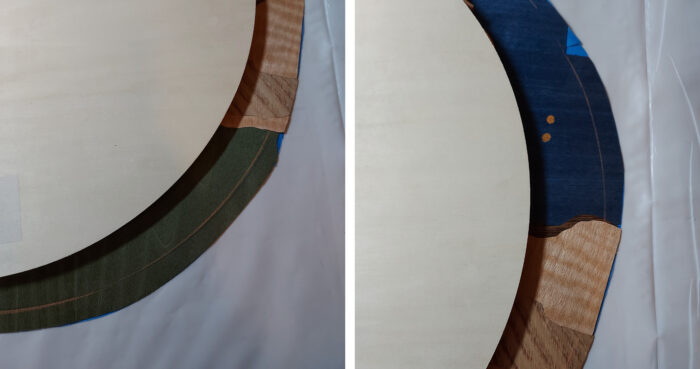
After you practice your dry glue-up, lay out exactly where you want your piece placed and trace around it.
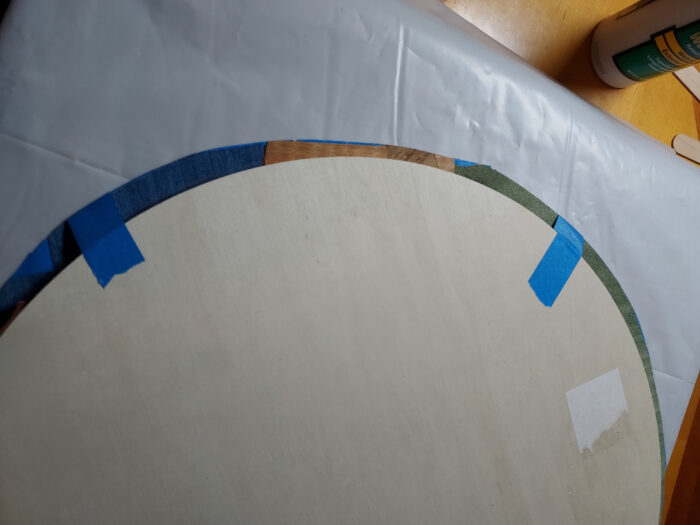
Use 4-5 pieces of tape around the edge so the substrate does not slide when clamped. Apply glue to the substrate and not the veneer because if you spread glue across your veneer seams, there is a chance fibers can be pulled out. Make sure to cover every single inch of your substrate with glue. Use a good amount of glue, but not so much that when you hold it upright it drips. The bigger the piece the more cauls and clamps you will need. I suggest starting small and getting the hang of it. Leave the piece clamped up for approximately 8 hours.
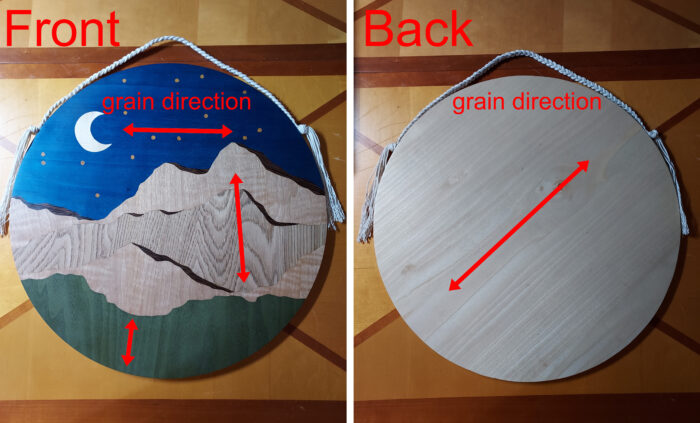
Gluing veneer to a substrate adds one layer of glue and one layer of wood to one side. Having veneer on just one side of your substrate lets in an uneven amount of air and moisture and the piece will warp. It is important to glue a piece of veneer to the back with the grain going in the opposite direction to fight the wood movement. In the above photo, my grain is going in two directions, so I split the difference and laid the grain direction in between the two.
The great thing about veneer is that there are always opportunities to fix mistakes, even after the glue-up! In my next blog I will talk about how to correct potential issues and how to sand your veneer art.
More in this series
 |
Getting started with veneer |
 |
Affordable tools and materials for veneering |
 |
Veneer through a lens of affordability and fun |
Fine Woodworking Recommended Products
Whiteside 9500 Solid Brass Router Inlay Router Bit Set

Bahco 6-Inch Card Scraper





Log in or create an account to post a comment.
Sign up Log in