Amana Church Bench
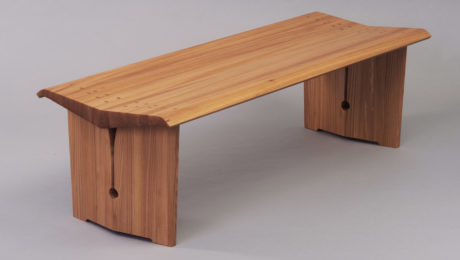
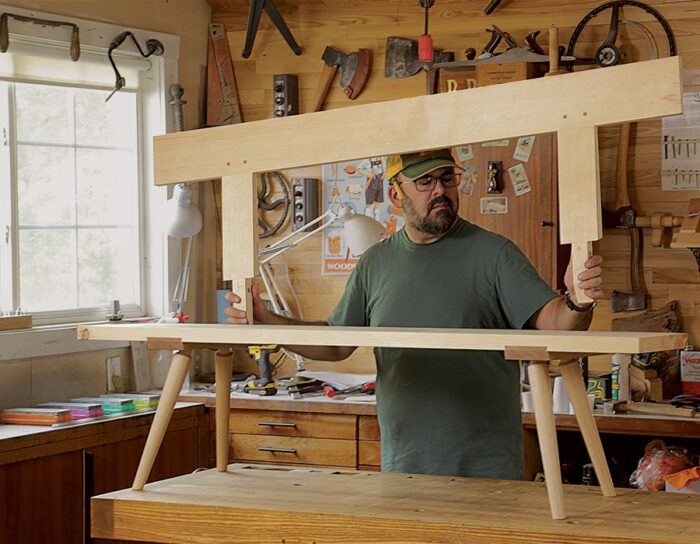
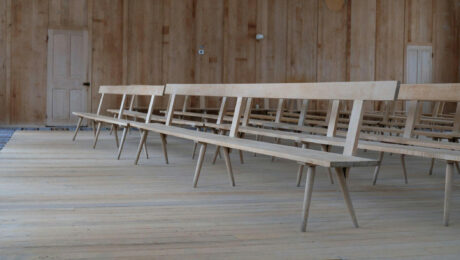
With a long and storied history going back to the early 1800s in Iowa's Amana colonies, this bench is built to survive being broken down and transported, and used every week by church members.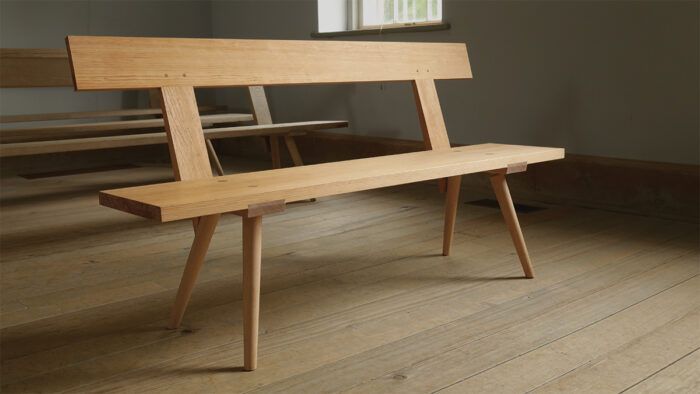
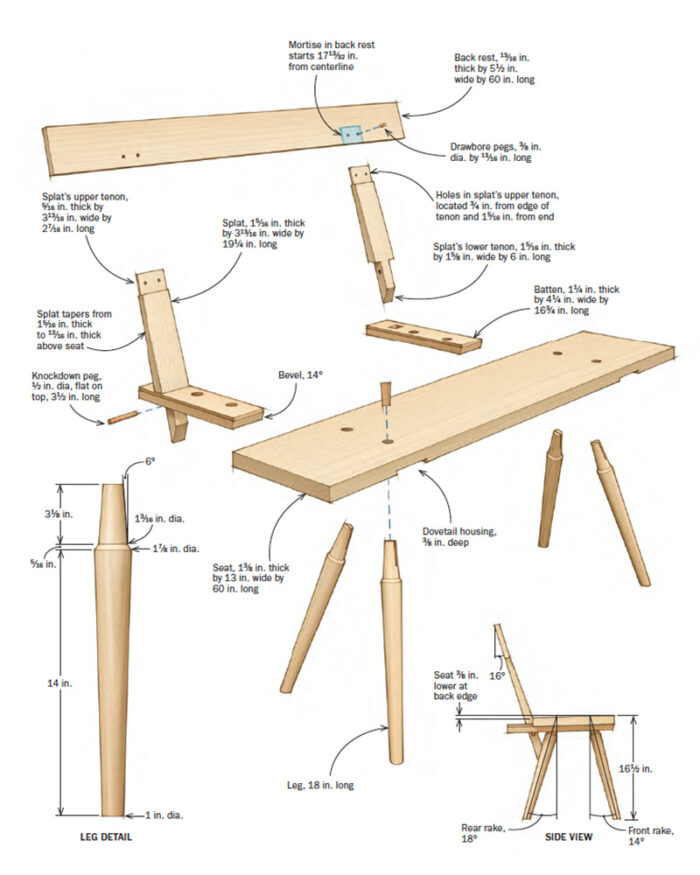
Synopsis: With a long and storied history going back to the early 1800s in Iowa’s Amana colonies, this bench is built to survive being broken down and transported, and used every week by church members. Yet despite its utilitarian past, it has a pretty exciting design. The legs use staked joinery to attach to the seat and battens, which are joined with sliding dovetails. The seat and splat are linked with a knockdown joint, with an angled tenon. And the back rest connects to the splat with drawbore pegs.
The moment I first saw one of these benches in a church in Iowa’s Amana colonies, I wanted to build one. After researching the benches’ history with Amana historian Peter Hoenle, I discovered that the original benches were made in Ebenezer (now West Seneca), N.Y., in the early 1800s for the churches of the Community of True Inspiration, a communal society that still exists. The benches, with their removable backs, were transported from New York to Iowa in 1846 when the entire community relocated to near Iowa City. The majority of the benches, some upwards of 22 ft. long, are still used each week by members of the church. I scaled down the bench to 5 ft. to better fit in a typical home. I also used hickory for the legs and battens and pine for the rest.
For a seemingly spartan design, the joinery is pretty exciting—and it’s all visible. The legs use staked joinery to attach to the seat and battens, which themselves are joined via sliding dovetails. The seat and splat are linked with a knockdown joint, whose angled tenon requires special care. A tapered wedge locks the joint. To top it all off, the back rest connects to the splats with drawbore pegs. It sounds like a lot, but it’s worth it; the originals have been going strong for nearly 200 years.
A few parts, joined well
Benches with this design have lasted nearly 200 years thanks to tapered, staked joinery, sliding dovetails, and well-considered mortise-and-tenons.
Battens with sliding dovetails
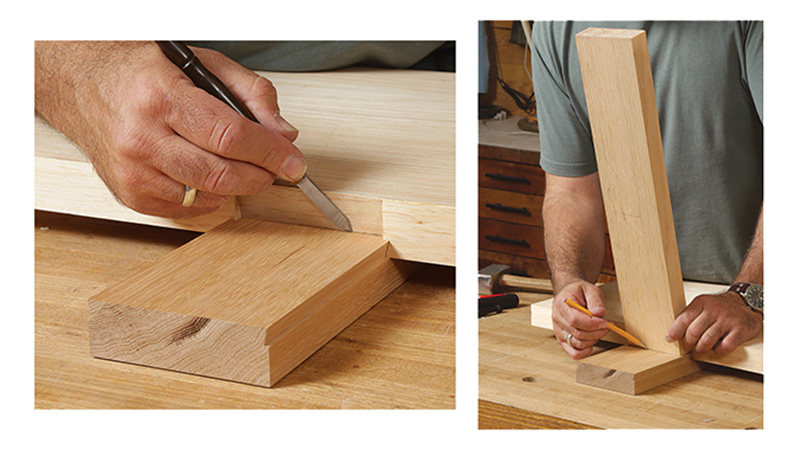
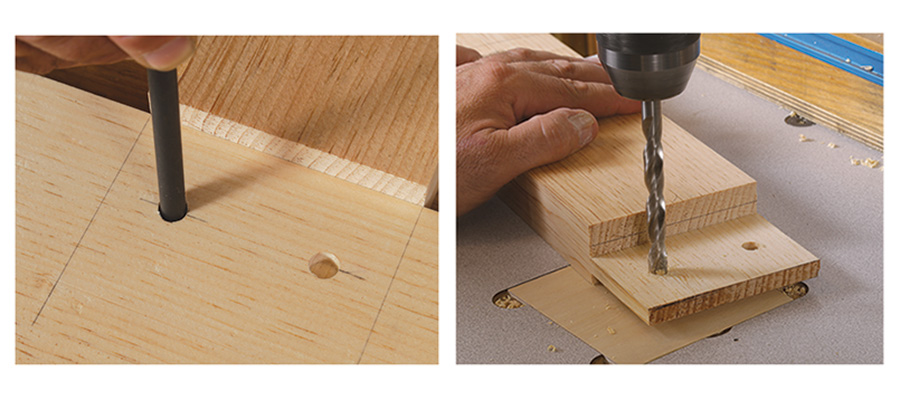
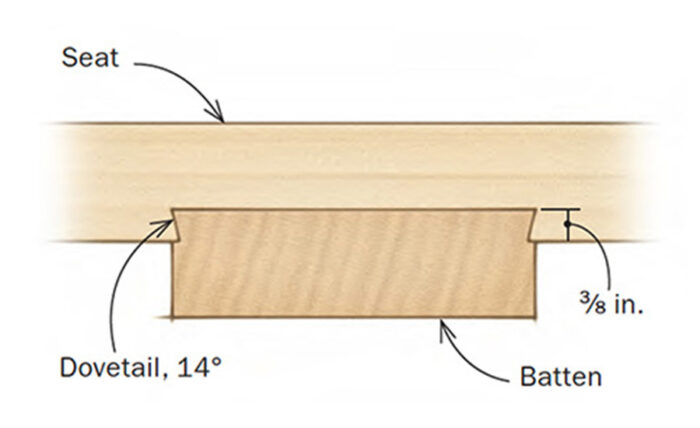
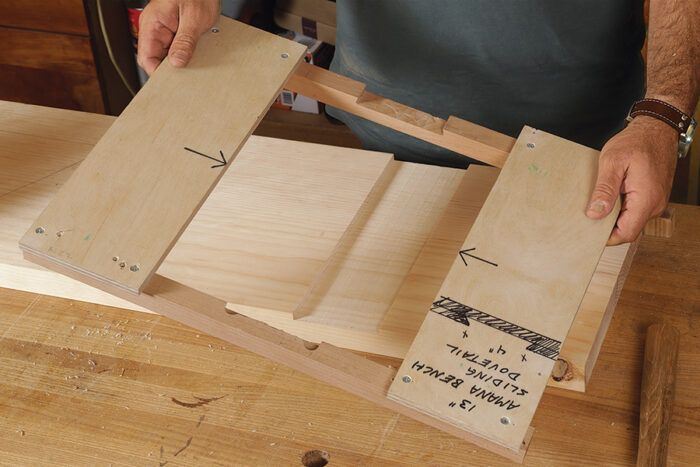
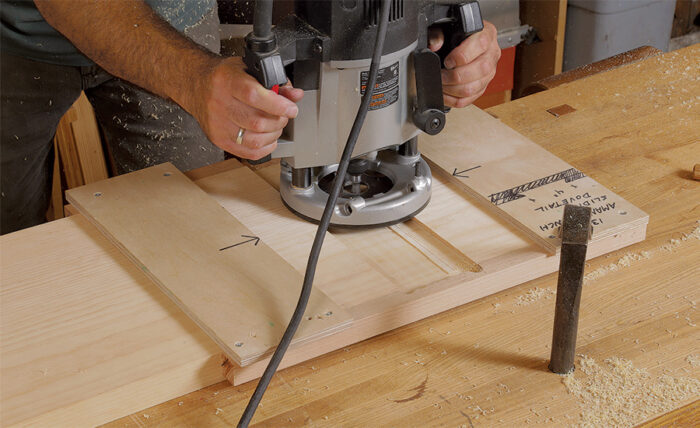
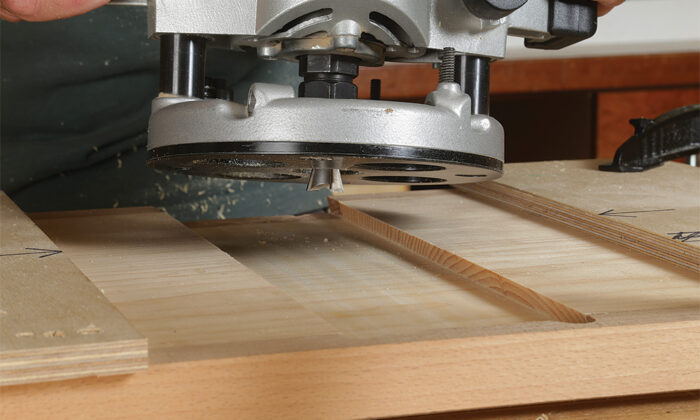
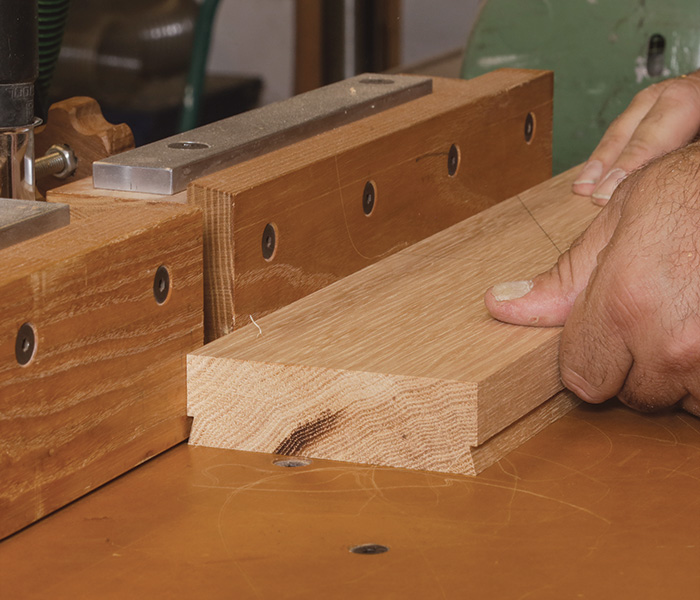
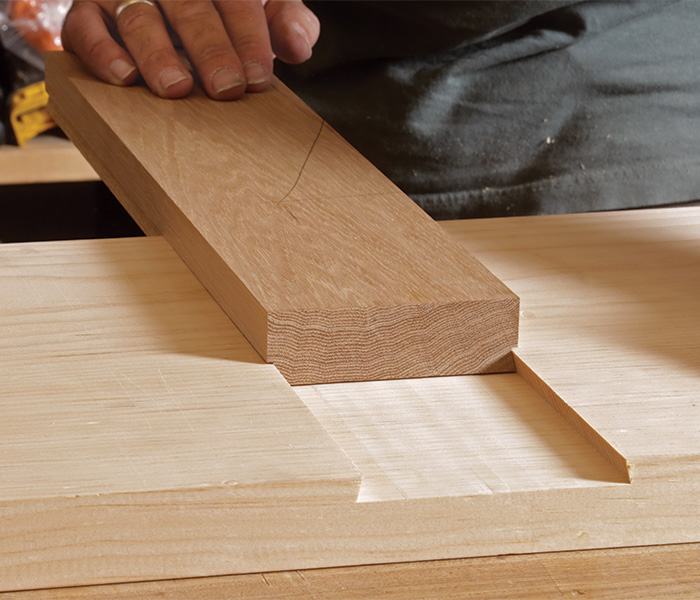
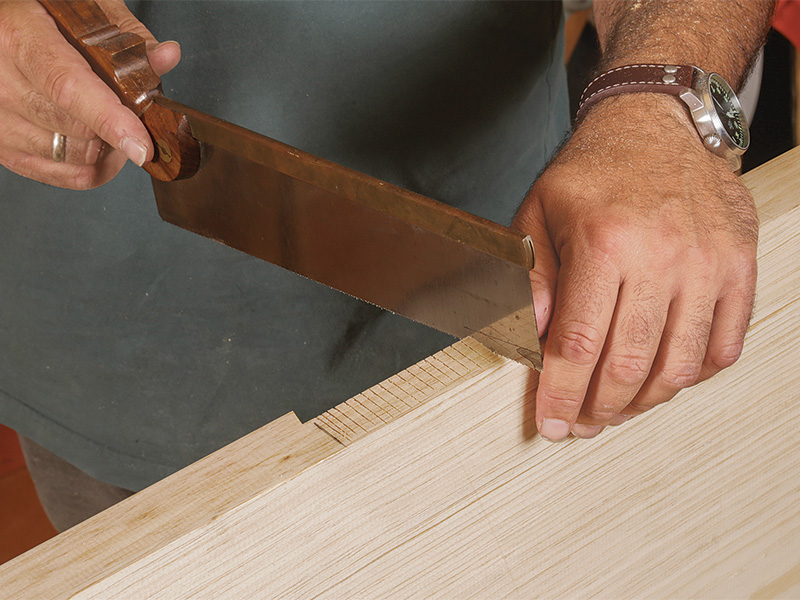
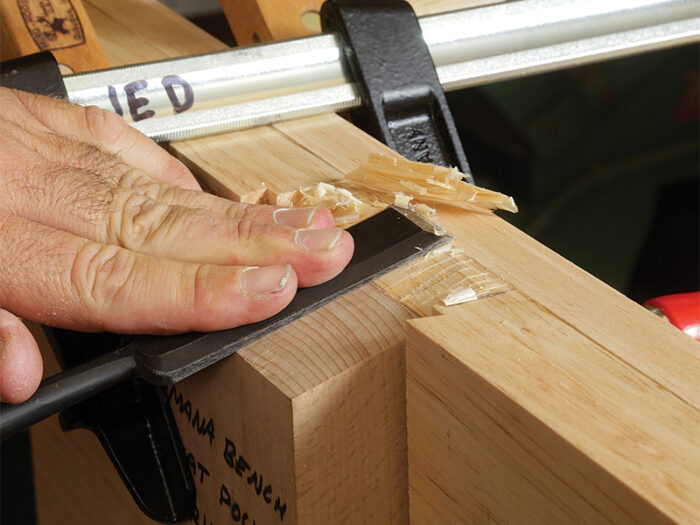
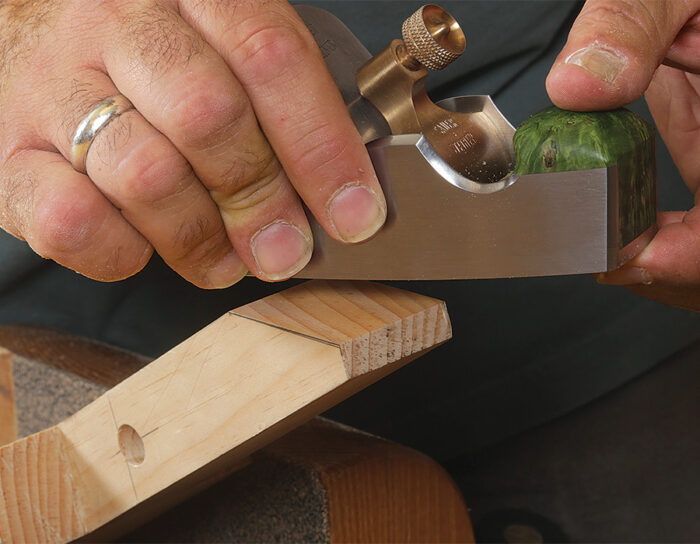
Done right, the sliding dovetails create a solid mechanical joint that also benefits from glue. Cut the housings first. After clearing most of the waste with a dado stack, I use a router and jig to create the flared side walls. I then use the same dovetail bit in the router table to cut the dovetail on the battens. Only light mallet taps should be needed to assemble the joint. I leave the battens about 1 in. long for fitting. The seat gets angled notches at its back edge to make room for the angled splats. Trace each splat onto the seat to lay out the notch’s width. Saw and chop the joint first, then refine it with an angled paring block, deepening it until the notch’s top edge meets the top face of the seat at the very corner. Blue tape or a backer strip at the top of the seat can help control blowout. Then chop the ends for nice, crisp shoulders.
Dovetail battens are the heart of the seat
Angled mortise-and-tenons
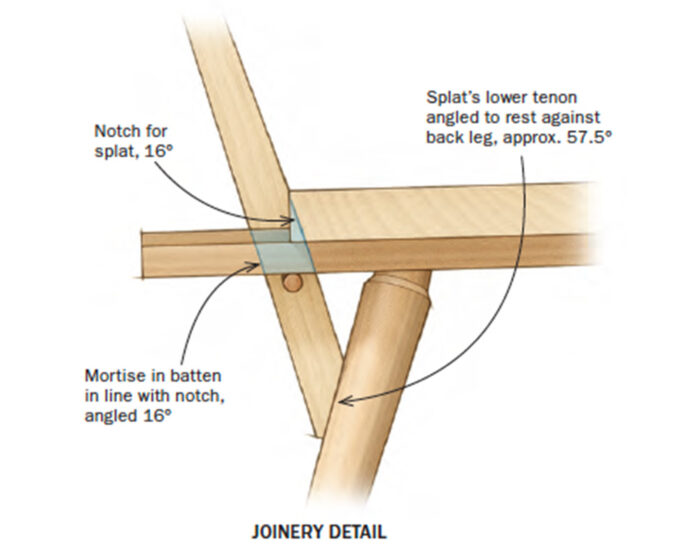
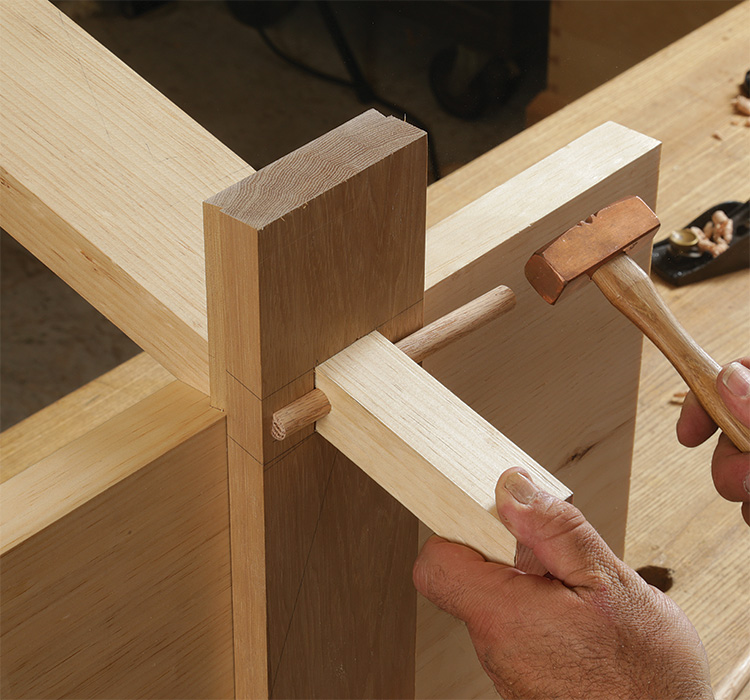
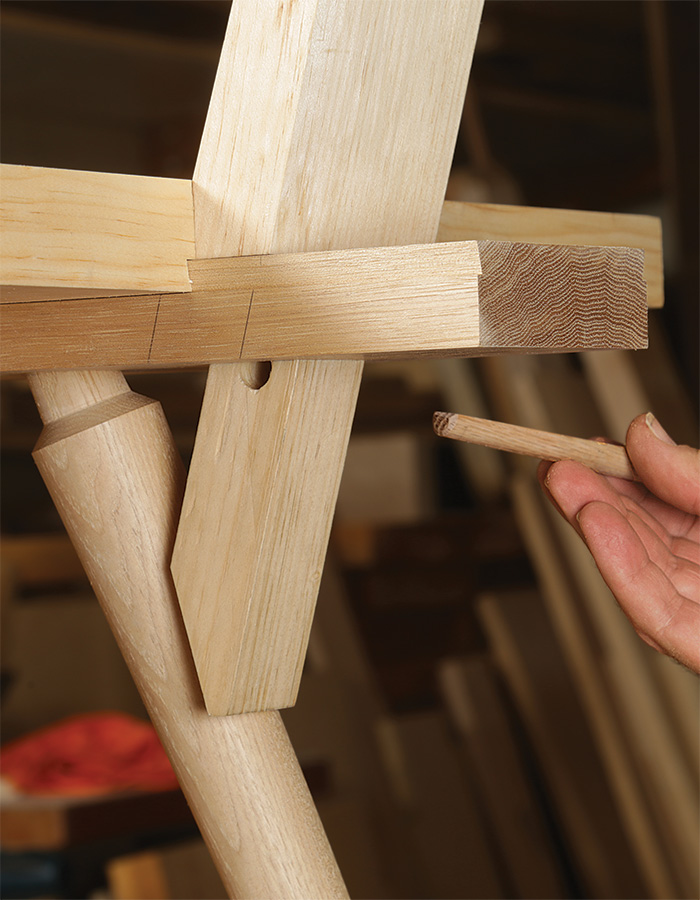
Angled through-mortises in the battens accept the long splat tenons. Although this is a knockdown joint, it yields an incredibly rigid structure.
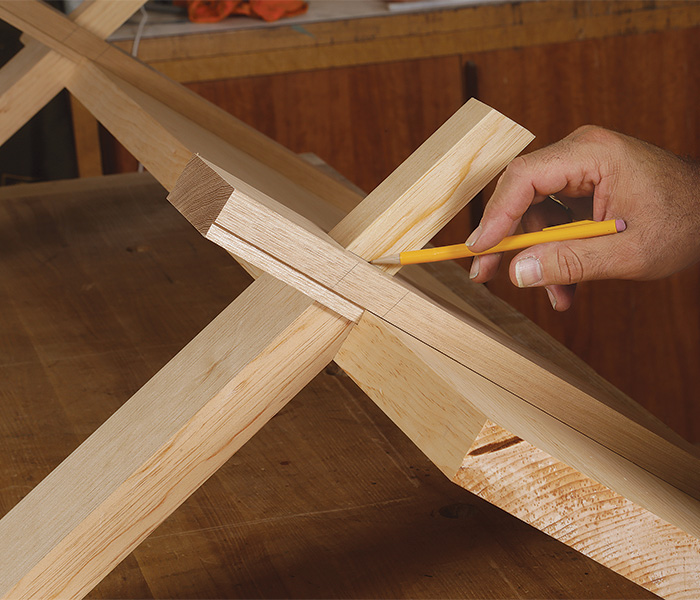
To lay out the mortise for the splat, I drive a batten into its housing until it’s 1 ⁄8 in. proud at the front edge of the seat. Then I knife a line where the batten meets the notch to mark the front of the mortise. To mark the back, I hold a splat blank in the notch and trace against it with a pencil. A pencil line is fine here since I’ll plane the future tenon to fit.
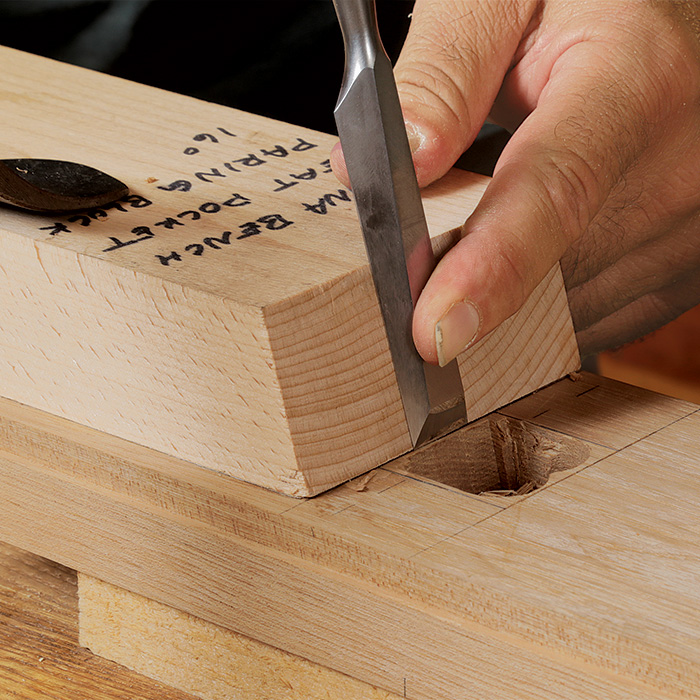
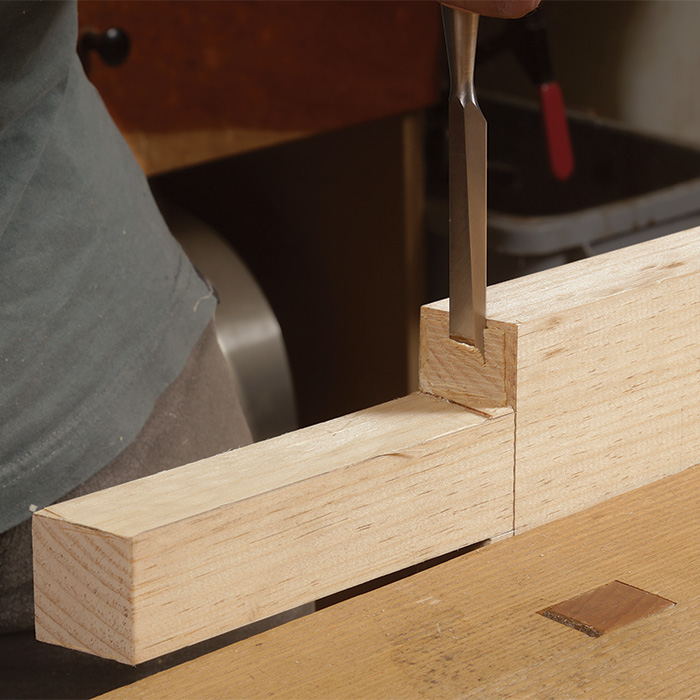
After removing the batten to lay out the rest of the mortise, including transferring it to the batten’s bottom face, I drill and chop away most of the waste, then carefully chisel the ends with an angled paring guide block clamped to the batten.
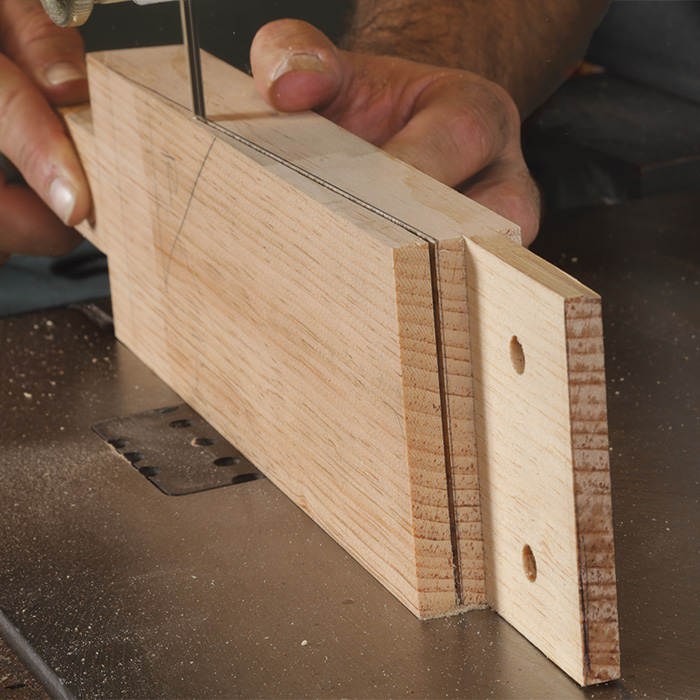
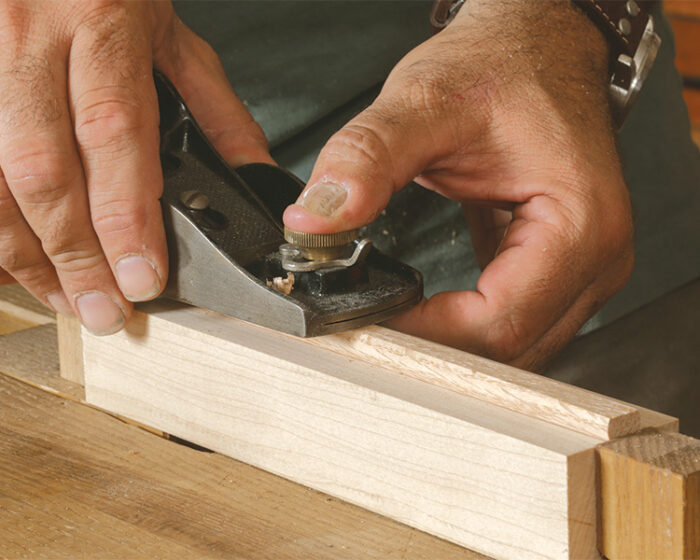
With the mortise done, turn to the accompanying tenon on the splat. To make sure the splat lines up perfectly with the notch at the back of the seat, place the splat right on its batten and use the mortise to mark the tenon’s width. I cut the cheeks on the bandsaw, chop the shoulders with a chisel, and shave down the thickness with a handplane. Leave this tenon long for now. You’ll cut it to length later when the base is assembled. Do check its fit though. Insert the splat into the batten, then tap the batten until the splat tightens up to the notch. There should be no gap where the splat meets the top of the seat.
With the splat still tight against the notch, mark the front of the batten to length. After cutting at this mark, I cut the bevel on the batten’s front end for a nice shadow line.
Finally, install the batten. When driving it, stop a couple of inches from the front of the seat, apply some glue to the housing, install the splat, then drive the batten until the splat seats against the notch. Clamp the front of the batten to the seat to close any gaps, remove the splat, and let the glue cure.
Splats are knockdown and drawbored
Back rest is drawbored
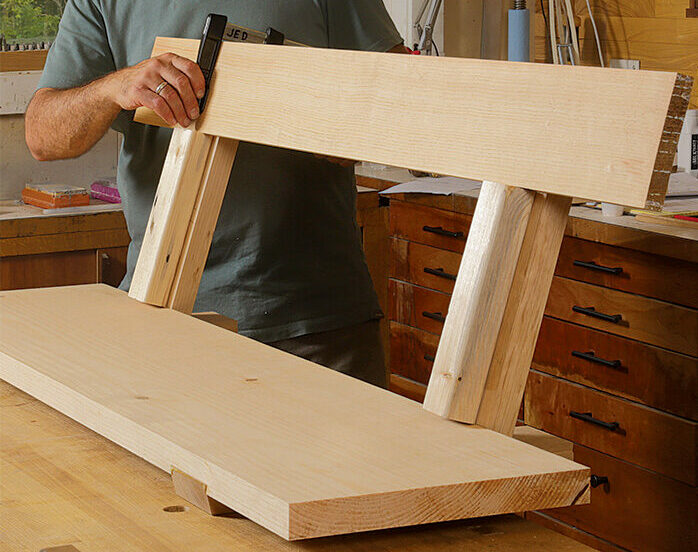
The joinery for the back rest, a straight mortise-and-tenon, is a break from the angled work so far. Its drawbore means it’s no less interesting though. Again, lay out the joints using the parts themselves. Insert the splats into the battens and clamp the back rest to them, using spacers to set the correct height. Even though I haven’t cut the splats’ upper tenons yet, this setup allows me to use a knife to mark the length of the mortise on the back rest and the shoulder on the splats.
The back rest’s mortises are centered in the stock, but the splat’s corresponding tenons are offset toward the back so the taper can be cut into the splat’s front face.
After the joints have been fitted, dry-assemble the back rest and splats to lay out the splat’s taper, which runs from the top of the seat to the back rest. The taper gives the sitter a little ergonomic comfort— a welcome consideration from an austere piece of furniture.
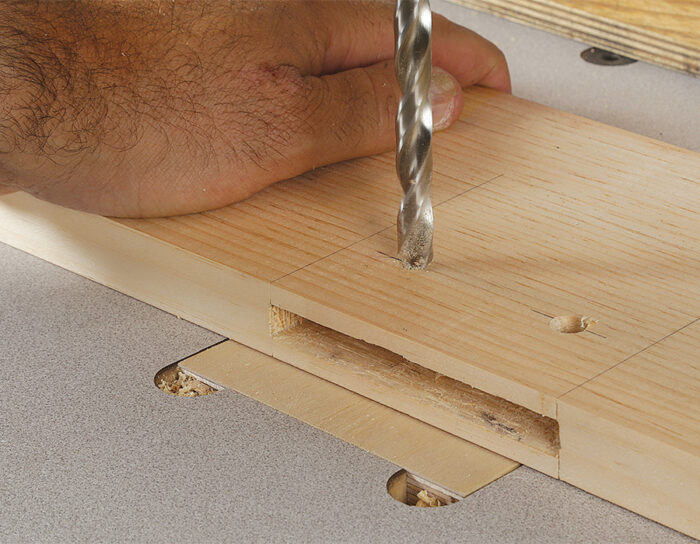
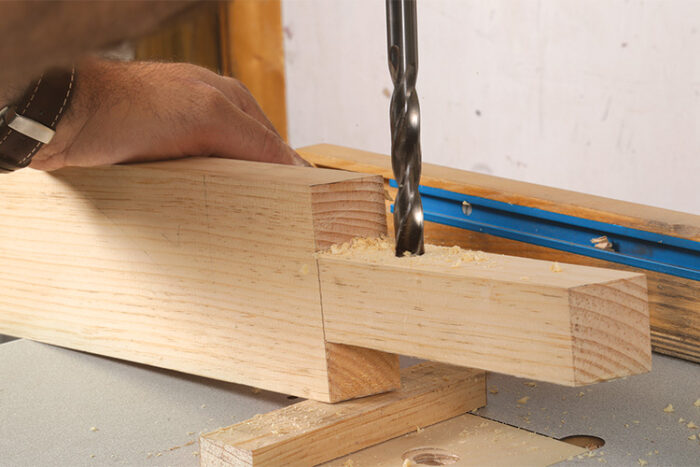
Finally, lay out and drill for the drawbore pegs. I don’t glue this joint; the pegs are sufficient. But don’t assemble it yet. There’s still more to do: the knockdown joint. Here, tapered pegs run through angled holes in the splats’ lower tenons. The wedging action keeps the splats tight to the battens—and lets you take the bench apart for cross-country moves.
Legs are turned and staked
Staked undercarriage supports back
Even with its little tweaks and added interest, the joinery until now is typical of flat work. The legs, though, are firmly in chair territory, with turned, tapered tenons and matching tapered mortises.
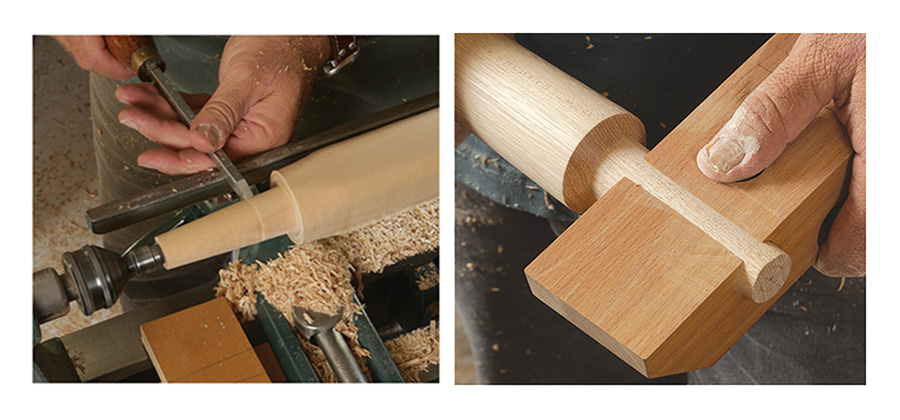
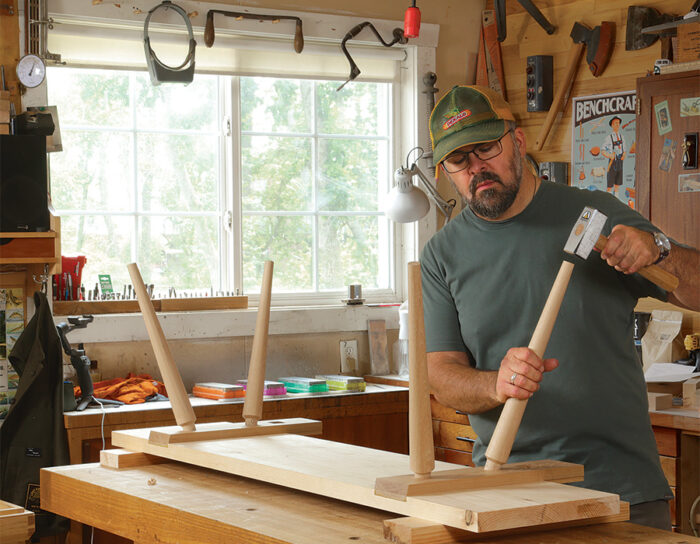
I turn the tapered legs and their tenons. The tenons need to be smaller than the largest diameter your reamer can cut. While you can use the measured drawing as a guideline when sizing the tenon, your individual reamer will determine the actual dimensions.
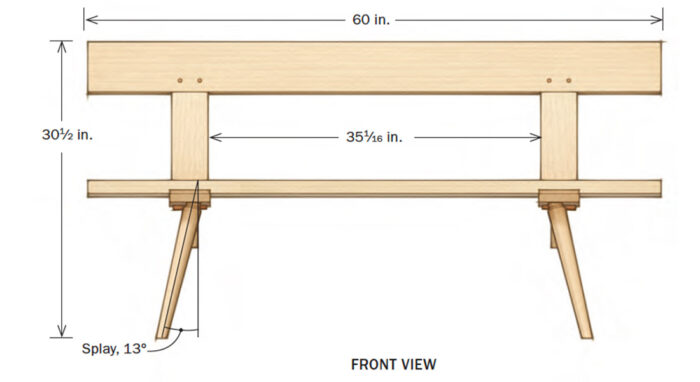
The rake, splay, and position of the legs were designed so the beveled ends of the splats’ beveled tenons rest firmly on the backs of the rear legs. This triangulation is what makes the bench so strong.
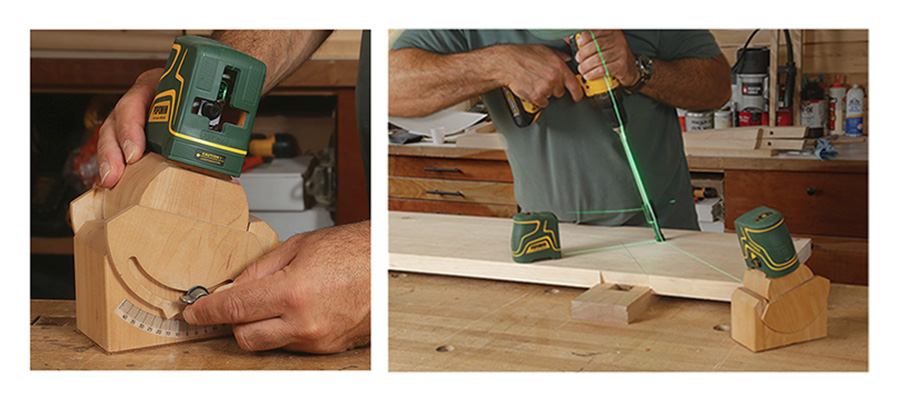
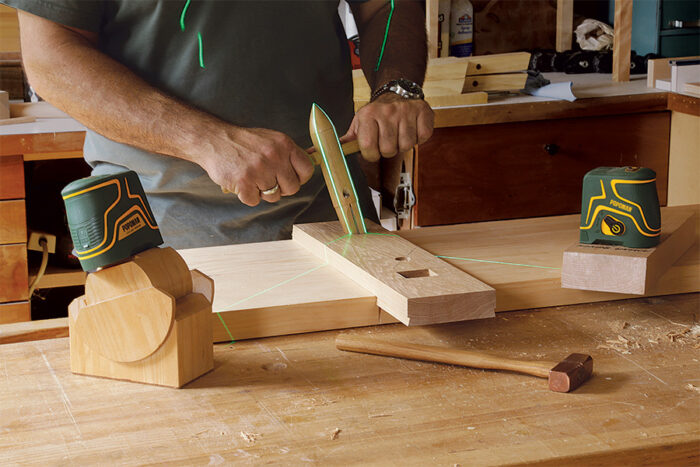
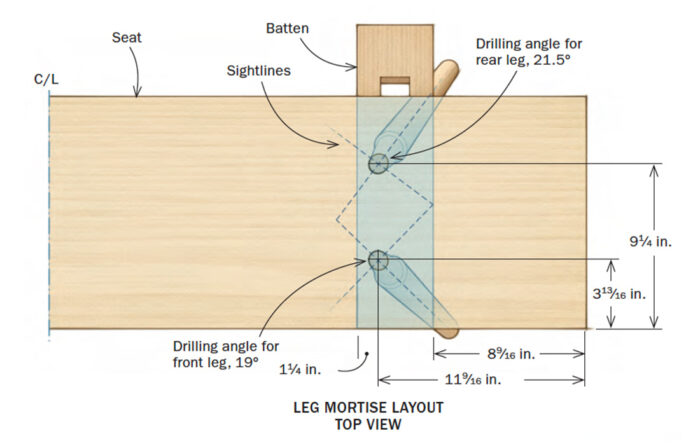
I use a pair of inexpensive laser levels, one plumb and one in a shopmade adjustable mount, to cast sightlines onto my drill and reamer. I usually turn the lights off in the shop so the laser beams are more visible.
Start by drilling through the seat and batten from the top. This will isolate blowout to the bottom, where it will be removed when you flip the seat to ream from below. Hold the drill and your elbows close to your body for the best control.
When reaming, center the lasers on the hole by eye. The lasers should walk up the reamer and meet at the middle of the top of the tool. Ream slowly and carefully, taking frequent breaks to clear out the waste and checking that you’re still aligned with your lasers. You could skip the reaming and use straight tenons, like many of the original benches do, but the joint would not be as strong.
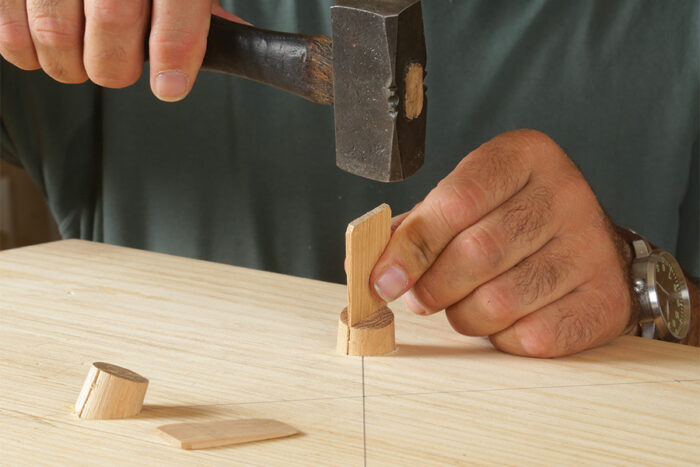
Before gluing the legs into the seat, I drive them into the mortises dry and mark the tenon at the underside of the batten. Only after that do I cut the kerf for the wedge. This allows me to seat the tenon without the tapered mortise closing the kerf. I apply glue to the tenon and the mortise. I then drive the tenons into the seat, stopping at the marks. I use liquid hide glue for its extended open time. Then I glue and drive the wedges, which should be about 1 ⁄ 16 in. wider than the tenon so its edges bite into the seat. I apply glue to only one side of the wedge so if the tenon shrinks, it moves away from the wedge on the unglued side instead of pulling away from the mortise. Once the glue cures, saw the tenons flush and smooth the top of the seat.
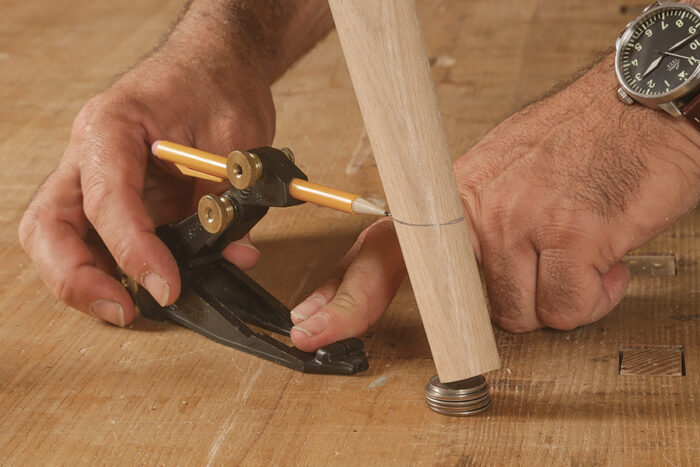
The bottoms of the legs need to be cut to length. Place the bench on a flat surface (I use my workbench top) and shim it so the seat is level left to right and angled down front to back. Now measure 16-1 ⁄ 2 in. down from the front edge of the seat and set a pair of dividers to the distance between the 16-1 ⁄ 2 in. mark and the top of the workbench. Use the dividers (I use the Accuscribe made by Fastcap) to mark a line around the bottom of each leg. Saw to the line with a backsaw and chamfer the cut.
The back assembly has two final steps, trimming and angling the splats’ lower tenons to length and attaching the back rest.
Each splat’s lower tenon needs to be cut to precise length and beveled at the end so it rests evenly on the back of the leg. Get this information, both the length of the tenon and the angle of the bevel, from the bench itself. I tend to saw the tenon long, then sneak up on the exact fit with a plane until the bevel rests at the back of the leg just as the splat bottoms out in the batten. Treat each tenon’s length and angle independently. With the splats fitted to the legs, drawbore the back rest to the splats.
I gave my bench a soap finish, which is what the original benches have. They’re still maintained with soap, and in fact, inside the church in Amana where I first saw them there is a sill cock and central drain for washing the wood floor and benches.
Assemble around the seat
Jameel Abraham is a woodworker and toolmaker in Cedar Rapids, Iowa.
Drawings by Christopher Mills.
If you’re looking for more chairs, benches and stools, check out our project guide here.
 |
Building a Community of Benches |
 |
Build a Classic Shaker Bench |
 |
Museum Bench |






Comments
Nice work. Clean and simple lines.
I would like to know where the chair leg marking caliper came from. I'd love to get my hands on one of these.
I believe it's the FastCap AccuScribe Pro.
Log in or create an account to post a comment.
Sign up Log in