Perfect panel glue-ups
Jointing with glue-ups in mind is a precise business. Watch how Mike Pekovich breaks it down into simpler steps.Sponsored by Grizzly Industrial
Jointing
Check that your jointer cuts properly before you use it. In case of sniping or tapering, adjust the outfeed table. In addition to this, you’ll want to make sure the jointer blades are sharp. Dull blades have a tendency to burnish wood, compromising glue absorption and the subsequent strength of the joint.
It’s not imperative, but if possible, the fence should be perfectly squared with the outfeed table. Despite differences in techniques, the geometric properties of handplaning also apply here with adjacent boards. In order to make them comply, alternate the faces that meet the jointer fence. Use chalk to help keep track of the face directions.
First, butt two adjacent boards together. On one side of the joint line, mark the board surface with an ‘I’ to indicate that the face of that board must run inside, against the fence. Mark the opposite side of the joint line with an ‘O’ to indicate that it must face outside, away from the fence. Once all of the adjacent boards have been respectively marked, it’s simply a matter of running them through the jointer while making sure the correct faces of the boards meet the fence.
When all of the adjacent boards are butted after jointing, the supplemental Y angle principle ensures that the surfaces are flush and flat. This approach is typically more reliable than running a pair of boards folded together through the jointer.
Clamping
Now that the boards are flat, straight, marked, and arranged to your satisfaction, it’s time to start considering the gluing process. Some prep is required first, starting with making sure the clamps have a flat and true work surface to rest on during the glue-up. An uneven or twisted work surface will result in uneven clamp placement, and ultimately an uneven tabletop. By using a straightedge across both the length and width of your work surface, you can easily ensure that it’s flat in both directions. Additionally, winding sticks will help determine if the surface is twisted. If it is, you can usually add a shim under one or two legs to even out the surface.
Begin laying out the clamps. Either pipe or bar clamps will work, as long as they’re straight. Spanning across all of the clamps with a straightedge is also recommended. If the straightedge rocks or a gap appears between the straightedge and the pipe, replace the offending clamps.
Gluing
Apply a bead of yellow glue along the entire edge, then spread the glue using a stick. Next, press the two glued edges together and slide the boards side to side a little to fully spread the glue. Keep moving efficiently from one board to the next, making sure with each joint that the boards are sticking together as planned.
When all of the edges have been assembled, tighten the lower clamps only enough to apply light but firm pressure. Check the underside of the tabletop to make sure it’s sitting flat on the clamps. If it isn’t, a few judicious raps from the deadblow hammer should solve the problem. Starting from the middle of the tabletop and working toward the ends, begin applying additional pressure to the lower clamps. If the ends of any boards are misaligned, temporarily mount C-clamps at both ends of the tabletop, with the pads of the clamps spanning each joint. Since the steel pads only remain there temporarily, they won’t stain the wood.
Once all the faces of the boards align, apply additional pressure to the end pipe clamps, then remove the C-clamps. Next, add the top clamps. Once all of the top clamps are in position, it’s just a matter of tightening them snugly. Check again to ensure that the tabletop is flat on the pipes and that all of the clamps are tightened– but don’t over tighten.
Invariably, the pressure from the clamps is going to squeeze some glue from the joints. Allow enough time, usually about 15 minutes, for the glue to turn rubbery. Then, using a putty knife, the glue will scrape off with relative ease.
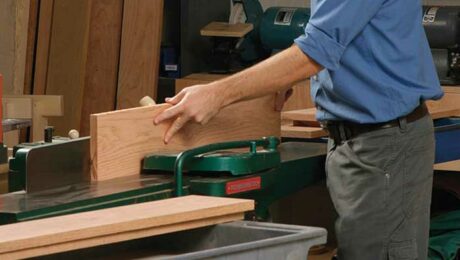 |
Jointing Boards for Dead-Flat Panel Glue-Ups |
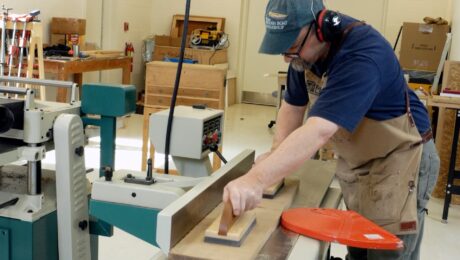 |
The jointer and planer are a team |
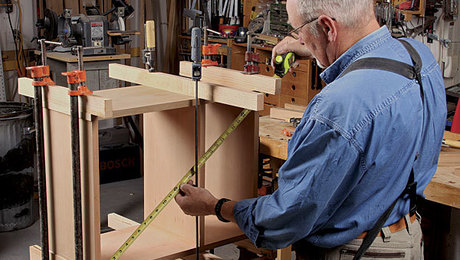 |
How to Gear Up for Glue-Ups |





Comments
I love these new videos you all are doing! The information is great and it’s very well put together. Please keep them coming!
Great video. I just got my Grizzly 8" benchtop jointer with a spiral type cutter head. It's not the full Shelix style, but still supposed to be better than straight knives.
It would have been nice to see the process of doing 3-4 boards.
I definitely understand this method, but I feel like it can only work when you have 2 panels. If you were doing a whole table top, that let’s say had 8 pieces, how could you possibly keep your measurements?
This explains why my raised panels for a bed I made weren't flat. It became quite evident when I ran them over the very intimidating raised panel router bit.
As others wondered, I need to learn some sure-fire ways for handling multiple boards. FWW may have a video on this already, so I need to search. Clamps, too, seem to be important. I found using my varied stock of clamps (black pipe, different aluminum bars, etc.) impedes a quick process. Some would fall over, so I need something to hold them steady. Pipe clamps need to be prepped so they don't mar your wood. And then getting all the joints to sing in the same key (remain flat,) well, Ode to Joy, ain't that fun! Cauls? Yet another layer of timing, prep, and complexity.
Great video, Mike. You're a trusted source of easy-to-consume techniques.
Good tutorial, Mike. One thing I didn't see, tho. The first thing I grab when I go into a glue up: My 1/2 gallon bucket, half full of warm water, with a rag and a toothbrush in it. Also, for panel glue ups, a putty knife to strip the squeeze-out before wiping the joint clean with the damp cloth.
Thanks for the good idea. I never thought of a simple bucket of warm water. I usually struggle with a spray bottle and paper towels.
What about using clamping cauls?
Log in or create an account to post a comment.
Sign up Log in