How to make a leather tabletop
Steve Latta details how to veneer and add a leather surface to a tabletop for an unparalleled writing surface.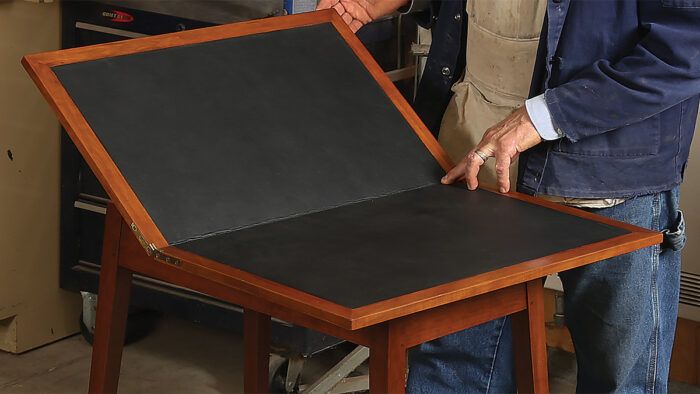
Synopsis: A companion to his “Folding Tabletop” article in the same issue, this master class details how to veneer and add a leather surface to the top. Special techniques are needed because this tabletop folds, but leather can be a durable and viable surface on tops for tables and desks of all varieties.
A leather top adds pizzazz to a piece, a certain formality typically associated with large executive desks. When leather is touched, its slight springback projects durability, comfort, and almost a sense of kinship. That might sound odd but as humans, we have an ancient relationship with leather that existed millennia before our use of fabric. In my mind, leather’s imperfections make it perfect, with its natural defects and wrinkles breaking up the monotony of a static flat plane.
In addition to its good looks, leather is a very pragmatic choice. As a writing surface, it has no equal. Upholstery leather, which I use, requires minimal upkeep. It holds its own against life’s daily assaults and I have never had to replace a damaged piece. I wish the same could be said for the countless wooden tops that have left my shop over the years.
With a little experience, leather is easy to work and requires no special tooling.
Veneer one side of both leaves
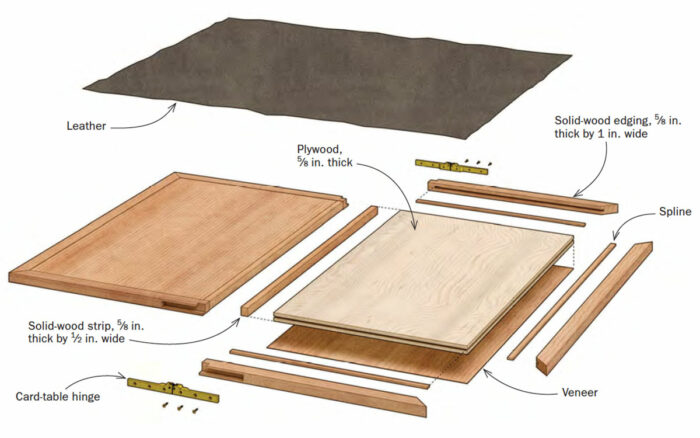
To begin, I took two pieces of 5 ⁄ 8-in.- thick by 15-in.-wide by 24-in.-long Balticbirch plywood and glued a 1 ⁄ 2-in. strip of cherry to one long edge on each of the leaves. Once the top is completed, these will be the edges at the fold.
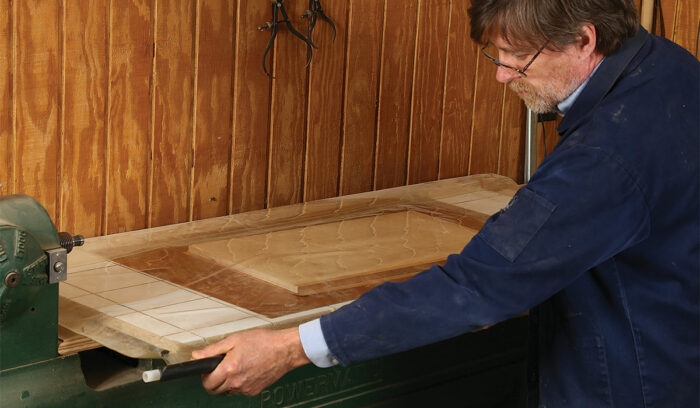
After cutting two pieces of cherry veneer a bit oversize, I laminated a piece to one side of each leaf using yellow glue and a vacuum bag. When the glue had thoroughly dried, I cut each leaf to 14 in. by 22 in., leaving the cherry strips untouched.
Veneer first
Before you get to the leather, you’ll apply veneer to one face of each leaf of the top.

Add leather to the tops
With the veneering complete, cut a piece of upholstery leather large enough to cover both leaves of the top with a 1 ⁄ 2-in. overhang all the way around.
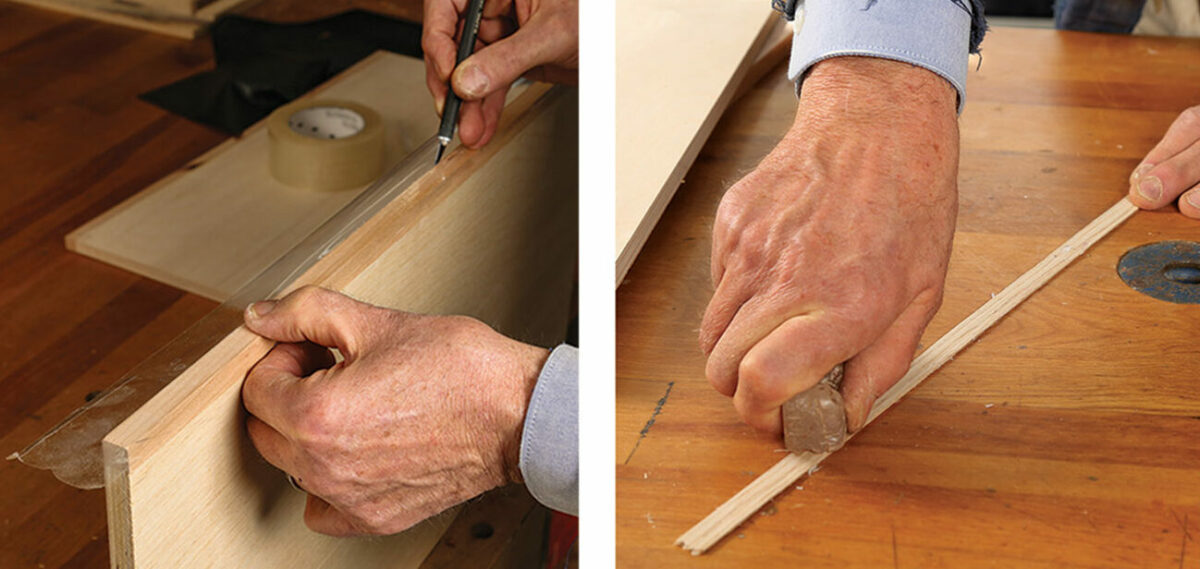
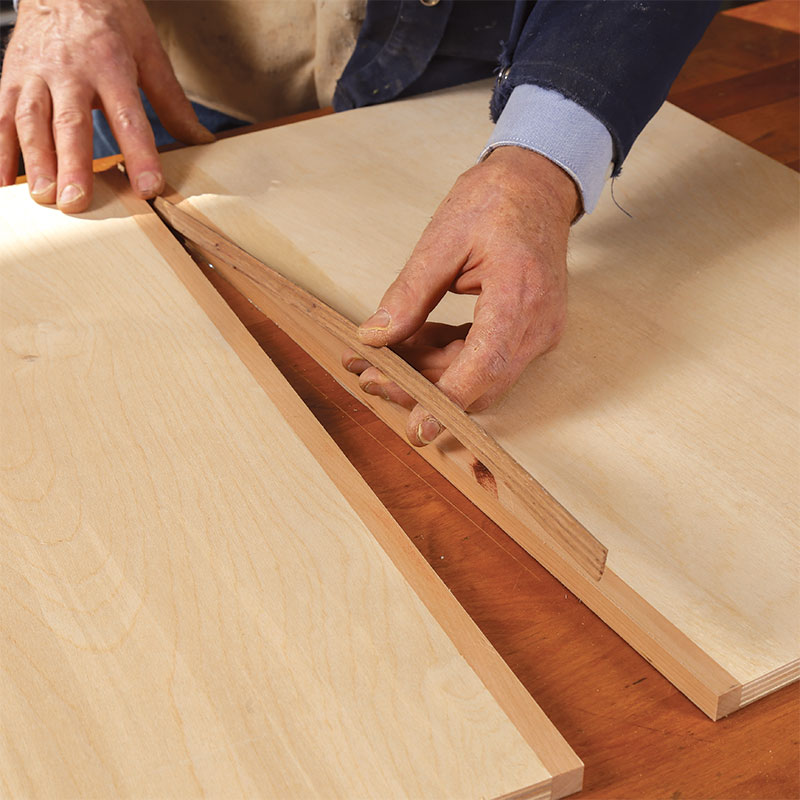
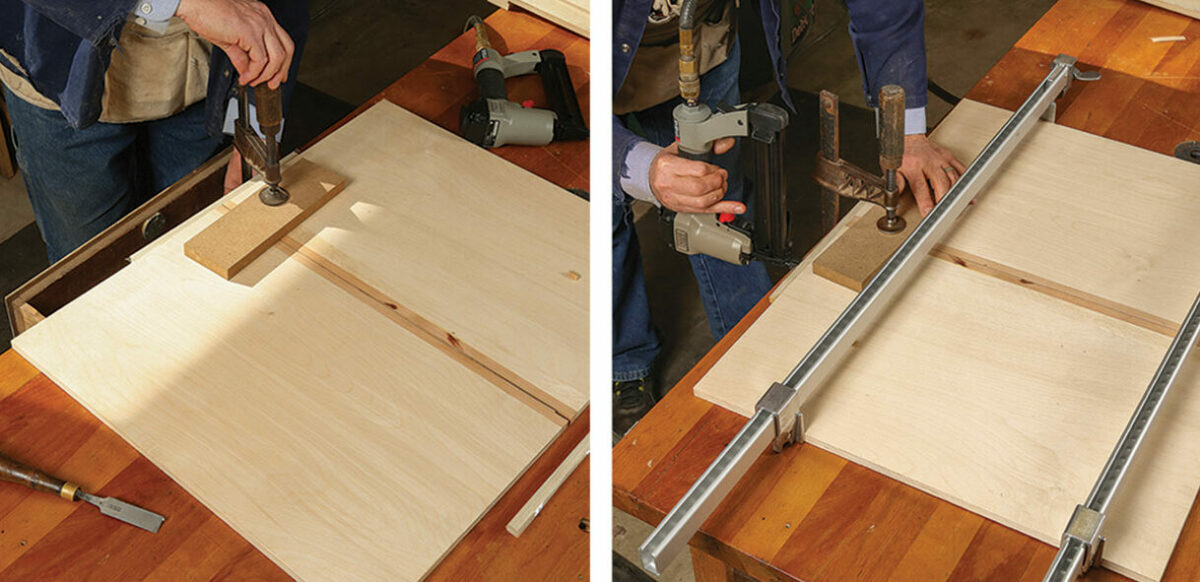
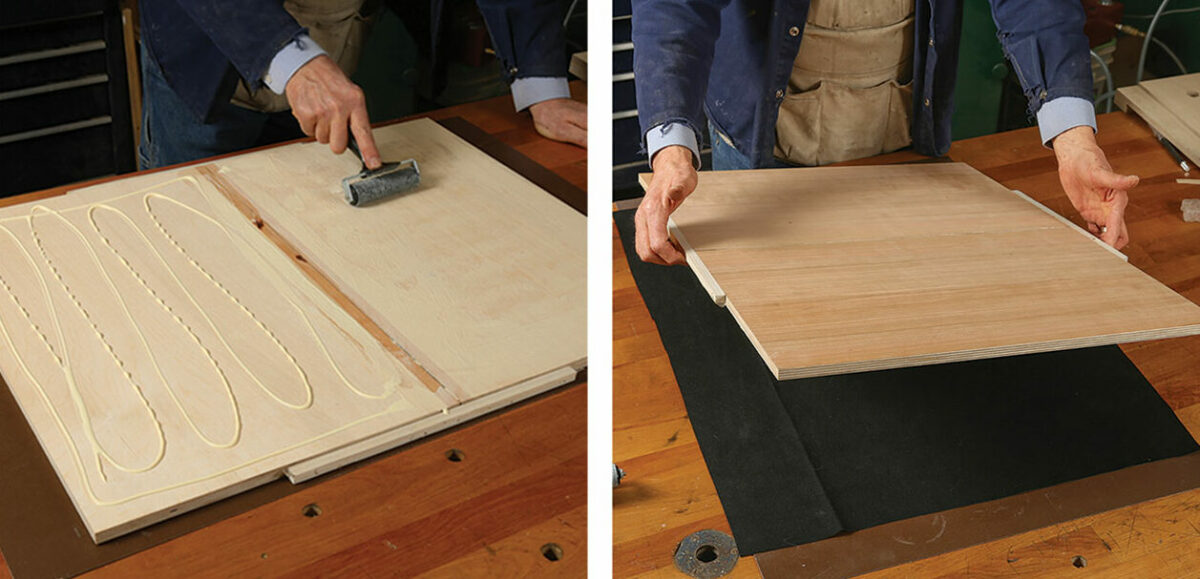
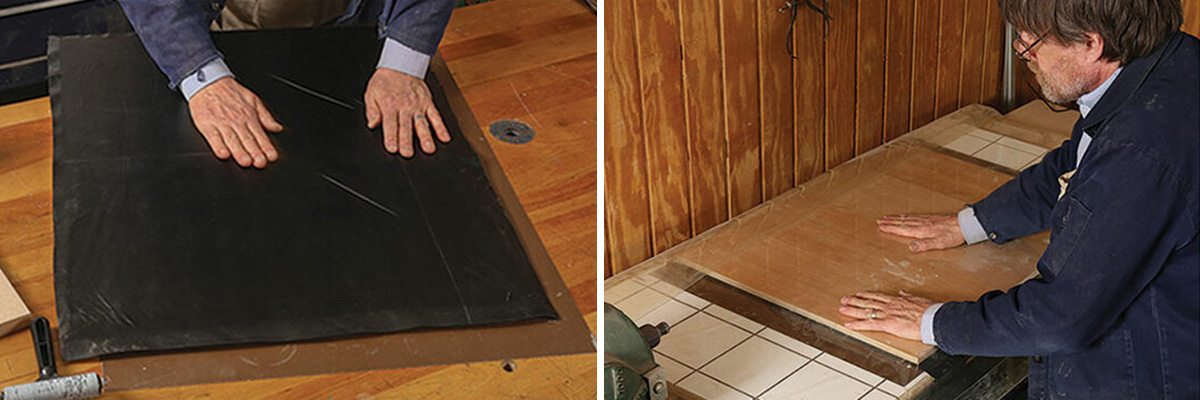
Align the cherry edges with each other and place a strip of veneer between the two. To keep parts from sticking during the glue-up, cover the cherry edges with clear packing tape and wax the strip of veneer. To keep the leaves from shifting in the vacuum press, tack a temporary cleat to the edge, straddling the leaves. Do this on both ends. Roll a nice film of white glue onto the unveneered faces of the leaves. Lay the leather on a flat surface, and set the leaves on top. With the leather side down, put the assembly on a platen in the vacuum bag and let the glue do its thing.
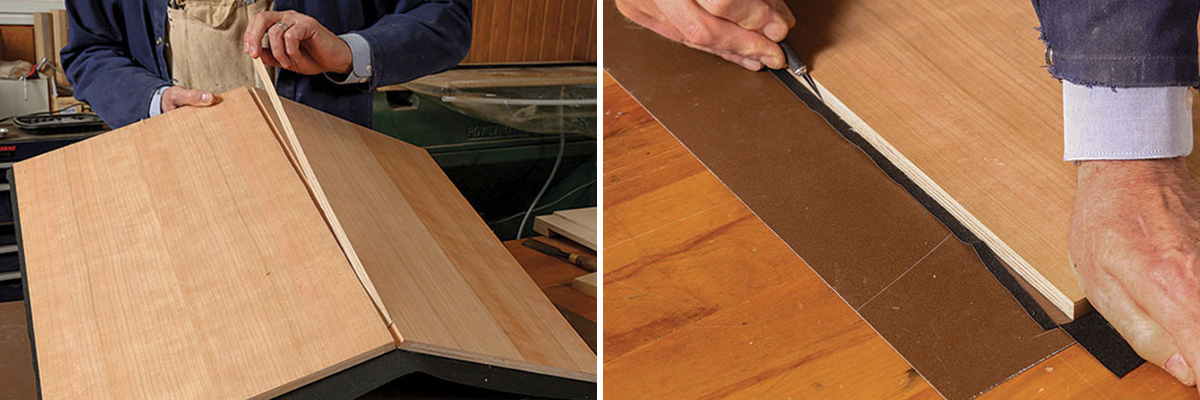
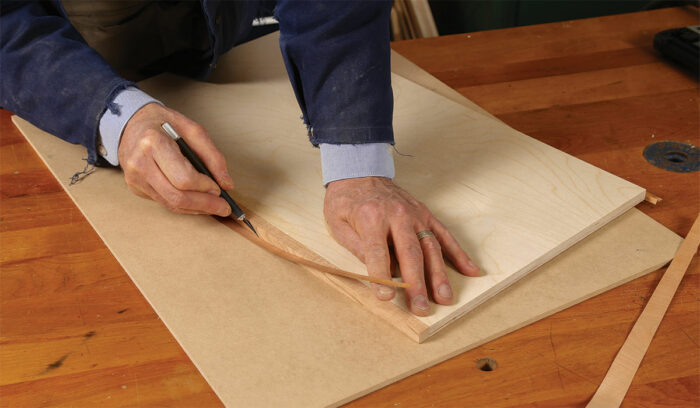
Once the glue has fully cured, pull out the top and remove the cleats, and the spacer between the leaves. The leaves should easily fold onto each other at this point. Take a sharp single-bevel knife and, with the top face down, trim the leather to the edge of the leaves.
Get ready for the leather
Prior to gluing a piece of leather to the two leaves, add a spacer between them. And secure the leaves with two tacked strips to ensure they don’t shift during the glue-up.
Apply the leather
Gluing the leather in place is similar to gluing veneer.
Edge the perimeter
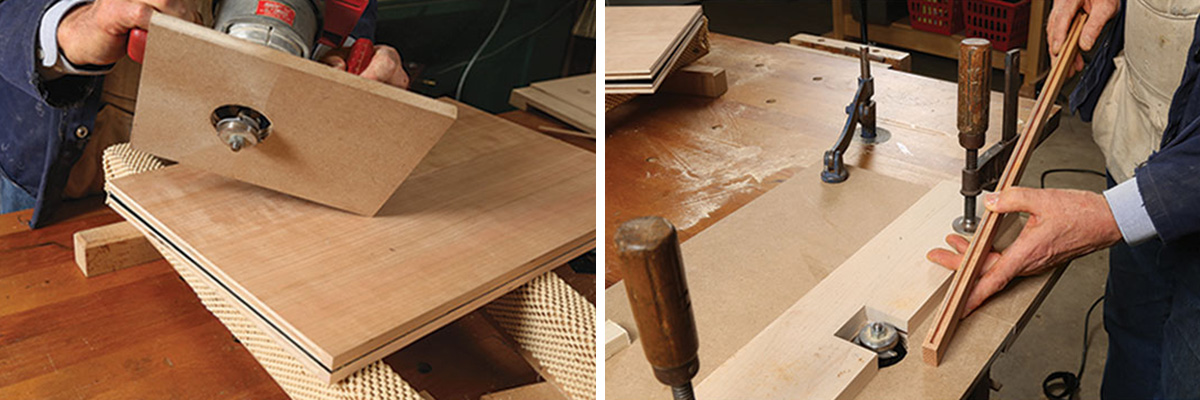
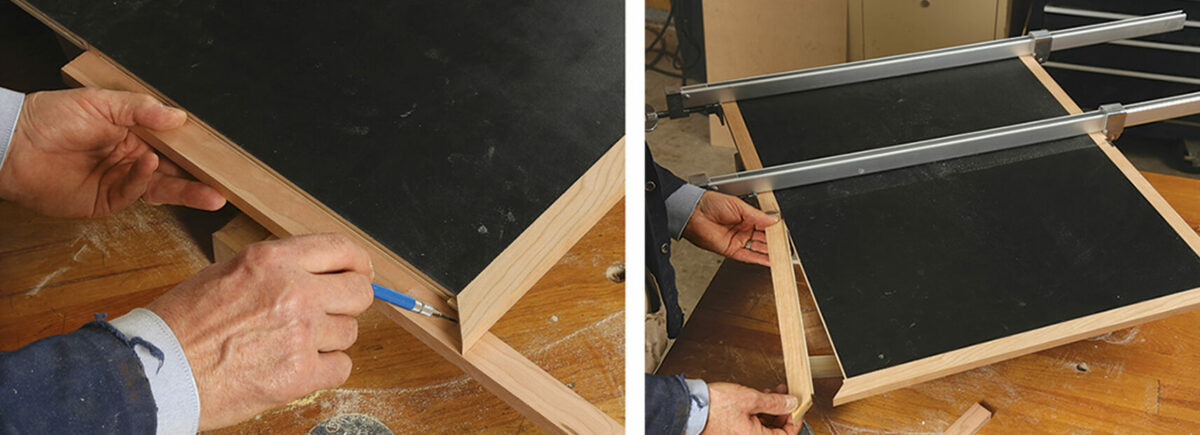
The three exposed sides of each leaf now get edged with a 1-in.-wide strip of cherry mitered at the outer corners. Adding biscuits or splines along the joint will help with alignment and slippage. Take the time to make your biscuit or spline joints extremely accurate, because after the edging is glued it must be perfectly flush with the surface of the leather. The edging can be flushed on the veneered side of the leaf but I don’t take that risk on the leather side.
Post glue-up
Once the glue is dry on the leather, it’s time to think about edging the outside.
Contributing editor Steve Latta teaches woodworking at Thaddeus Stevens College in Lancaster, Pa.
Photos: Anissa Kapsales; drawings: John Hartman.
More from Steve Latta
 |
Build a folding card table |
 |
One Routing Template For a Perfect Fielded Panel |
 |
Federal Details Transform a Simple Table |





Comments
Measure the tabletop. ...
Place the table upside down on the chosen material and center it. ...
Pull one of the corners tight. ...
Pull the chosen material from the opposite corner. ...
Tug on the leather or vinyl centered from one side
Log in or create an account to post a comment.
Sign up Log in