Designer’s Notebook: Extracting the past
Paul Bouchard's Egyptian stool journeyed from tomb to museum to computer to paper to shop.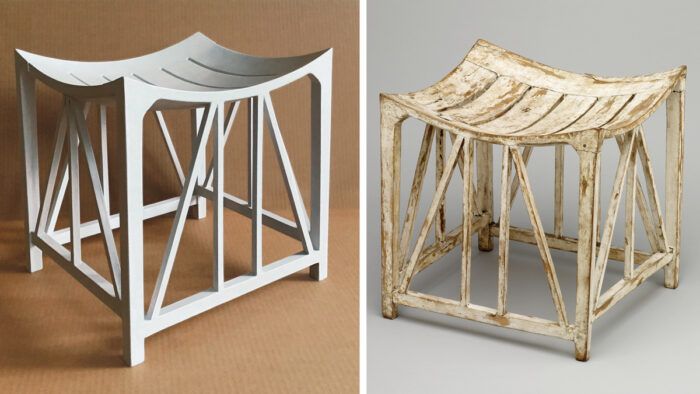
Synopsis: Stools were the most common pieces of furniture in ancient Egypt, and this one on display at The British Museum caught Paul Bouchard’s eye. He wanted to build it, and so he studied photos, researched tools and procedures used in ancient times, and set about making this version. Here, he describes the journey.
I found this ancient Egyptian stool on the British Museum’s website in early 2020 and fell in love with it. A couple of things pushed me to make a copy: its graceful beauty, curiosity about the execution of its joinery, and a desire to own it, sit on it, and see how it holds up over time.
I’d planned to visit and photograph the museum display, but COVID canceled my London vacation. Thankfully, the museum page has excellent pictures and measurements, and the image viewer allows you to zoom in quite close.
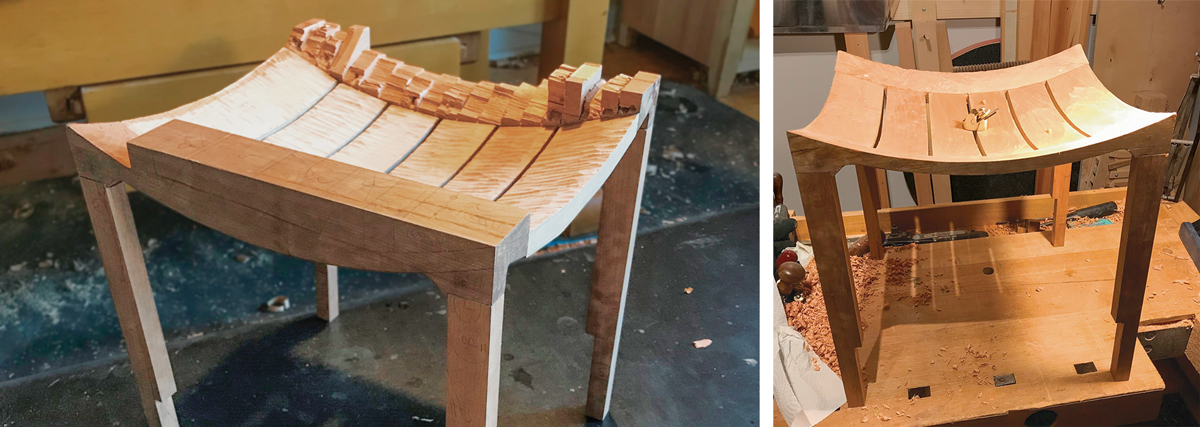
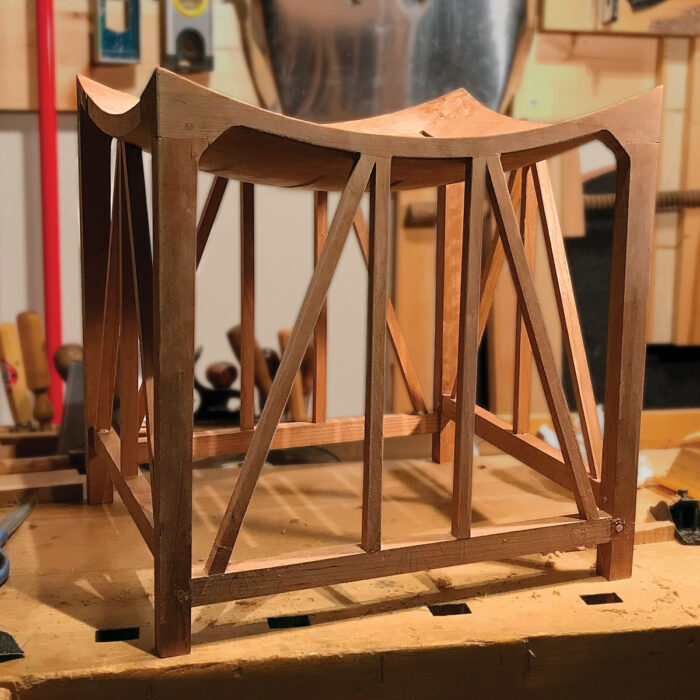
This isn’t a full build article, but it does shed light on some of the history and what I think are the two focal points of the piece, the seat and the lattice, and how the design and construction play off each other.
Stools in ancient Egypt
Turns out the most common pieces of furniture in ancient Egypt were stools, three- or four-legged with curved wooden seats or woven seats. Stools were made from materials such as reeds, rush, and wood. They are depicted being used by laborers and nobles alike, though stools in wealthier homes were more elaborate and made of more expensive materials. One of the reasons these pieces survive is because of the dry and stable conditions in the tombs where they were discovered.
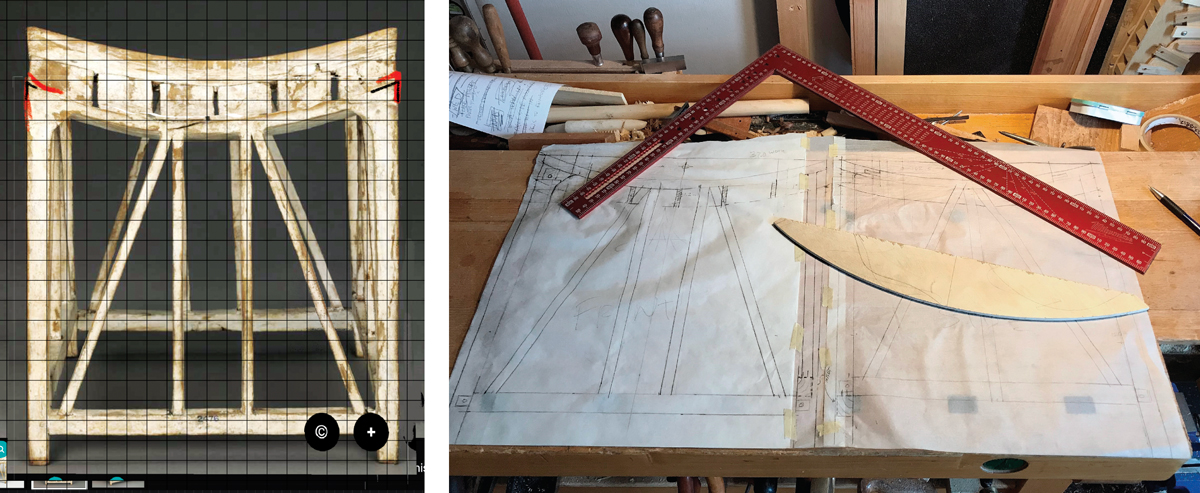
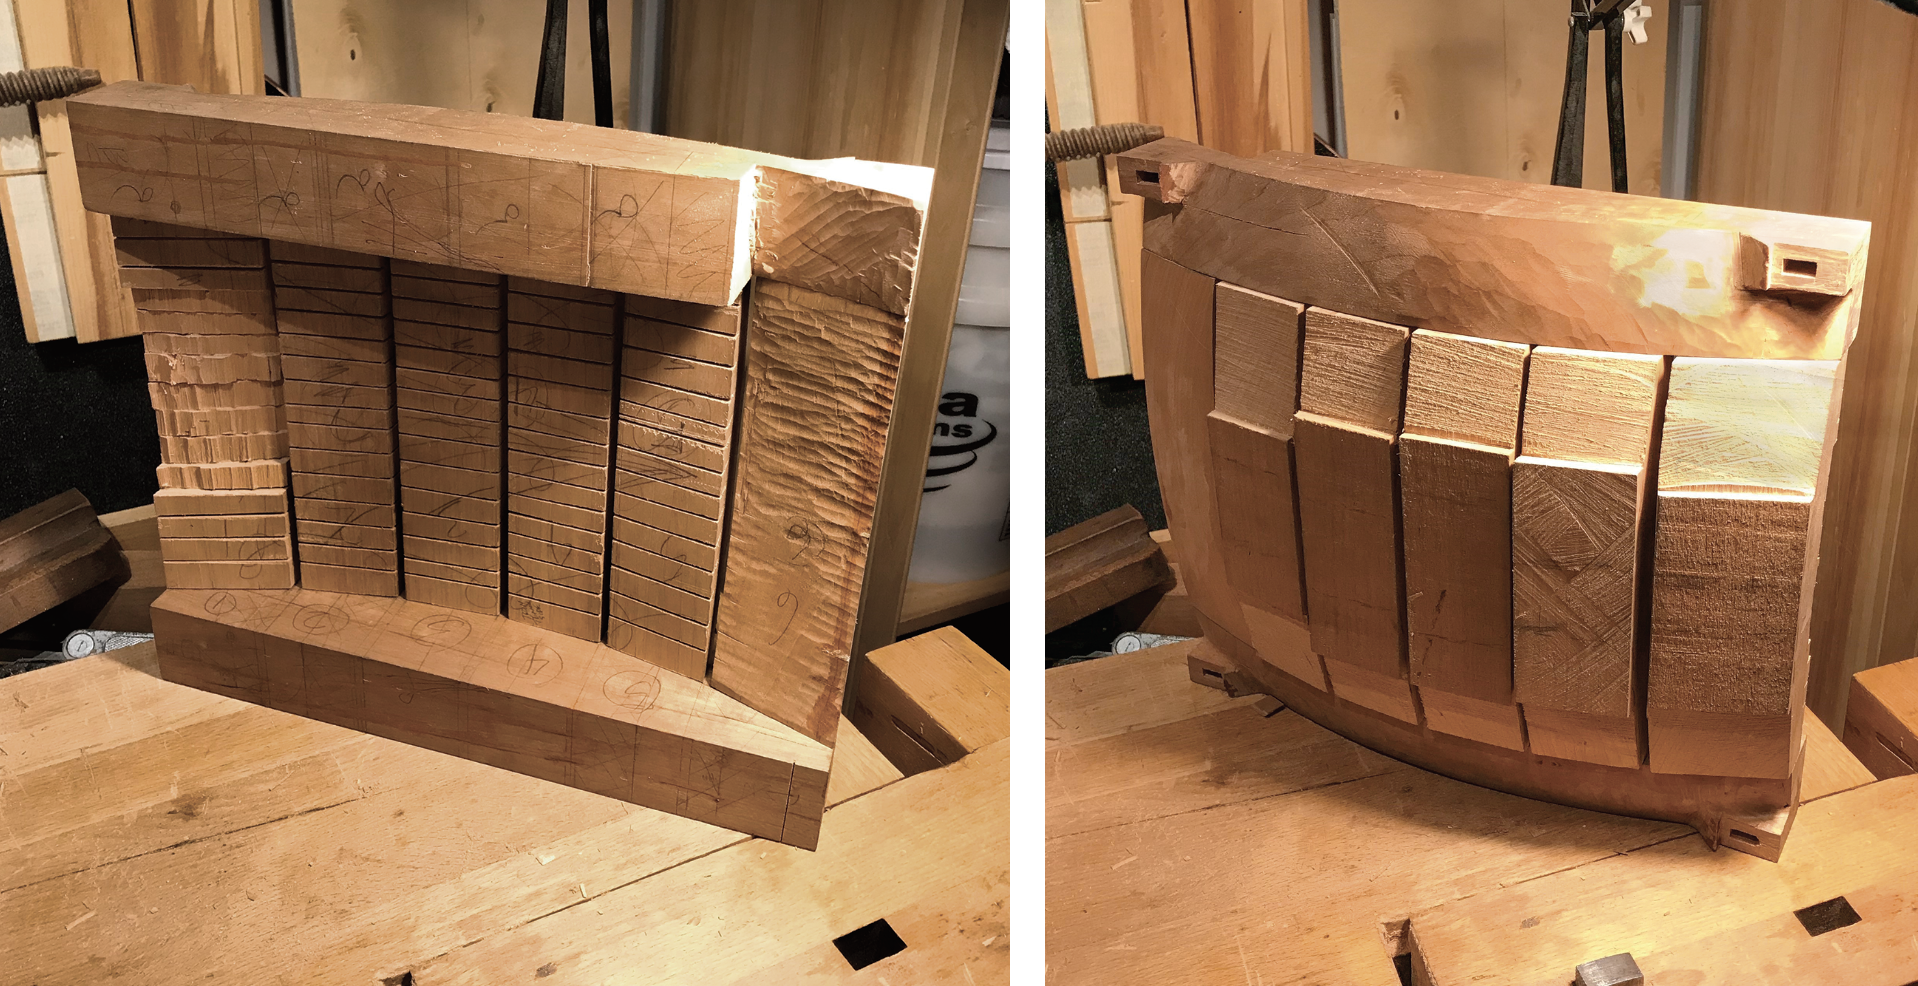
A big takeaway from my study has been how “human” a lot of the workmanship is. X-rays show the internal joinery can be primitive (hogged-out mortises, packed with gesso to fill the gaps). I was curious about what types of tools were used in building back then, so I did some research. In his book Egyptian Woodworking and Furniture (2008, Shire), Geoffrey Killen covers Egyptian tools extensively. The 18th-dynasty woodworker’s handsaw is functionally the same as a modern one, so I used a panel saw and a backsaw. As far as I know they didn’t have bow saws or coping saws, so I made all my inside curves by sawing multiple straight kerfs, splitting off the segments, and paring with a gouge close to the final surface.
I was more concerned with staying close to the procedures than exactly replicating techniques or textures. Adzes would have been used to straighten all the flat surfaces, but I stuck with handplanes because I didn’t want to lose any fingers. The Egyptians also would have sanded with flat or curved stones. I work in my apartment and for health reasons try to minimize my use of sandpaper, so I used coarse rasps for rough work on the seat underside and cabinet scrapers for the final shaping.
Making the seat slats and side rails
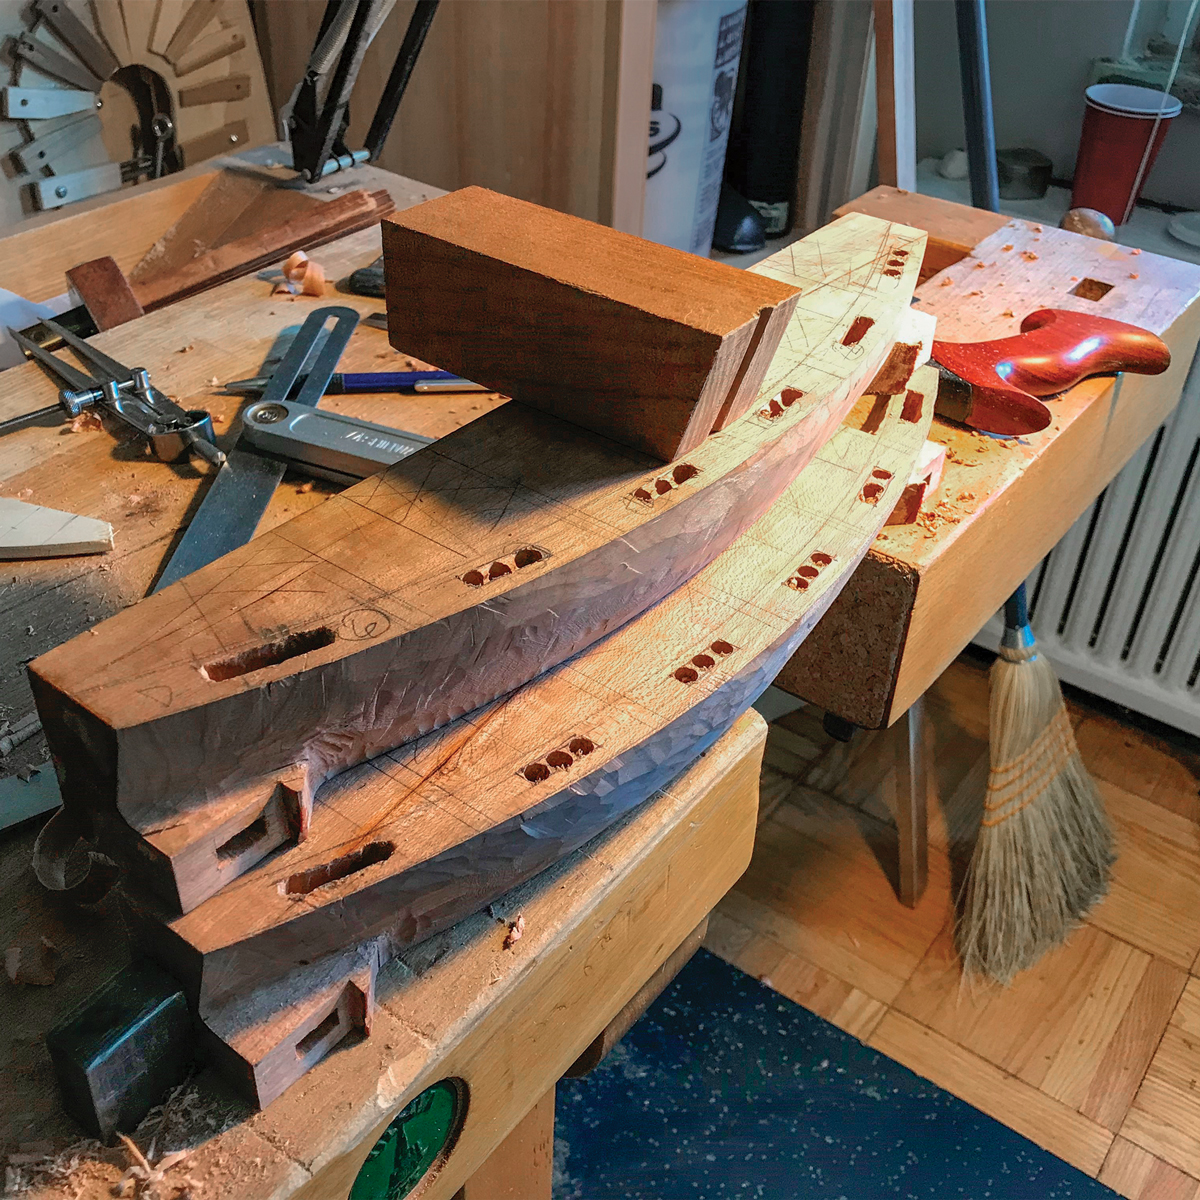
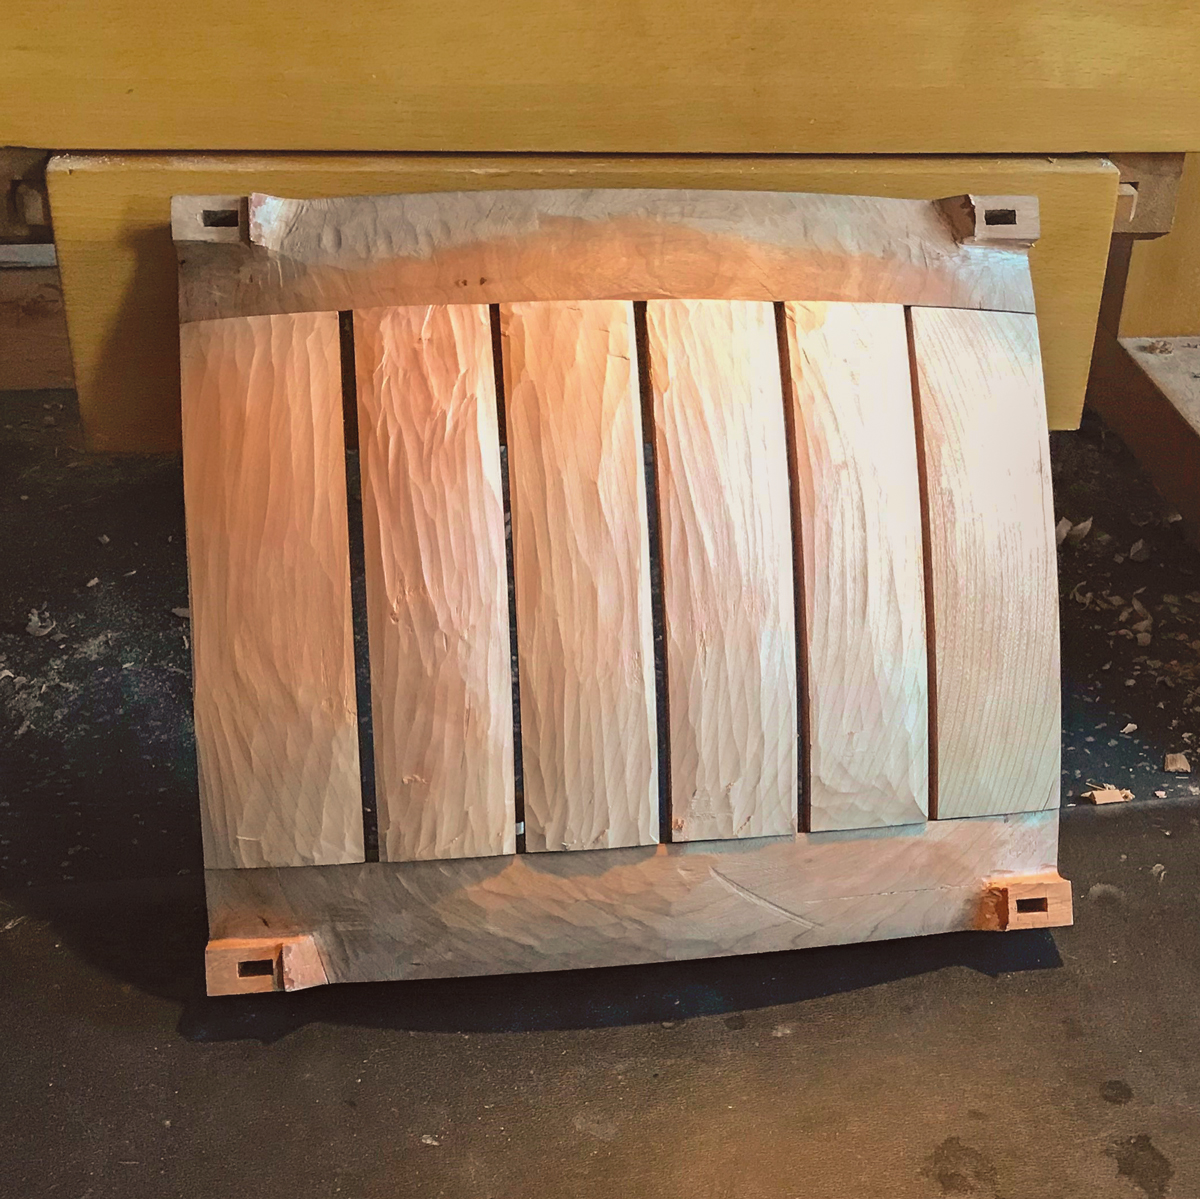
I used cherry scraps for the seat’s roughly 3-in. by 2-in.-thick side rails. Their top and inside faces were most critical to keep flat and square, but I made the outside a reference face as well because I’d be marking the leg sockets on it. I cut the side rails to overall length, then made myself a radius template from 1⁄8-in. plywood and used it to draw a curve on the outside face connecting the top corners of the rough block. Then I set dividers for the seat thickness, pricked a few marks to line up the template, and repeated the curved line about 1⁄2 in. lower. For the slats, I started with blanks wide enough to encompass the shoulder contact outline and thick enough to allow for the belly of the curve. Three different widths were needed for the six slats. I marked the tenon shoulders from a reference piece to make sure all the slats were exactly the same length.
Adding lattice and paint
The mortises for the stretchers are offset vertically to preserve strength in the leg.
Additionally, the side stretcher is flush to the outside of the leg; the end stretcher is flush to the inside.
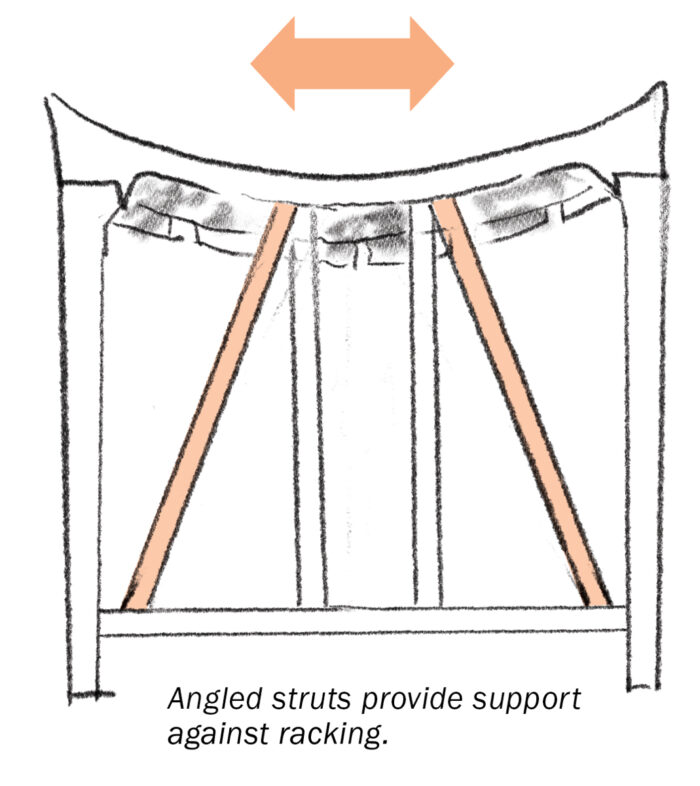
The vertical struts can be measured and cut while the stool is dry-fit. If their length is a tiny bit off, it’s only cosmetic. The diagonal struts are another story. They’re trickier to fit, and if their length is off by the tiniest amount, it will throw the stool slightly out of square. With eight diagonal struts, there’s a danger that tiny errors could compound, only becoming apparent during glue-up as the pins are being driven home.
Realizing this, I was feeling stumped, so I turned again to Killen, who made a very useful observation in his book: “Some of these [lattice braces] are tenoned into mortises in the horizontal elements while others are simply wedged into position.” I’m not sure exactly what he meant by “wedged” in this instance, but it got me thinking.
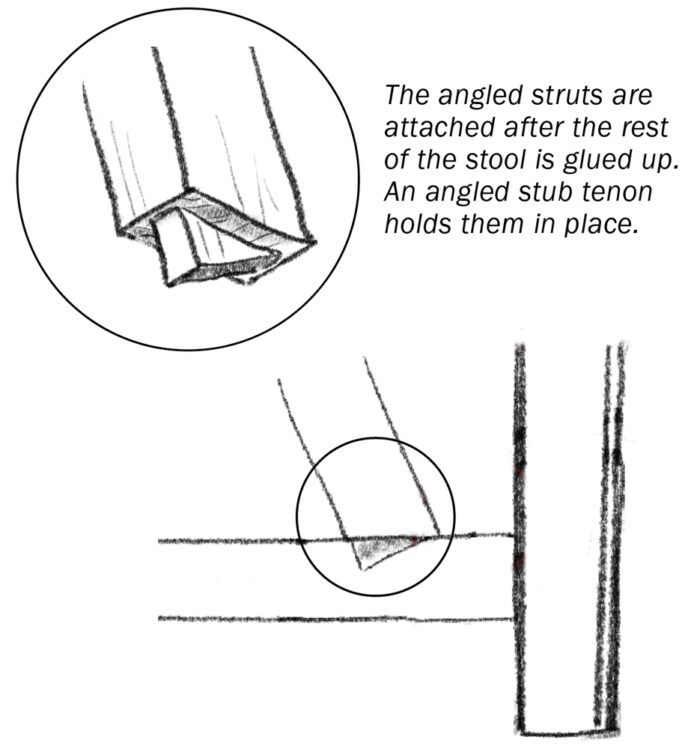
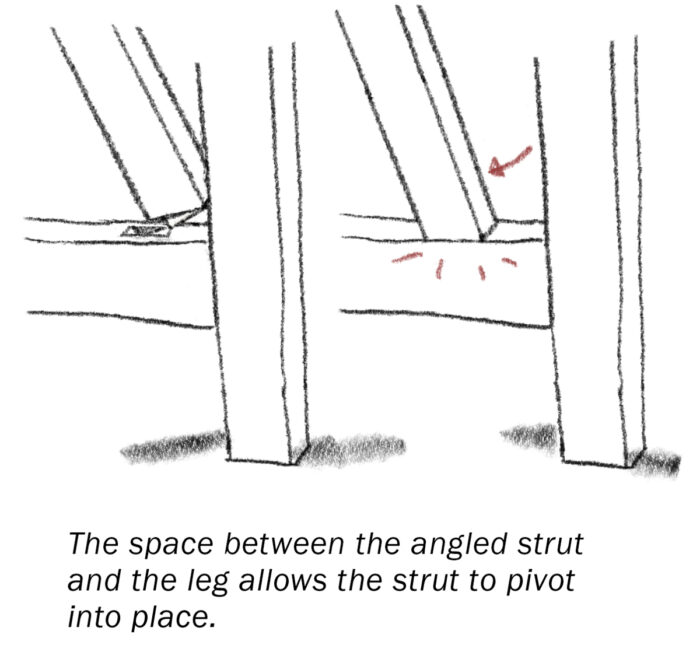
I’ve seen photos of cabinets on legs with doweled latticework, and it appears the bottoms of the diagonal struts are just pressed into notches. Many of the ancient lattice stools have their diagonal struts connecting to the stretcher at a peculiarly uniform distance from the leg. I think the gap might be there so a stub tenon can be slid into an angled mortise. I adopted this technique, and fit the angled struts after the rest of the stool was glued up. In use, there’s a tendency to bump your heels against the stool’s sides, and I think this tiny tenon will do a lot to keep the diagonals in place.
Paul Bouchard is a woodworker and story artist in Toronto, Canada.
 |
Hand-carving a chair in Cairo |
 |
The incredible carvings of Zanzibar |
 |
Moorish design |






Log in or create an account to post a comment.
Sign up Log in