Clever jig sharpens bandsaw blades in place
Brian Newell came up with his own jig that will save plenty of money on blade sharpening and replacement.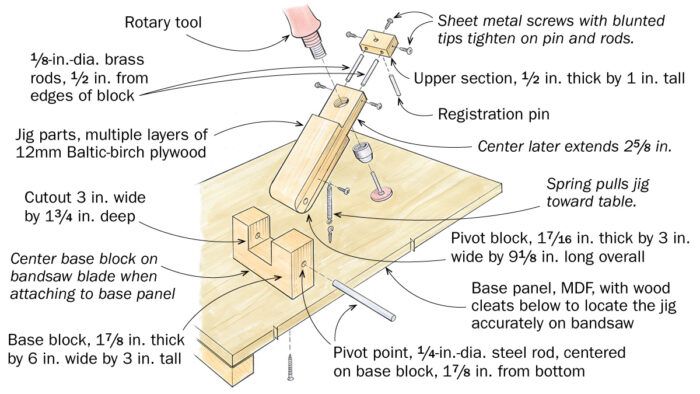
I prefer long-wearing, bi-metal bandsaw blades, but even these dull quickly with heavy use, requiring that you push harder and harder to produce a cut, which wears out bandsaw tires and bearings and causes the blade to drift offline. At that point you have three choices: You can buy a new blade, send out your dull blade for sharpening, or try to sharpen it yourself.
There are automated blade sharpeners, but they’re expensive and generally designed for bandsaw mills with blades 1 in. wide or wider. Like most woodworkers, I use a 1/2-in.-wide blade for general bandsawing. So I came up with my own jig.
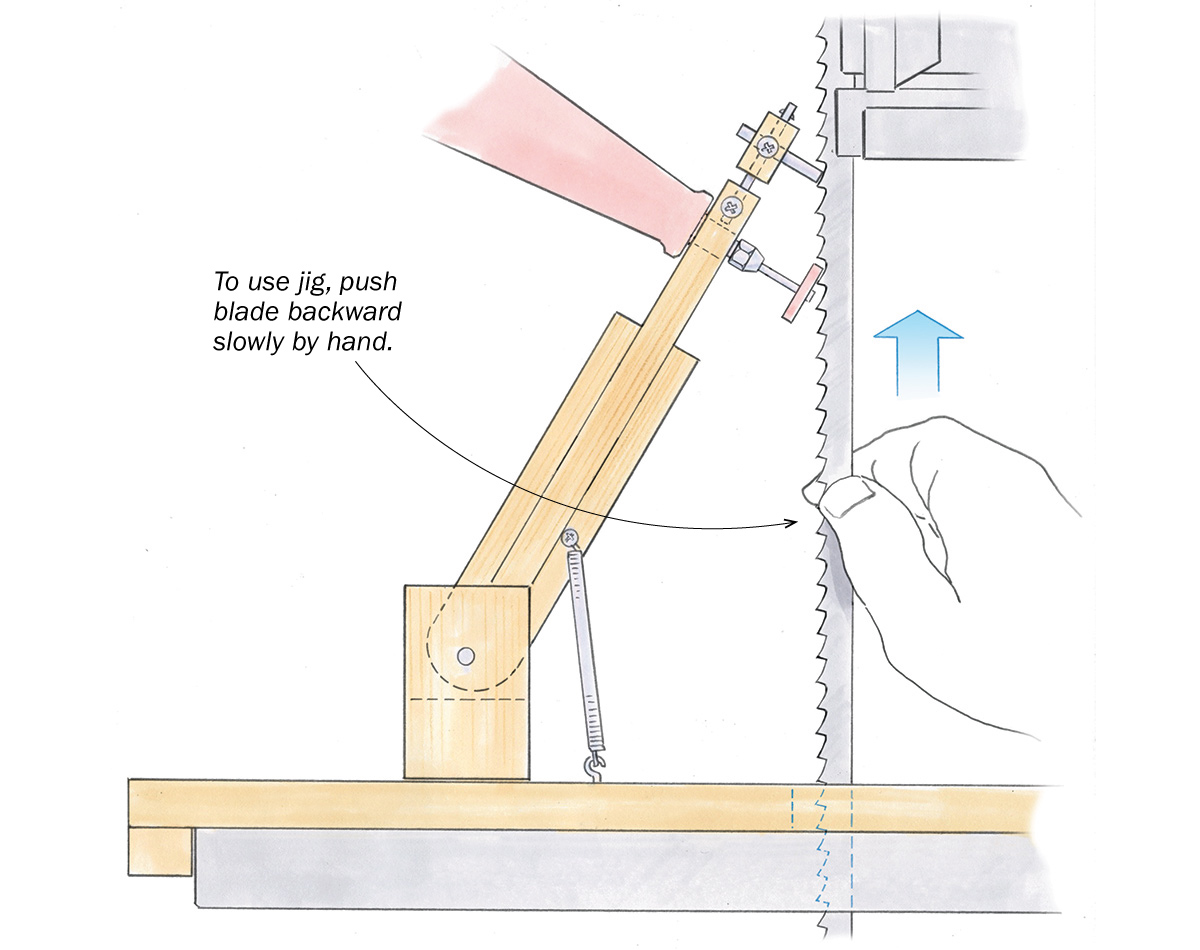
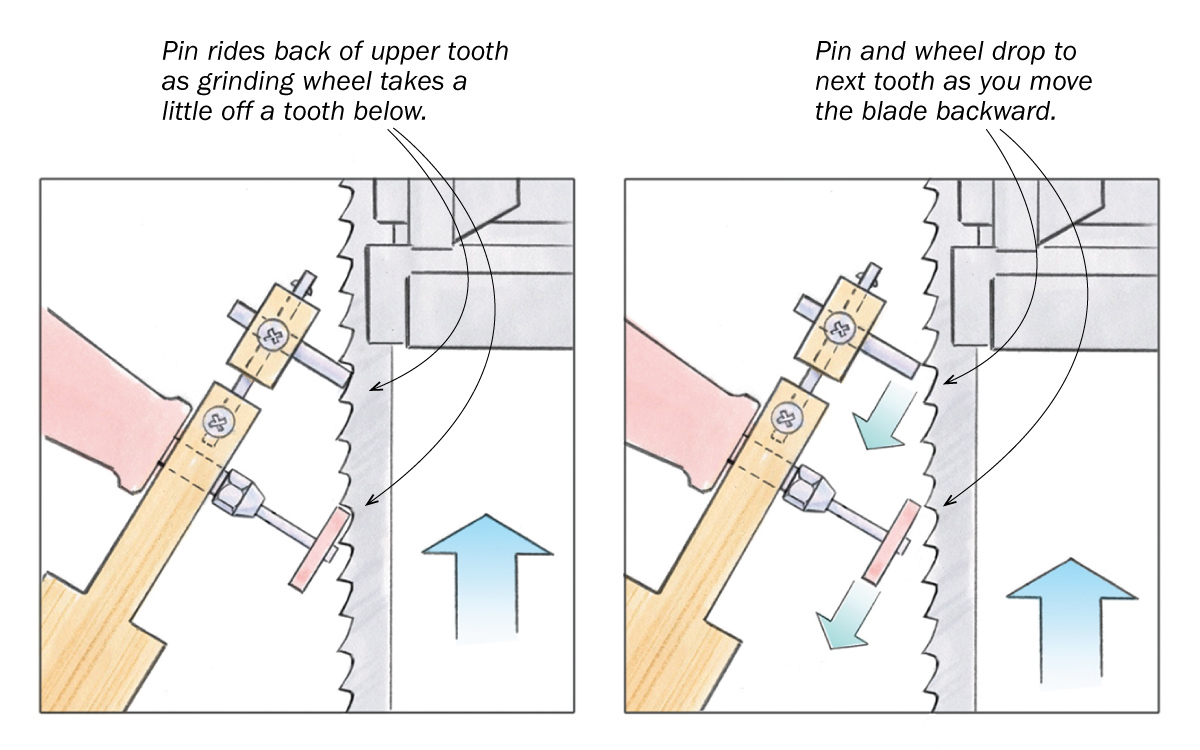
A bandsaw blade can be sharpened with a very light, shallow grind on the top edge of each tooth, which leaves the cutting geometry unchanged. My jig has a pivoting arm that holds a small registration pin and a rotary tool fitted with a small grinding wheel. When you push the blade upward, the pin follows a tooth above the grinding wheel, pivoting the arm and moving the wheel perfectly along the top edge of a tooth below. As you continue to move the blade backward, the pin and wheel travel down the top edges of the teeth, dropping from one to the next.
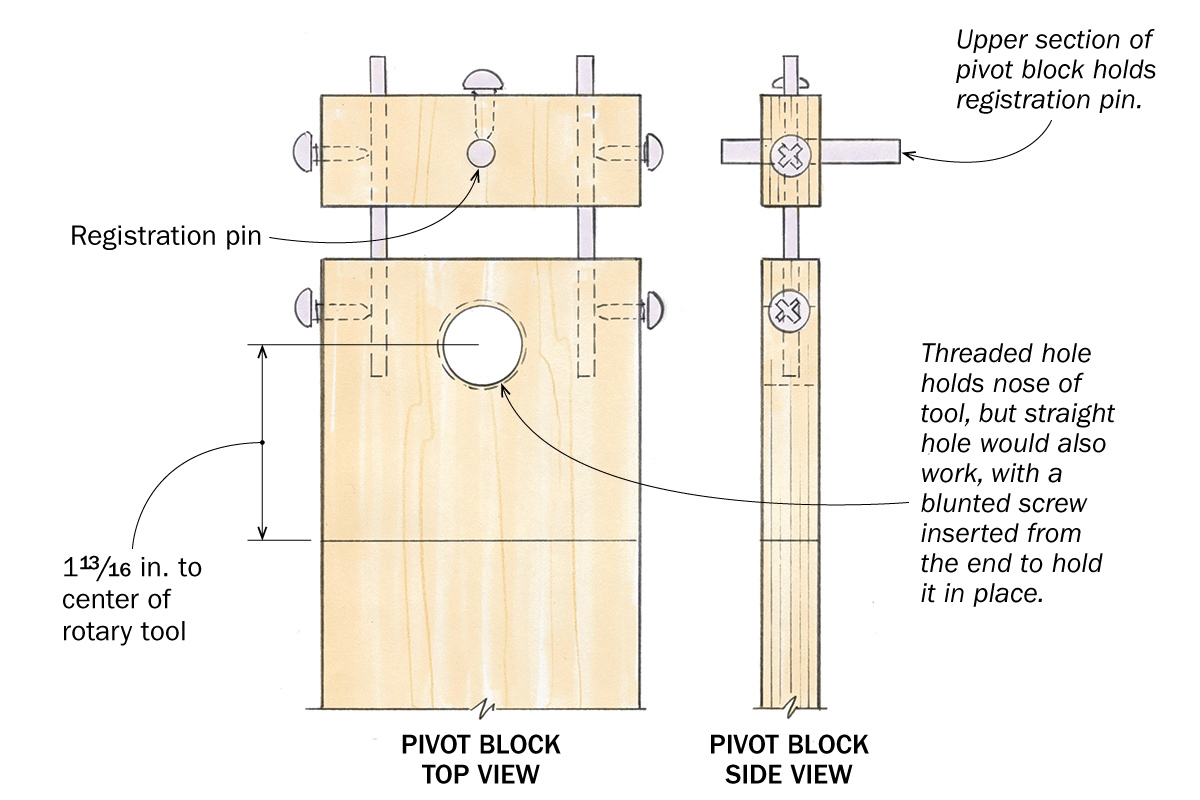
To attach the rotary tool to the pivoting arm of the jig, I unscrew its nose cone and cut the same threads in a hole in the jig, using a tap. Then I screw the tool firmly into the jig. Instead, you could drill a hole for the nose of the tool and use a blunted sheet-metal screw as a set screw to hold it in place.
A variety of small abrasive wheels will do the job. A small diamond wheel works best, as it resists wear, but a silicon-carbide wheel will also work well.
The jig has a number of built-in adjustments, which allow you to dial in the grinding angle for any type of tooth as well as the perfect offset between the registration pin and grinding wheel. Start by sliding the big base panel forward and back to change the angle of the pivoting arm and grinding wheel, and then clamp it in place. Then set the depth of cut by resting the grinding wheel against a tooth, touching the pin lightly against a tooth above it, and tightening the pin’s set screw.
Last, dial in the offset between the pin and the wheel by adjusting the upper section of the pivoting arm on its brass rods. The wheel must clear its tooth before the pin drops.
Using the jig
To use the jig, turn on the grinder and start moving the blade slowly upward. After the first sharpened tooth reaches the registration pin, you will likely need to readjust the pin slightly for the following teeth. After that, the jig will be set for all future sharpenings.
It takes some fiddling to get all of the adjustments dialed in, but once you do, nail a couple of cleats to the bottom of the base plate to locate it on the bandsaw table. Then you’ll be able to place the jig back on the saw with no adjustment and sharpen any blade in 10 to 15 minutes.
I can sharpen a blade three or four times before the geometry of the teeth is altered too much for them to cut effectively. That saves me money and time. The sharpened blade works like new.
—BRIAN NEWELL, Fort Bragg, Calif.
Illustrations by Dan Thornton
From Fine Woodworking issue #300
 |
Jigs for Smooth Curves on the Bandsaw |
 |
Taper Jig Combines Bandsaw and Planer |
 |
Uncommonly Sharp: How to Sharpen 13 Tools that Don’t Fit in Your Honing Guide |
Fine Woodworking Recommended Products
Rockler Silicone Sharpening Stone Tray

Honing Compound






Comments
This is genius, Brian! I would point out, after watching the video, that it's faster than changing the blade too.
Log in or create an account to post a comment.
Sign up Log in