Building the Morley Mortiser
Make strong, versatile, repeatable joints with a plunge router and slip tenons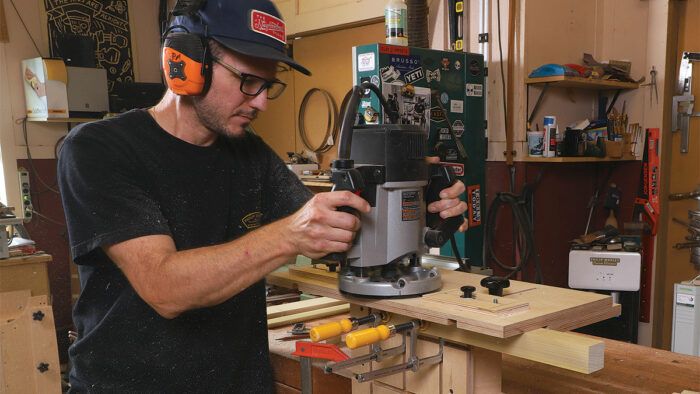
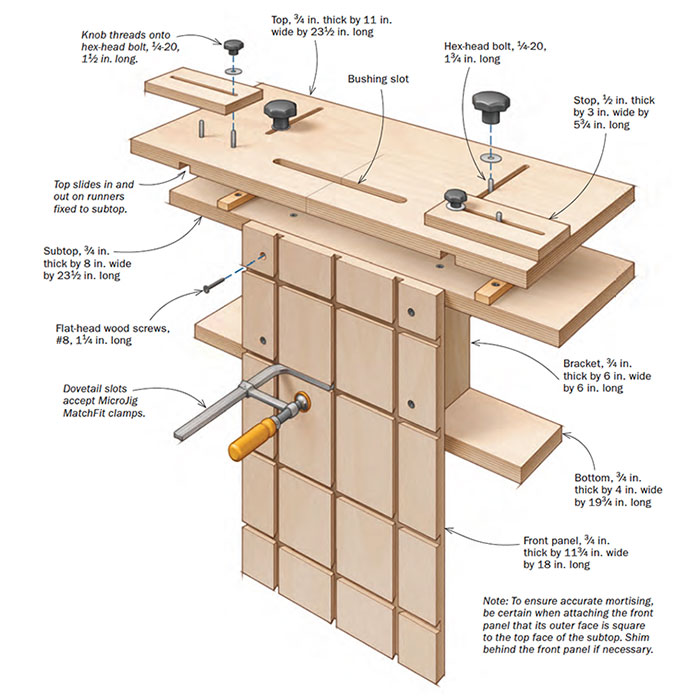
Synopsis: Create mortises with a plunge router with this universal jig by Philip Morley. The jig’s top moves in and out on runners, which makes positioning the mortises easy, and knobs lock down the top at the desired setting. A pair of sliding stops built into the top make it simple to set the length of a mortise.
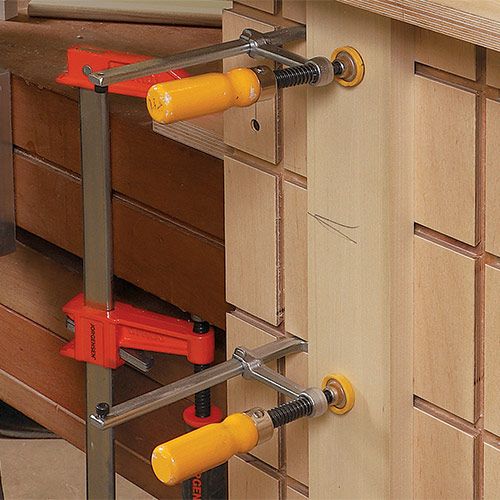
I designed this jig as an affordable and accurate way to create mortises with a plunge router, usually for slip-tenon construction. Because it uses a guide-bushing system, the jig is universal—it’s not specific to any particular router. The jig’s vertical front panel has a grid of dovetailed grooves to accept MatchFit clamps, so you can clamp the workpiece anywhere on it easily and securely.
The jig’s top moves in and out on runners, which makes positioning the mortises easy, and knobs lock down the top at the desired setting. A pair of sliding stops built into the top make it simple to set the length of a mortise. I create spacers for commonly used mortise lengths so I can set the stops quickly with no measuring. Centerlines on the spacers, the top of the jig, and the stops make setup simple, and make it easy to repeat setups precisely.
I use a 5 ⁄ 8-in. OD guide bushing and choose bits with enough extra length to compensate for the 3 ⁄ 4-in. thickness of the jig’s top. I find I get the best results using a 1 ⁄ 2-in.-dia. bit, or a 3 ⁄ 8-in.-dia. bit with a 3 ⁄ 8-in. shank.
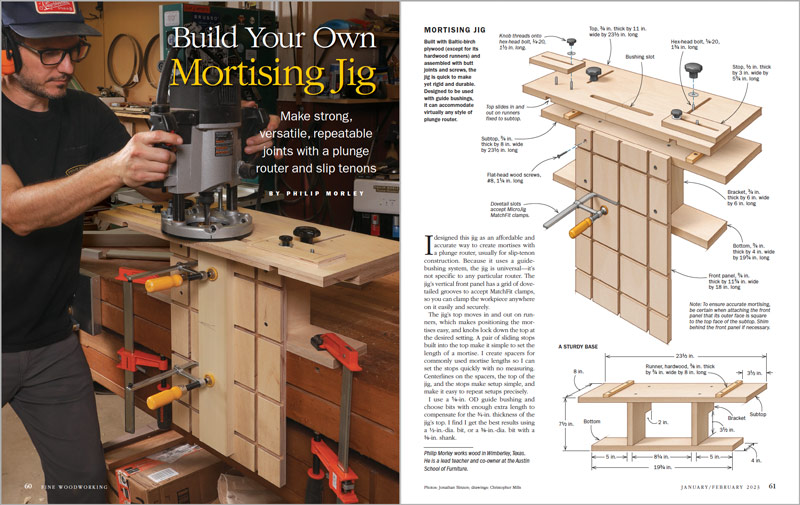
Mortising jig
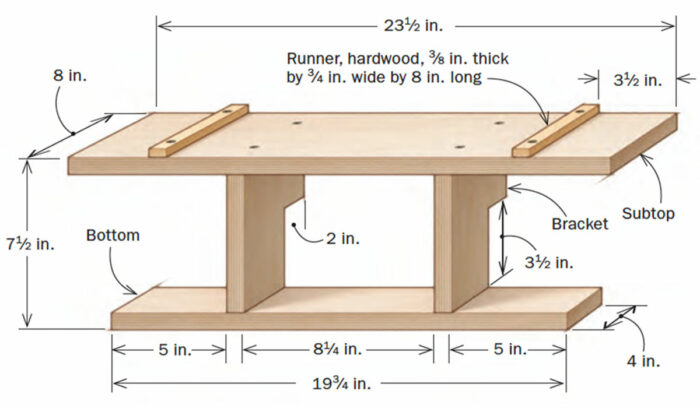
Built with Baltic-birch plywood (except for its hardwood runners) and assembled with butt joints and screws, the jig is quick to make yet rigid and durable. Designed to be used with guide bushings, it can accommodate virtually any style of plunge router.
Microjig MatchFit Dovetail Fixture and Jig Clamps - 2 Piece
- Clamp Capacity: 0 to 5-1/4"
- Clamp Pressure: 595 lb. open at 4"
- Minimum Dovetail Slot Length: 3-3/4"
- Dovetail Profile for Clamp: 1/2" x 14°
A sturdy base
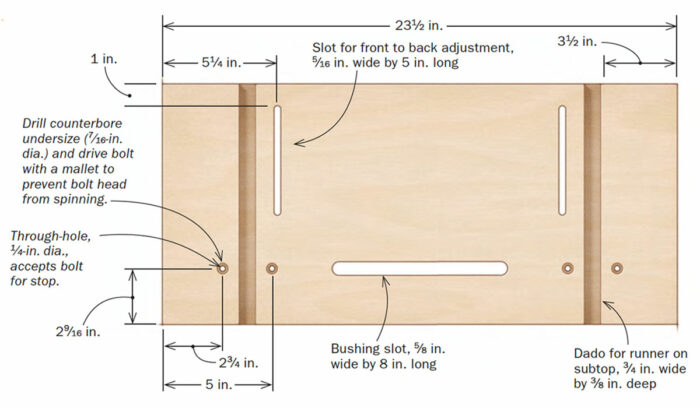
Top of the jig
Most of the jig’s critical machining is in the top, and it occurs at the router table. In preparation for that routing, be certain to saw out the top so its ends are perfectly parallel to each other and square to the front edge. Any error here will directly affect the accuracy of the jig.
Bottom view of top
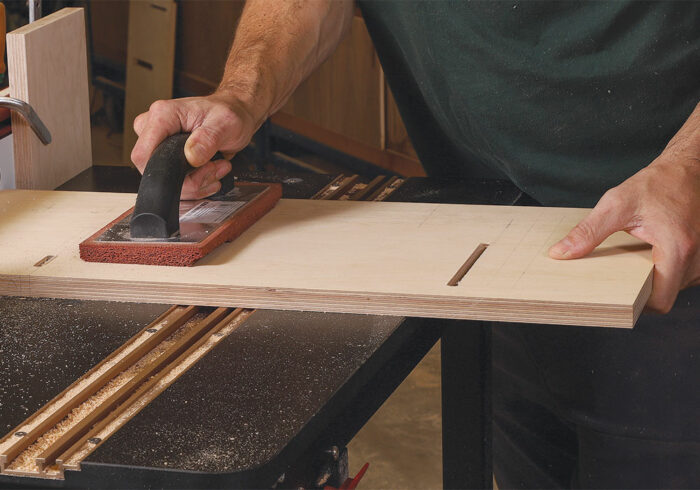
Twin slots in the top
To accommodate front-to-back adjustment of the top, rout two stopped slots for the threaded studs. At the router table, with a 5 ⁄ 16-in.-dia. spiral bit, cut the slots in several passes between a pair of stop blocks, lowering the workpiece onto the bit at the beginning of the pass and lifting it off at the end.
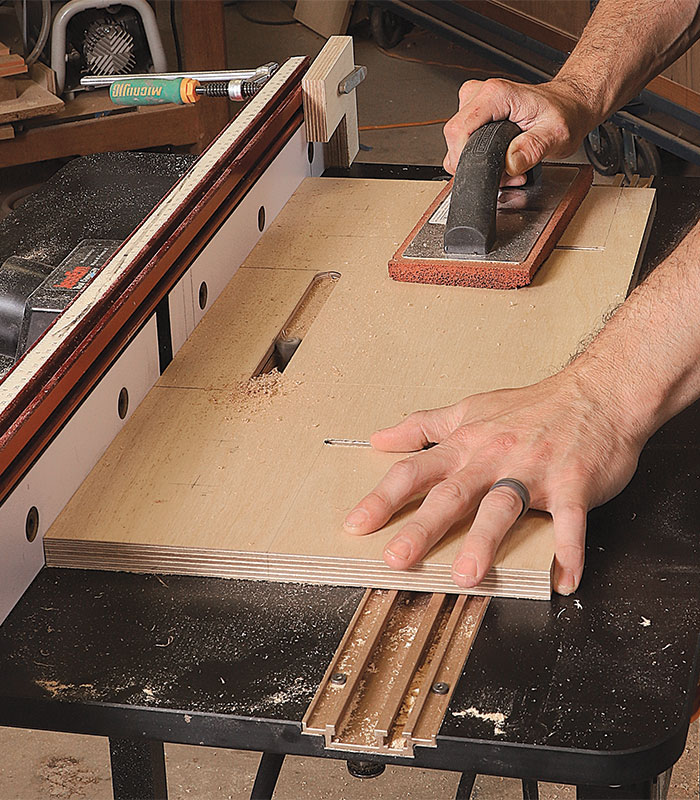
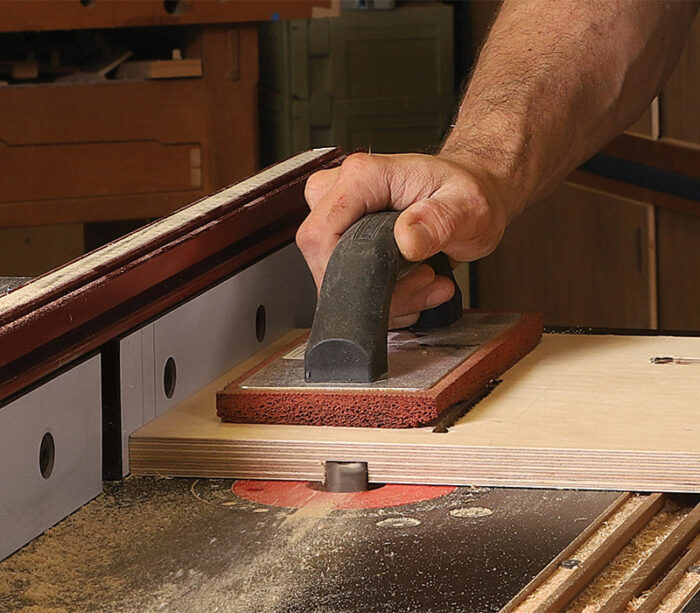
Single slot for the bushing
Use a 5 ⁄ 8-in. spiral bit to rout a stopped slot for the guide bushing. As with the adjuster slots, use stop blocks and make a plunge cut in stages.
Make ways for the runners
Cut 3 ⁄ 4-in.-wide throughdadoes in the underside of the top to accept the runners attached to the subtop.
Fix the runners to the subtop
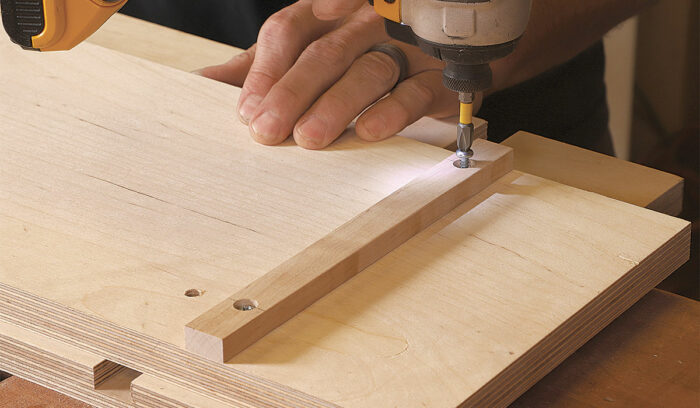
After counterboring and through-drilling the runners at the drill press, Morley attaches them to the subtop with pan-head screws. To locate the runners perfectly for screwing, he sets them in their dadoes in the top, applies double-sided tape to their exposed face, and sets the subtop in place, being sure the top and subtop ends and front edges are flush.
Clamping surface
The front panel gets dovetail slots to accept MatchFit clamps. You’ll be clamping your workpieces to this surface, so be sure the piece of plywood you select for it is completely flat.
Front panel
Philip Morley works wood in Wimberley, Texas. He is a lead teacher and co-owner at the Austin School of Furniture.
For more information and photos, please click the View PDF button below.
More from Philip Morley
 |
Benchmarks: The Source of Philip Morley’s Fascination with Jigs |
 |
It’s in the Details |
 |
Kerf-bent wall cabinet |





Comments
The article is not clear - is this jig limited to routing 1/2” wide mortises? Can I use this jig if my requirements call for only 1/4” wide mortises? I am assuming I cannot because of the need for extra length bits to accomodate the 3/4” thickness of the top. Is my assumption correct?
The mortises can be any width, as long as the bit fits inside the guide bushing you're using. The author chose a 5/8" OD bushing, so you could use 1/2", 3/8", 1/4", or smaller bits if you really wanted to. It's a pretty adaptable design.
I found another omission. There are hex head bolts that go through the subtop and then through the longitudinal slots on the top to adjust the overhang of the top as it rides on the runners fixed to the subtop. The illustration does not show where the bolts should be drilled and I can probably figure it out and use the bottom right photo on page 62 as a clue but the illustration and instructions fail to reference this important part of the instrutions.
I absolutely agree. I have both print and digital subscriptions, but neither address the positioning of the 1/4 20 bolts thru the sub top for riding in the slots cut in the top for forward and back movement. Like you, I am sure I can figure it out, but it should have been in the plans.
IS there a method using this jig to mortise at an angle?
No, not as designed.
Log in or create an account to post a comment.
Sign up Log in