A Seymour sideboard
Start with a really good photo, and all the details will fall into place.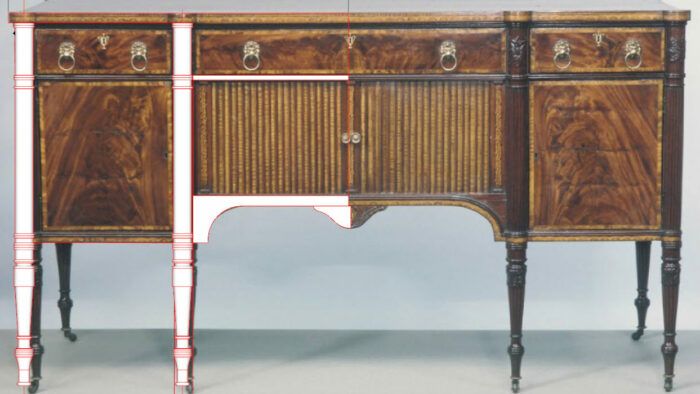
I’m starting a new project—very large—a Seymour sideboard. The one I’ve chosen is displayed in the Metropolitan Museum of Art. It is also shown in the book John and Thomas Seymour: cabinetmakers in Boston, by Vernon C. Stoneman (Special Publications, 1959).
As you probably know, I start my work in SketchUp, along with photographs. In this case, I was able to download photos from The Met’s website. Here is the main photo that I have been using with SketchUp. The photo is a good example in that it is practically a straight-on front view. This helps in getting component shapes. The book and The Met provide the overall dimensions as 26 in. deep by 73 in. long by 42 in. high. Knowing these dimensions, the first step in SketchUp is to import the photo and make it full size. Then I can begin tracing over shapes as shown below for the legs and other components.
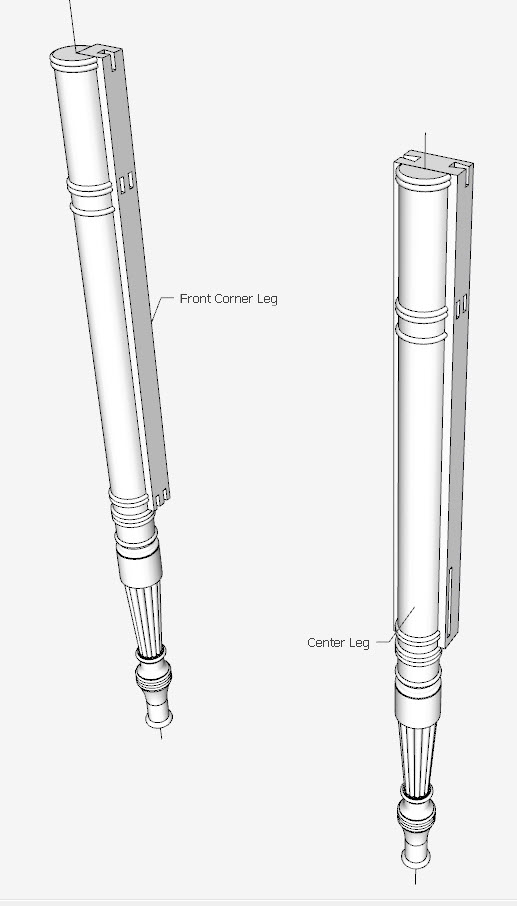
I wasn’t sure how to connect to these legs that are full-length round. As shown below, the upper part of the leg turnings will be routed out so that square-shaped fillers can be added. Sides and rails are connected to those square fillers with mortise-and-tenon joints. Here is a look at those leg assemblies.
A bottom portion of the legs is reeded. It is a several-step process in SketchUp starting with making one reed of 12 on a separate round section. First, I isolate the short section that needs reeds.
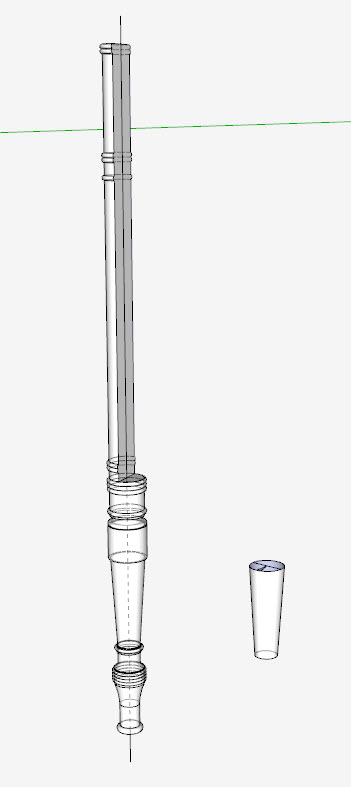
Next I make the shape of the 12 reeds then make that a cylinder.
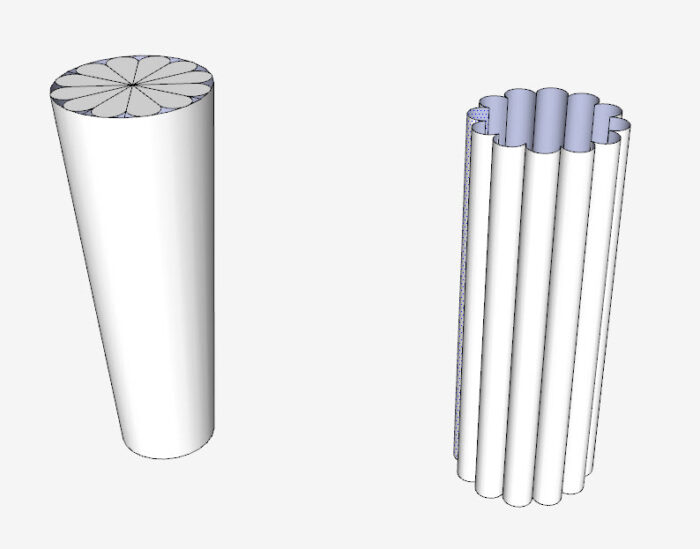
Here is a photo showing the cylinder and the smaller diameter that it should be when tapered.
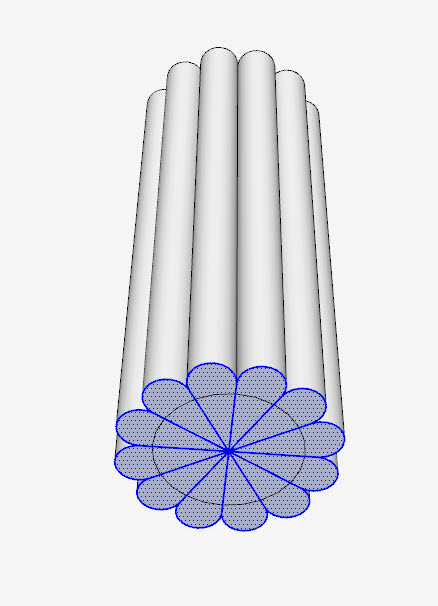
Using the Scale Tool, I reduce the bottom to the required diameter.
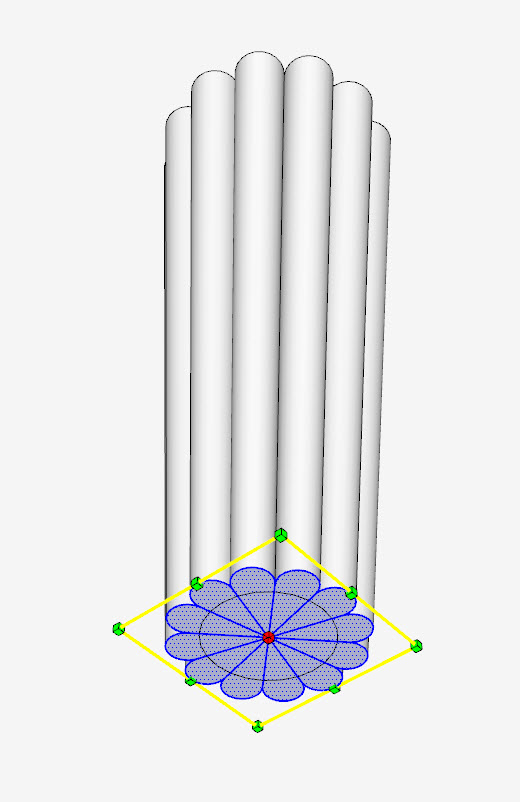
Then I add that reeded section to the rest of the leg components.
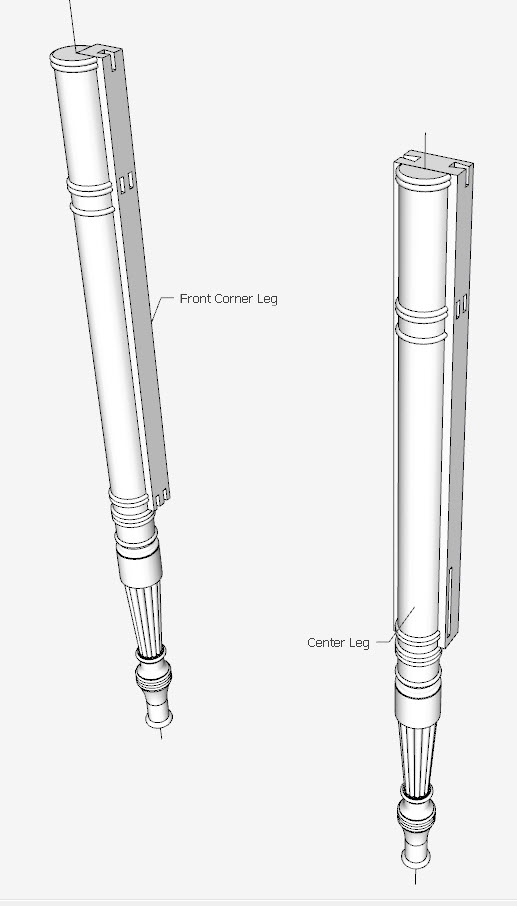
My first major milestone in development of the model is to get all the unique components defined and connected. However there is no joinery at this stage; pieces are just butted together.
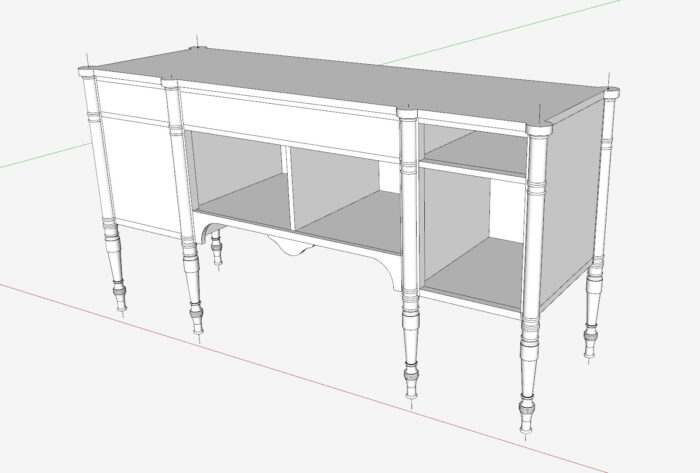
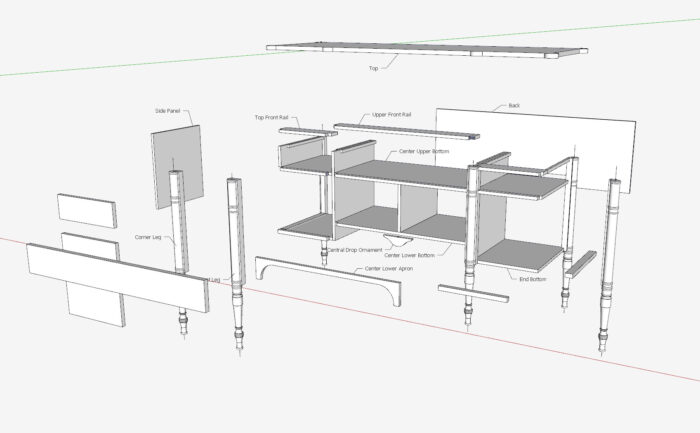
At this no-joinery stage, I also create an exploded view that shows the components with their identities.
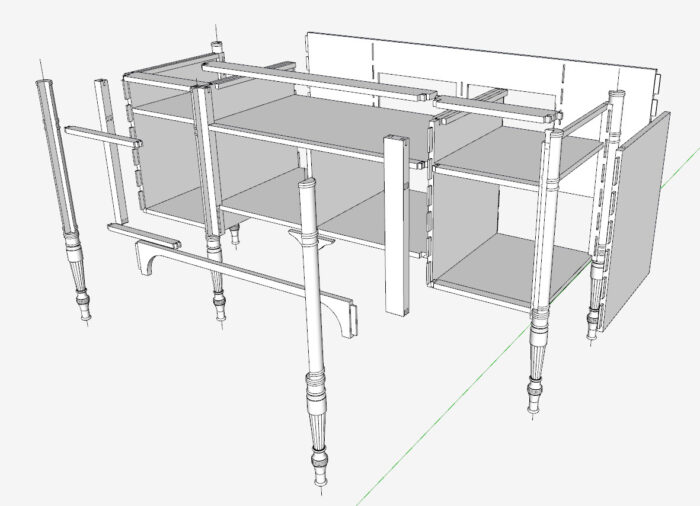
The next step is to develop all the joinery: mortise-and-tenon mostly, but also some dovetails in the upper rails. This joinery is typical for sideboards.
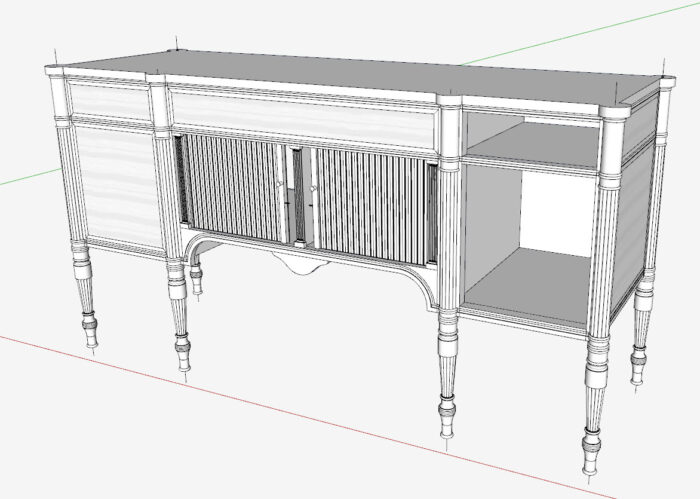
There is much more to go, especially in the tambour section. I quickly grabbed a copy of my tambour doors used for the Seymour secretary and bookcase that I made couple years ago. They don’t fit exactly but I will be able to retrofit them rather quickly.
Tim Killen
More from Time Killen
 |
Best photos for SketchUpWhen it comes to re-creating a design in SketchUp, perfect reference photos make all the difference. |
 |
Big piece with many small detailsWithin large structures come a number of very small details. Tim Killen identifies a few that demonstrate the ability of SketchUp to manage these intricate designs. |
 |
SketchUp to shop: 18th-century moldingTim Killen demonstrates how SketchUp helps him shape an 18th-century molding by hand. |
Fine Woodworking Recommended Products

Sketchup Class


Dividers







Log in or create an account to post a comment.
Sign up Log in