Build an elegant wooden bath tray
Easily adaptable to tubs of any size, this bath tray holds a phone, a glass of wine, a book, candles, or whatever you need.
Synopsis: Easily adaptable to tubs of any size, this bath tray holds a phone, a glass of wine, a book, candles, or whatever you need. The slats hold all the paraphernalia while allowing drips to fall through. The adjustable rails underneath keep the tray stable on the edges of the tub, and the whole thing is easily stored out of the way when not in use. Construction uses Domino tenons or slip tenons. The interior parts are attached with dadoes and notches, cut on the tablesaw. The adjustable bottom rails are screwed on.
I designed this bath tray for a friend’s birthday and called it “Settle.” She loves bubble baths so I built in everything she needs for a calming soak: a flat surface for a book or e-reader, pockets for tea lights, and a movable drink holder.
The slats are close enough to keep a glass steady and a phone from slipping into the suds, while allowing splashes to drain and dry. Underneath, adjustable rails stabilize the tray on the edges of the tub. When tub time is over, it’s easy to lean the tray out of the way.
This bath caddy is a simple, straightforward build. I used the Festool Domino for the frame joinery, but a number of other mortising approaches would work, as would dowels or biscuits. The interior parts are attached with dadoes and notches, cut on the tablesaw.
All parts are the same thickness
All of the parts for this project are made with 3 ⁄ 4-in.-thick stock, so mill everything to that dimension. Then you can cut all the parts to finished width and most to length; leave the slats and support rails a bit long for final fitting later.
Cut one extra blank for each part, in case you make a mistake when cutting joinery. You can also sand all of the parts ahead of time to at least 180 grit, leaving just a bit more sanding to do before final assembly. Sand the slats evenly, keeping their width as consistent as possible. You’ll be rabbeting their lower edges to create a tongue, which needs to fit into dadoes in the support rails.
Join the main frame
The first joints in the project are the slip tenons (Dominoes) between the end blocks and front and back rails, creating the structural frame of the tray.
Start by marking the orientation of the parts, and then mark centerlines at each joint location (a white pencil leaves clearer marks on walnut). The frame parts need to end up flush at their lower edges, so those are the faces that get layout marks, and those surfaces face upward when mortising with the Domino.
Insert the Domino bit for the 8x36mm tenons, set the fence to center the mortises on the end blocks, and set the depth for each cut. The tenons should project farther into the end block than into the rails.
The slats in the tray are supported by three rails that fit up into dadoes in the main frame. With the support rails milled to 3 ⁄ 4 in. thick, use one to dial in the width of the dado stack for a perfect fit.
Cut the slat joinery
The support rails get dadoes of their own, to hold the slats. But there’s a twist. The slats are just 1 ⁄ 4 in. apart, and if I made full-width dadoes for them, there would be a short, fragile, end-grain section between each pair of dadoes.
—Leah K.S. Amick is a furniture and product designer in Portland, Ore.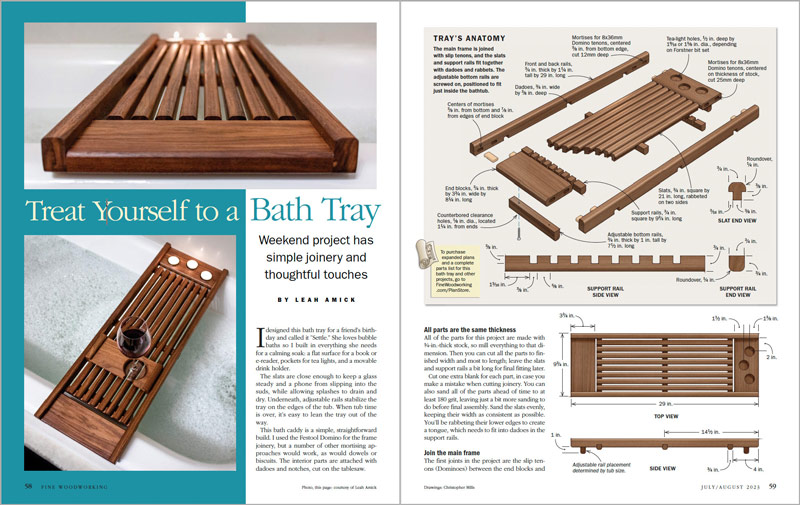
Photos, except where noted: Asa Christiana.
Drawings: Christopher Mills.
For more photos and information, click the “View PDF” button below:
 |
Stylish serving traysStrong, light, and graceful, they deliver breakfast beautifully |
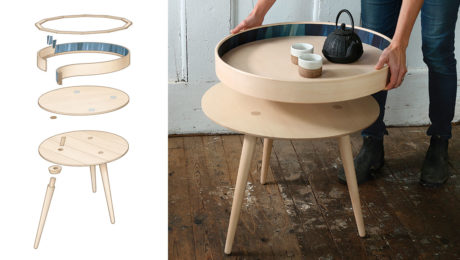 |
Transforming tray tableA removable parquetry tray transforms a simple, three-legged table. |
 |
From the archive: A serving trayHow to use up waste veneers and please the family as well |
Fine Woodworking Recommended Products

Suizan Japanese Pull Saw








Log in or create an account to post a comment.
Sign up Log in