How to hang a door
Tage Frid gives tips on installing an entry door and picking the right jamb.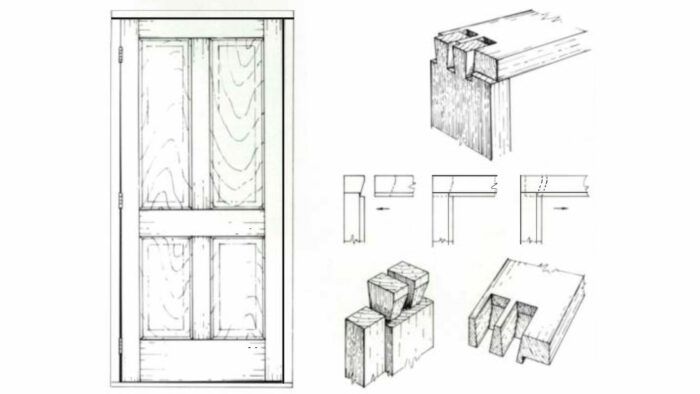
Originally titled “The Right Way to Hang a Door” in Fine Woodworking #9—Winter 1977
When I make a door I first make the doorcase (frame). I make the inside of the doorcase 3/16 in. larger in height and width than the door itself. If the door is to be painted, I allow a little more for the paint. I bevel the edges of the door a little toward the closing side, so that if dirt or paint should fill up the corners of the frame, the door will still close tightly.
If I am using two hinges, I place them approximately one-sixth of the height of the door in to the center of the hinge. With three hinges, I center one and move the other two out closer to the top and bottom. The hinges should be mortised half into the door and half into the frame.
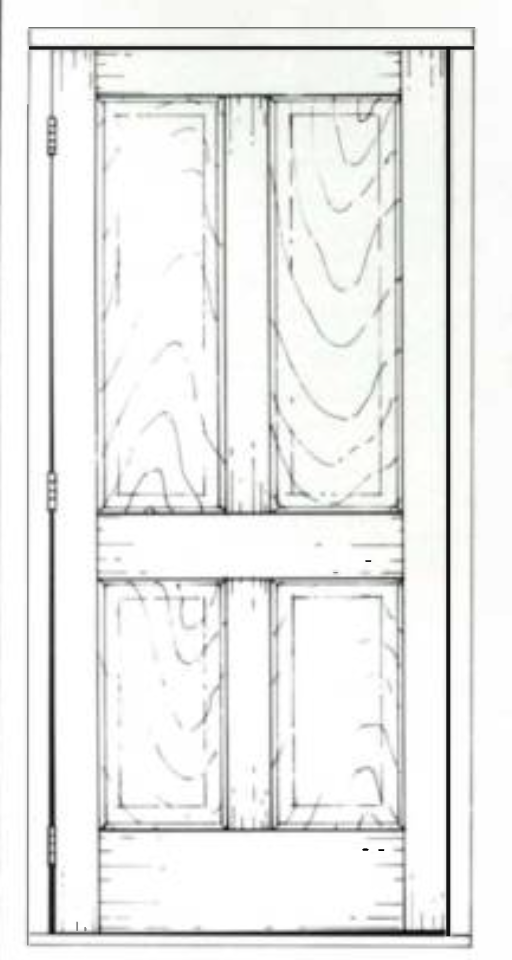
When fitting the hinges to the jamb, inlay the top hinge so that the door will fit tightly against the jamb when it is closed. But inlay the bottom hinge a little less, so there will be a gap of 1/8 in. or so in the back. Setting the hinges this way will leave the whole door cocked at a slight angle, which is much exaggerated in the drawing. The space will not be the same the whole way around. I do this because as a hinge starts wearing the door will begin to droop down. Hinges set as described will allow for this droop and the door will fit much better throughout the life of the hinge. It is especially necessary to do this with modern stamped and rolled hinges. You can see in old doors that haven’t been hung this way the extent to which drooping occurs.
When I install the door frame I have all the hardware—hinges, locks, latches—already installed in the frame. I use wood shingles as shims to level the frame and fasten the hinge side first. Then I hang the door into the frame, close it, and shim it until I get the spacing I want all the way around the door. Then I fasten the rest of the frame to the studs on the wall.
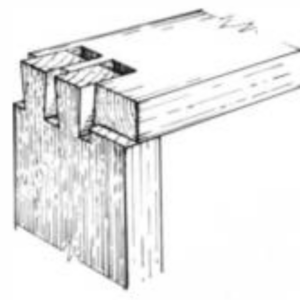
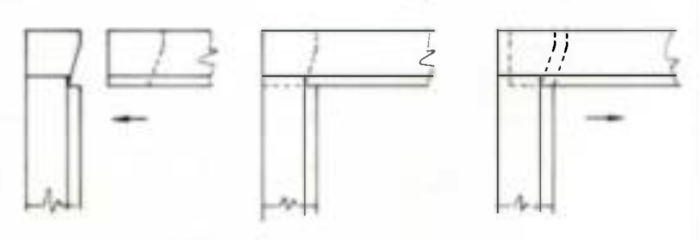
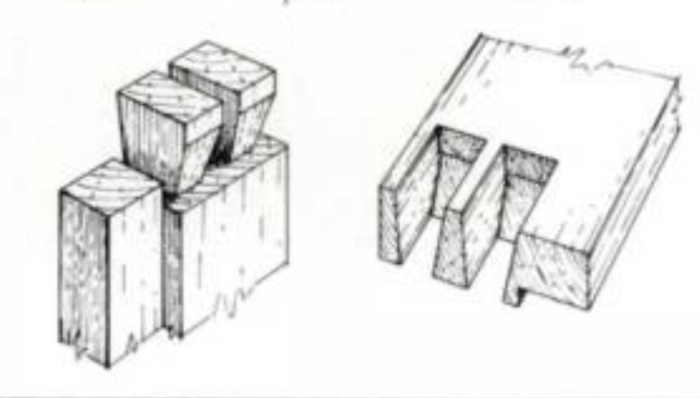
If I really want to do it right, I use a door-frame dovetail on all four corners, with the pins in the horizontal pieces. The joint is designed so that when you fit the door you can make the frame narrower or wider without a gap showing. Also, if the door should shrink or expand, I can take the outside molding off and wedge in or shim out the door frame to fit the door without getting a gap and without having to plane the door and refit the hardware. And this joint is much stronger than the usual method of nailing the corners together.
 |
 |
 |
More from Tage Frid
 |
How to use and make a sliding dovetail sawStep-by-step instructions on this hand-cut joint from a woodworking legend Tage Frid |
 |
How to make drawersDesign for drawing table illustrates the principles |
 |
Carcase constructionChoosing and making the right joints |




Comments
This is a super interesting look at old fashioned door hanging. Its also super outdated. I work for an interior finishing specialty store and half my job is hanging doors. Modern jambs, at least here in Canada, come with a nice rabet already cut on the top edge for the header to sit in, so you don't need any dovetails like this.
Its interesting how tight Taig's tolerance on the height is. We allow an inch gap on bottom for an unfinished opening or half inch for a finished opening. Dude leaves no wiggle room!
Log in or create an account to post a comment.
Sign up Log in