Easy-to-use featherboard requires no clamping
This featherboard sets up quickly and requires no clamps, using friction and a T-rail to keep itself in place.
A featherboard’s springy fingers hold work tightly against a table saw’s rip fence, providing greater accuracy and an added measure of safety. But it can be tedious to clamp a featherboard in the perfect position, requiring two clamps and some fussing to apply the right pressure to the workpiece.
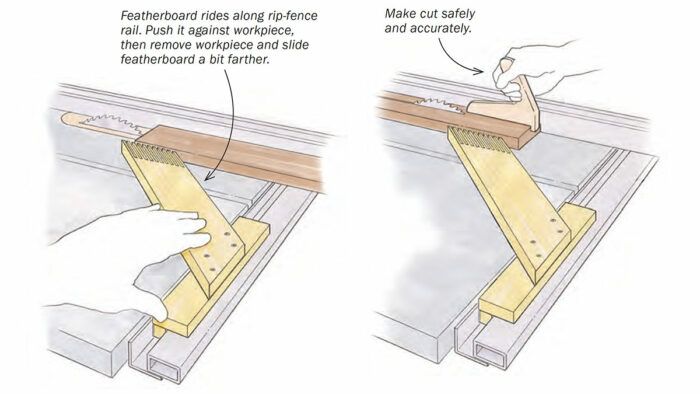
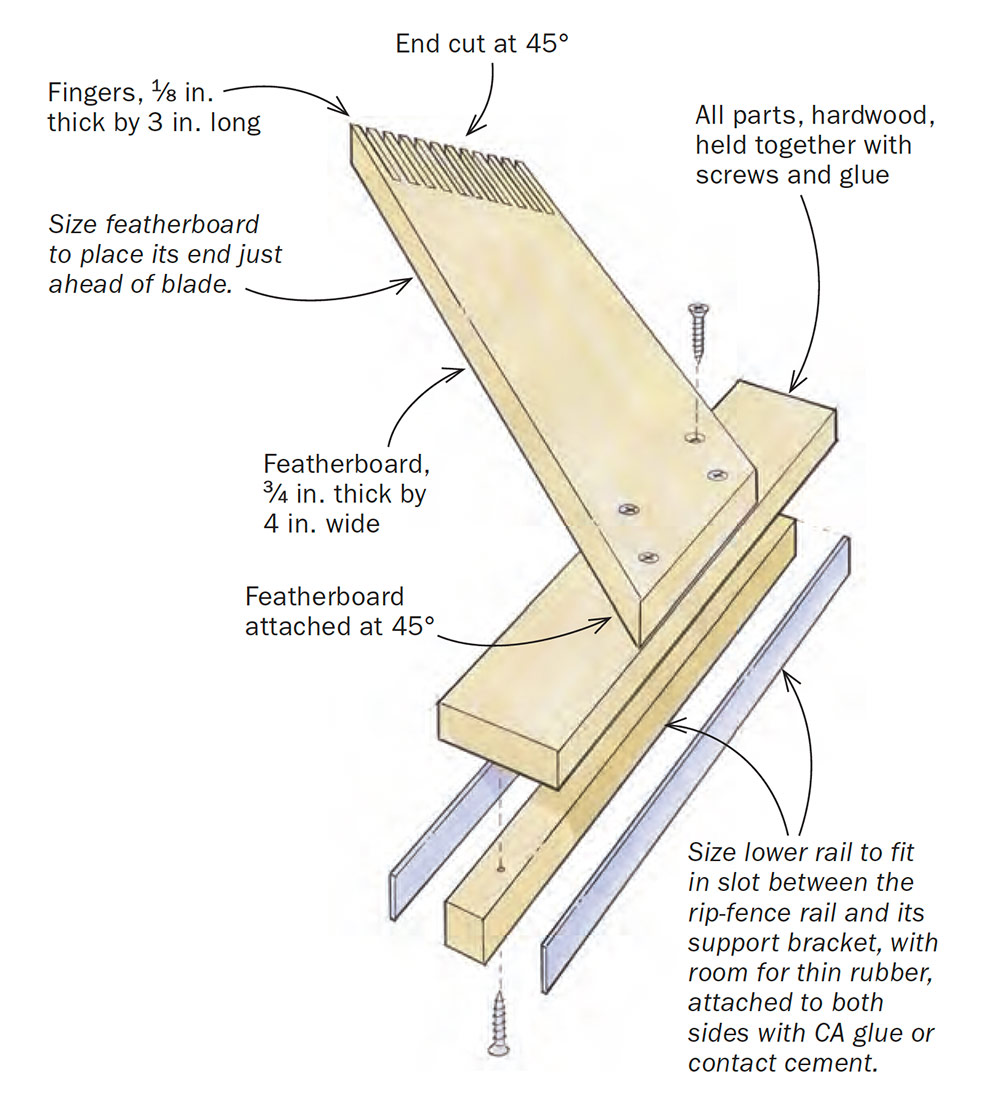
This featherboard sets up much more quickly and easily, needing only friction to keep it in place. The trick is a T-rail of sorts, which rides in the slot between the rip-fence rail and its support bracket. You’ll find this sort of rip-fence setup on most modern cabinet saws. The slots can vary a bit, so shape the featherboard rail to fit your saw.
The friction is created by thin layers of rubber attached to both sides of the lower rail on the featherboard, glued on with cyanoacrylate glue or rubber cement. I used rubber-stamp sheets, available on Amazon, but other types of thin rubber will do. Make the rail narrow enough to accommodate the rubber and still slide easily, without being loose.
You can make the parts from any straight-grained hardwood, and they are simply glued and screwed together. I used the table saw to cut the slots in the featherboard itself, but a bandsaw also works if the blade cuts straight.
Featherboards can be placed in a variety of positions relative to the blade, but I built this one for the most common spot, flat against the table, bearing on the workpiece just ahead of the blade.
Start by positioning the rip fence as needed for your cut. To set up the featherboard, simply slide it against the workpiece, and then remove the workpiece and bump the featherboard a little closer, so the fingers will flex in use, and pressure will be exerted.
—TOM LOKKEN, Kenmore, N.Y.
Illustrations by Dan Thornton
From Fine Woodworking issue #306


Log in or create an account to post a comment.
Sign up Log in