Throwback: How to Hew a Beam in 10 Steps
Tackle traditional work without aging your body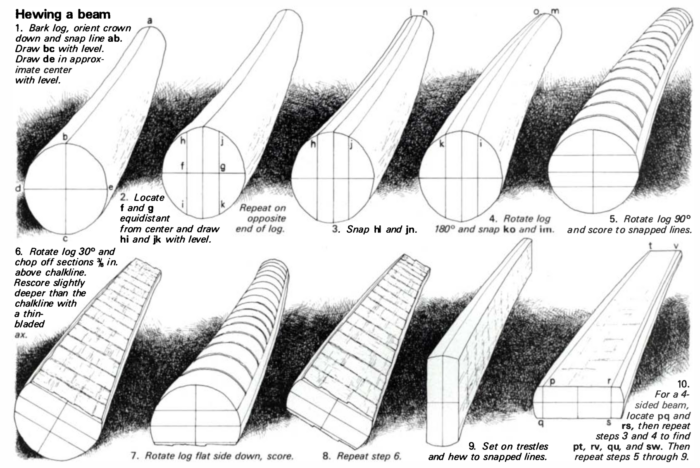
—This article is from FWW #21–Mar/April 1980.
Most areas grow at least one timber species that is suitable for log work. Some typical hewing woods include the pines, fir, spruce, redwood, tulip poplar, and oak, but you can also hew other woods such as black locust or maple. Within a species, certain trees will be more suitable than others. Knots add to the work involved, and the butt section of a tree is often much tougher than wood a few feet farther up the trunk. Most projects call for relatively straight trees. In North America, logs are generally worked green, but most European craftsmen prefer to hew seasoned logs, which are less likely to check, split, or warp.
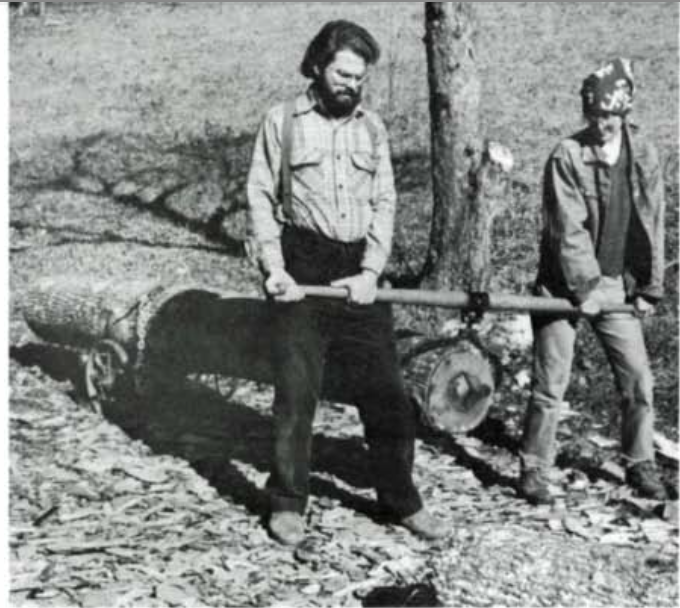
Before beginning, it’s important to be aware of the problems in dealing with a material as heavy as logs, which when green weigh between 40 lb. and 70 lb. per cubic foot. It’s often difficult to get a log moving, but when gravity takes over, the log becomes hard to stop. Always be careful when lifting or moving logs. Learn to use leg muscles, which strain less easily than the back. Make use of levers, fulcrums, block and tackle, and rollers. Large and small peaveys and cant hooks are almost indispensable. I like to lift and haul logs with a partner on the other side of a timber carrier. It consists of a pair of grab hooks that hang from a swivel in the center of a 4-ft. or 5-ft. pole. Each person lifts an end of the pole. The front end of the log is in the grab hooks between them; the far end is supported by a pair of wheels in a wooden truss.
Most log hewing is done with broad axes, but though they’re wonderful tools, you don’t need one to try hewing. In fact, some beginners find a 7-lb. to 10-lb. broad ax intimidating, awkward, and backbreaking.
The broad ax that I use has a 9-lb. head with a 13-in. cutting edge. An important feature of this ax, often not understood, is that the inside face of the head is not flat. The side curves along a horizontal line, forming an arc about 3/16 in. deep. This causes the ax to cut with a slight scooping effect. Vertically, the inner face is perfectly flat from the cutting edge to the poll. Broad-ax handles vary in length from 15 in. to 30 in. For most hewing techniques, the handle must take a radical bend immediately behind the head where the lead hand is positioned. This provides the necessary clearance between the hewer’s fingers and the log.
The method of hewing I use was developed by Peter Gott, an accomplished craftsperson who has refined his hewing technique and style during 18 years of log-building. Many hew by eye, snapping one or two chalk lines down a log, and then hew. This can be tricky because logs taper, bend, and bulge, making it difficult to eyeball a flat plane. Gott’s technique, which practically guarantees good results, uses a series of accurate pencil and chalk guidelines that are all perpendicular or parallel to one another, and can be used for hewing one, two, three, or four surfaces. Flat planes facilitate notch work, mortise-and-tenon joints, and other detailed refinements. You can also adapt Gott’s technique to carving and sculptural projects.
Begin hewing by barking the log. Some trees (such as tulip poplar) peel in large slabs; others require more work. Slash a narrow strip with an ax, then try to peel by inserting a barking spud or garden spade at the cambium. You can also ax off bark or use an extra-large barking drawknife.
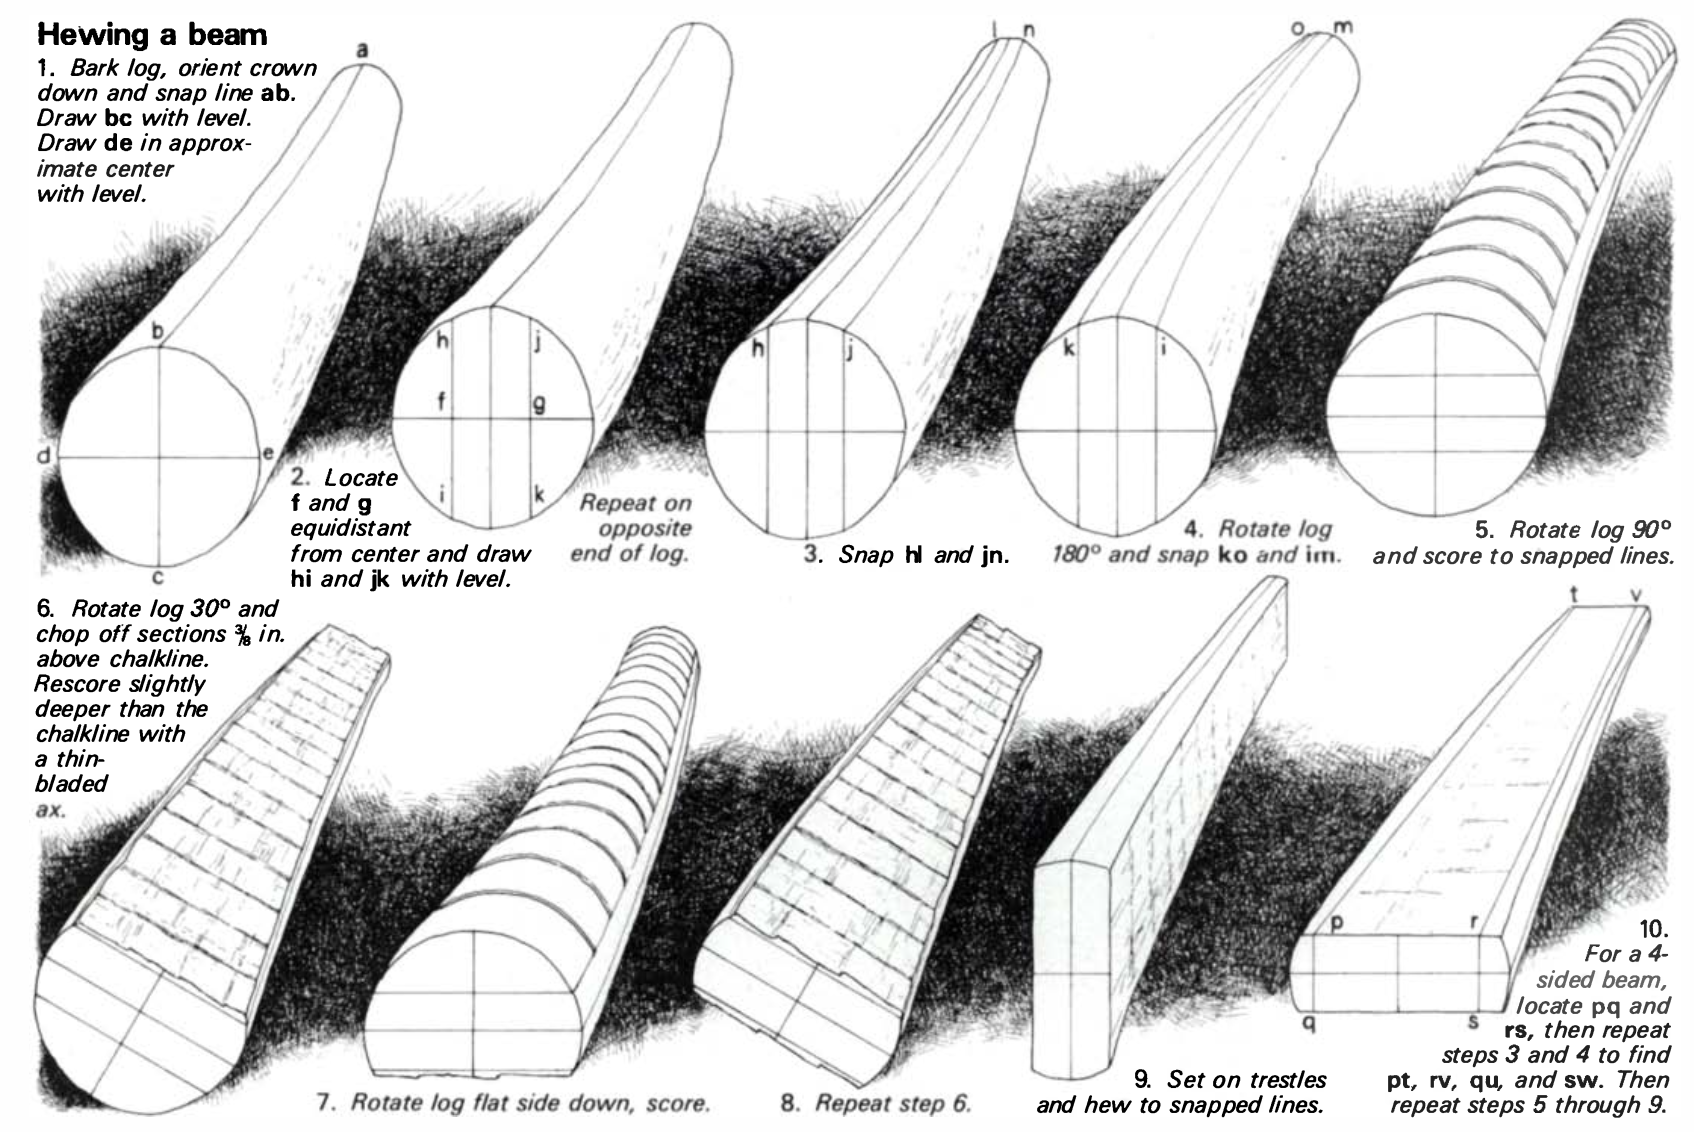
Move the clean log onto a pair of cribs (3-ft. to 4-ft. cross logs with center notches to prevent rolling). Sight the log from each end to determine dominant swag or crown, and, with a short peavey or cant hook, rotate the log so that it is crown down. Put an awl through the loop of a chalk line and stick the point into the approximate center of one end of the log. Reel out the line and stick a second awl into the other center, pulling the string taut. A chalk line snapped on a rounded surface can easily result in a curve. Avoid this by locating the angle for snapping the line with a vertically held carpenter’s level. This is particularly important when working on nonlevel ground, as it’s difficult to judge plumb by eye.
Draw a vertical line down the end of the log, using the level as a straightedge. Then draw a perpendicular line somewhere near the middle. Locate the edge(s) to be hewn by drawing vertical lines across the perpendicular line. (On a log to be hewn on two sides, these lines are equidistant on either side from the original vertical line.) Use your level.
When your lines are drawn, knife a small V-notch where they meet the side of the log. Repeat this procedure at the other end of the log. Snap new chalk lines along the length of the log to locate the hewing lines, using the V-notches to hold the chalk line in place. Rotate the log 180° (crown up) and snap parallel hewing lines along the crown.
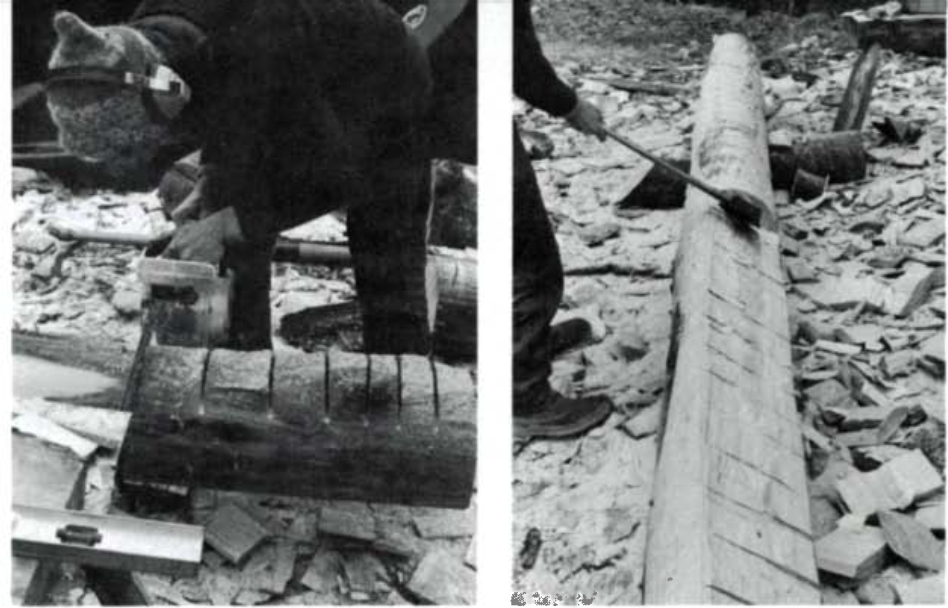
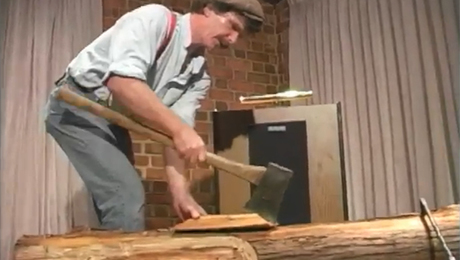
Rotate the log 90° so the side to be hewed faces up. Remove the bulk of the waste by first scoring to the hewing line every 8 in. to 24 in. on center, using a symmetrically beveled ax, a handsaw, or a chainsaw. Then rotate the log 30° and remove the end chunk, placing the ax edge 3/8 in. to the waste side of the chalk line and striking the poll with a mallet.
Continue down the log, splitting wood off and leaving the same 3/8-in. margin above the chalk line so the broad ax, which will be used to finish the surface, will have something to bite into. After you have removed most of the waste, chop another series of vertical scoring marks slightly deeper than the chalk hewing lines with a sharp, thin-bladed ax. These cuts should be about 4 in. apart; their pattern will show slightly after hewing is finished. Deep scoring prevents fiber from tearing inward, especially around knots, and is also more attractive than rough sawkerfs. Then flip the log and repeat the entire process on the obverse face.
Set the log on a pair of trestles about 30 in. high minus the diameter of the log (size of craftsperson and personal preference dictate different trestle heights). Place the log on edge, and temporarily hold it steady with makeshift wedges placed underneath. Use the level and a vertical guideline on one end of the log to adjust for plumb. A variance of a few degrees makes hewing considerably more difficult.
One traditional way to hold a log steady on edge is with hewing dogs—iron staples with one end driven into the log and the other into the trestle or crib log. Some large logs can be wedged upright, or you can wrap a chain with a light load binder (a lever and cam device used to tighten the chain) around the log and trestle. You can also improvise excellent bracing using 1x1s cut to various lengths and secured to the log and the trestles with box nails. With this system it’s possible to make any number of lightweight staples in dimensions as needed. They’re virtually free and have the advantage of being mainly wood; there is little chance of dulling an edge tool. I generally begin with two staples on either side of the far end of the log, and one nailed on the opposite side from where I begin hewing. On a long wobbly log I’ll set a fourth staple after I’ve hewn past the first trestle.
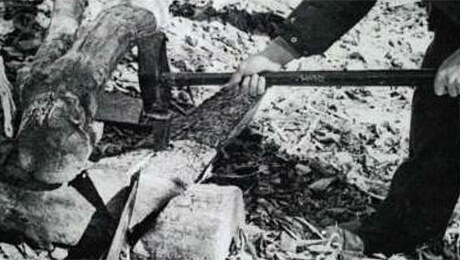
The hand grasps used in hewing are different from those used for chopping wood. The best hewing grasp consists of holding one’s accustomed hand immediately behind the ax head (thumb extended forward and fingers tucked close to the handle), with the unaccustomed hand somewhere near the handle end. Rather than lean over the log, I prefer to bend both legs, keeping my right leg well forward (something like an advance position in fencing, but not as extreme). I like to stand close to the log, so that my vision is straight ahead along the hewing line. I take short and deliberate strokes.
Carefully hew down the right-hand vertical guideline on the log end, with the length of the log in front of you. Start with short, careful strokes. Hold the ax slightly askew (outward) so that you chop a shallow bevel, trying to split the upper line, but stop after about 2-1/2 ft. Go back and hew straight down, concentrating on the area between the log and the inner side of your ax blade.
I hew about half to two thirds through from the upper line, then move on. It’s easy otherwise to break off wood along the bottom edge, or to go off plumb. Another advantage of not hewing straight through is that I’m continually hewing into waste wood, so the ax doesn’t fly free, throwing me off balance or out of rhythm.
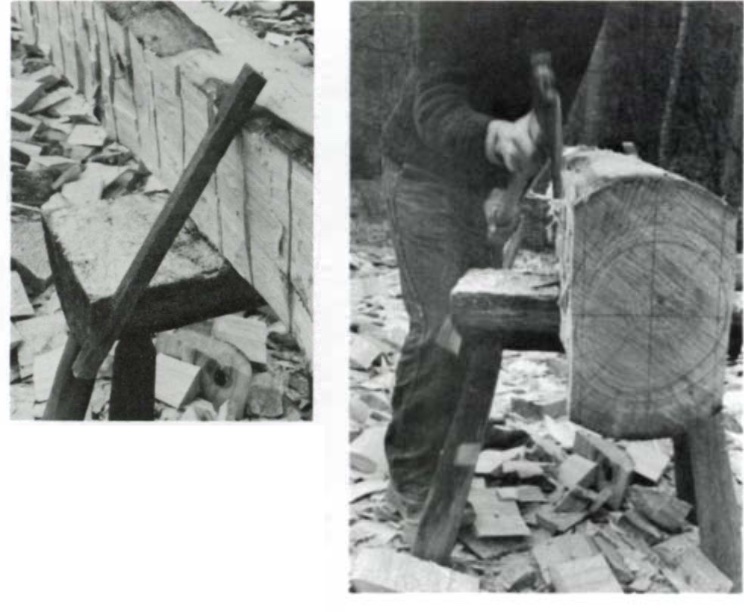
Hewing is a skill that combines muscular exertion with subtle accuracy. It’s important to find a steady rhythm. Hewing through knots takes extra muscle; extra scoring across and around them minimizes excessive tearing. Sliding your forward hand toward the middle of the ax handle results in more power. Try to remove thin shavings.
When I get to the far trestle I remove the staple and renail it at the first trestle, if one isn’t already in place. I carefully hew down the vertical end, stopping often to glance down the line. (It’s not visible from the hewing posture.)
In hewing two surfaces of the log, switch staples and work down the other side. Turn the log over, restaple, and finish hewing. For hewing a three- or four-sided beam, continue the same procedures. Chalk Lines for each side of the log can be taken from the original horizontal pencil line made when the log was round. Scoring the third and fourth sides is awkward, because it’s necessary to see both hewn edges while sawing. If you’re using a chainsaw, I recommend stationing a friend on the opposite side who can signal just as the cutters approach the chalk line.
Once you develop a feel, it becomes possible to hew fairly large slabs and to move along at a steady pace. In cool weather I hew one side of a 15-ft. log 15 in. in diameter in about half an hour. Seasoned experts are considerably faster. However, the total time needed to hew two sides of the same log, from initial barking and layout to final hewing, adds up to several hours. The job should be virtually perfect, requiring no touch-ups with an adze or slick.
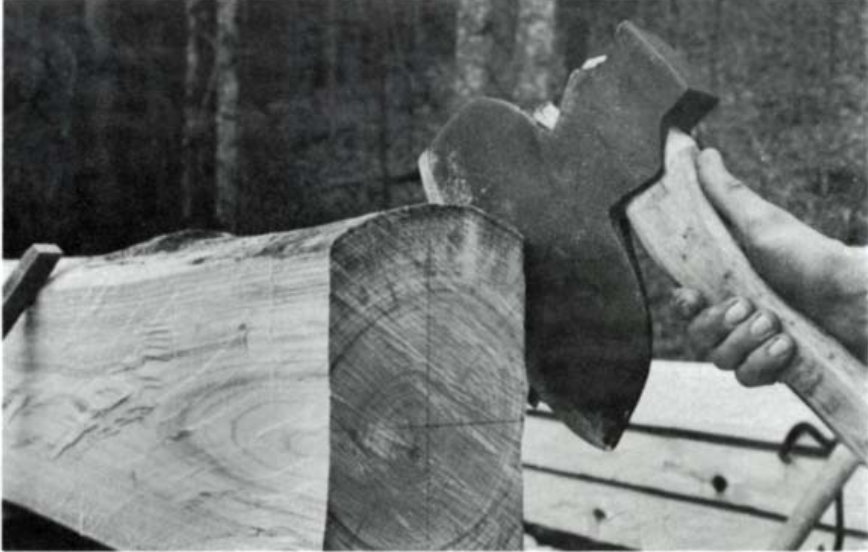
Photos: Tad Stamm
Fine Woodworking Recommended Products
Veritas Micro-Adjust Wheel Marking Gauge

Marking knife: Hock Double-Bevel Violin Knife, 3/4 in.
Veritas Wheel Marking Gauge




Log in or create an account to post a comment.
Sign up Log in