Build a workbench around a mechanic’s tool chest
A steel tool chest forms the skeleton of Thom Lipiczky's workbench.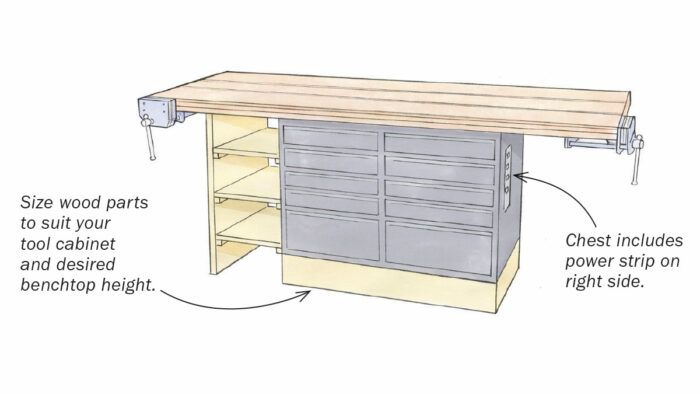
I made a really solid workbench by using a steel tool chest as the foundation. This was much easier than building a traditional base with a shopmade cabinet. The tool chest is the Husky brand from Home Depot, but there are lots of similar models on the market. Mine came with casters, a wood top, and a multiple-plug outlet on one side, which is very handy.
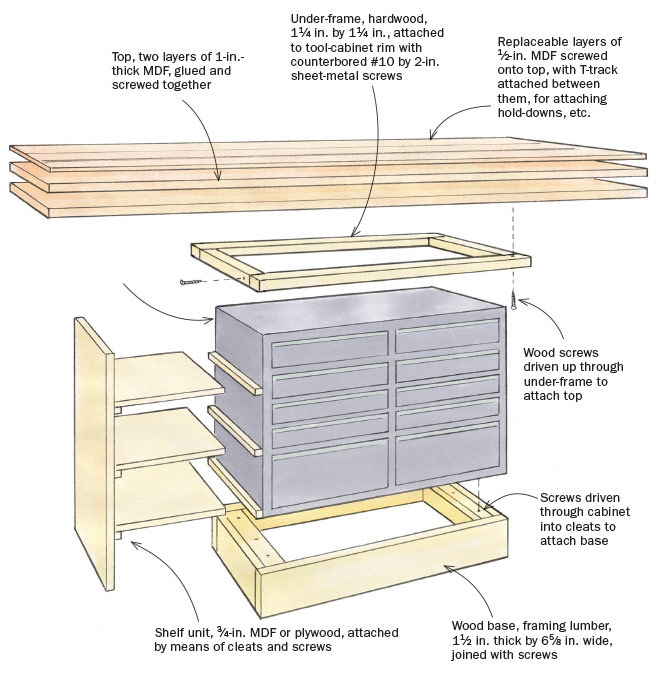
To make the workbench solid and stable, I removed the wheels on the tool chest and screwed on a wood base, made from framing lumber. Removing the wheels also let me add open shelving on one side, which is accessible from the front and back of the bench.
I made the benchtop by gluing together two sheets of 1-in.-thick MDF, with panels of 1⁄2-in. MDF screwed onto the top as a sacrificial top layer, separated by handy T-tracks. But you can add any type of top you like, and whatever vises you like also. To attach the top securely, I screwed a wood frame onto the outside edge of the tool cabinet, and then drove screws up through that.
Adjust the dimensions of the wood parts to suit your steel tool cabinet and your desired benchtop height. You can also paint the wood parts of the base to match the tool cabinet.
The finished workbench is solid, stable, and functional, with more than enough storage for hand tools, bench accessories, and more. It was very easy to make, and cost me $750 total, including the steel cabinet, vises, and wood parts.
—THOM LIPICZKY, West Stockbridge, Mass.
Illustrations by Dan Thornton
From Fine Woodworking issue #309




Log in or create an account to post a comment.
Sign up Log in