Throwback: Bending a tray
An experiment with lamination, an article from 1977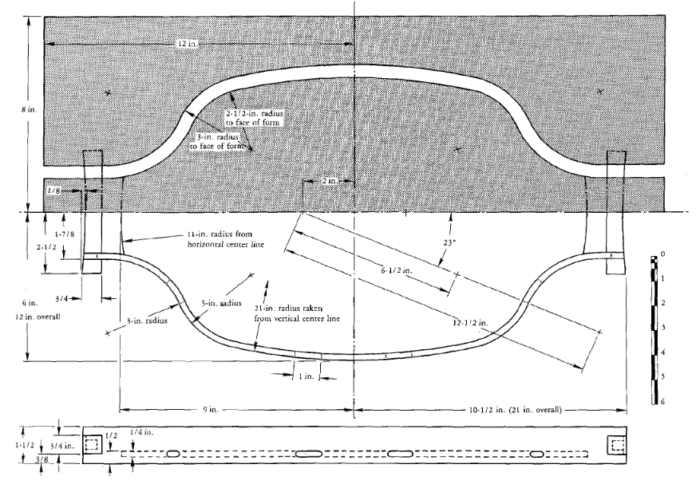
The serving tray described here is designed to introduce the woodworker to bending a simple lamination. The project is small and easily modified to suit your own taste, yet making it will give you the experience you need to apply the process to your own work. It can be made entirely with hand tools and clamps, although a table saw and a band saw or jigsaw are a great help.
The tray is symmetrical and combines a plan view of the work with the form layout. The curve is constructed by swinging a series of arcs with the centers and radii shown below. The important thing in making any two-part form is taking accurate account of the full thickness of the laminates and form liners. Because the curve of this project need not be absolutely precise, I have simplified the drawing process by using the outside line of the bent side as the face line of the concave half of the form. This means accounting for the total thickness of the liners on the convex half of the form. Where you need precision, you would construct the form drawing by dividing the total= thickness of the liners, half on each side of the piece itself. In any case, you need a full-size shop drawing from which to make the form.
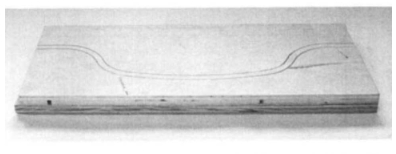
The bottom panel of the tray, shown in the photo at the top of the next page, does not lend itself to solid wood construction and is best made of good-quality plywood; I used 1/4-in. birch ply. The handles are of walnut and the sides are four laminations of 1/16-in. mahogany. This thickness turns the 3-in. radius well and the four layers are enough to minimize springback. Commercial veneers of 1/28 in., 1/30 in. or 1/40 in. could be used, but they are not the best because they often acquire lumps and bumps during glue-up. If you can’t find thicker veneer, you can saw it from an 8/4 board on the table saw, using a hollow-ground planer blade or a carbide-tipped blade. Resawn stock might require five thinner layers to produce the 1/4-in. thickness, because it does not always bend as easily as sliced veneer.
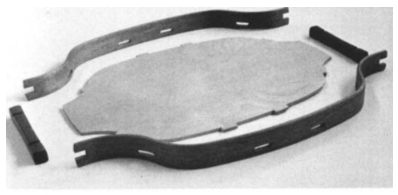
To line the form I used four layers of 1/16-in. Formica, two on each side of the laminates, and the package totaled 1/2 in. You need to prepare your stock and form liners and measure the package before you can draw the line for the second half of the mold. Instead of plastic laminate liners, you can use an extra layer of veneers, springy metal, or, for shallow bends, Masonite. But if the material is bondable remember to insert paper or to wax the liners, or the whole business might just stick together.
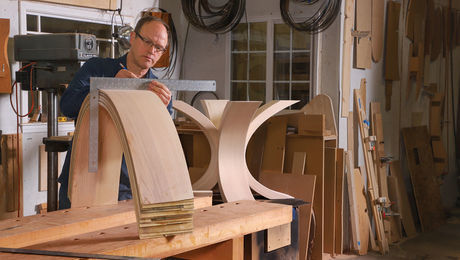
The form shown above, bandsawn but with the waste left in place for the photograph, is made of two layers of 3/4-in. veneer-core plywood. You could use particle board, a stack of Masonite, or even 2×10 lumber. But it is better to avoid solid wood with a strong grain pattern because the band-saw blade will track off the pencil line with variations in the density of the wood. Make the form as thick as the finished height of the bent sides, in this case 1-1/2 in., and make the stock to be bent a little oversize, perhaps 1-3/4 in., to allow for misalignment in gluing.
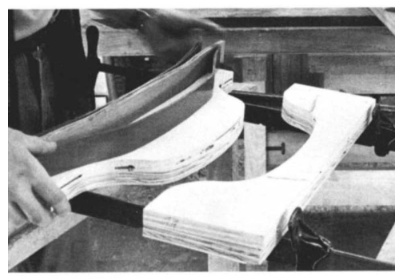
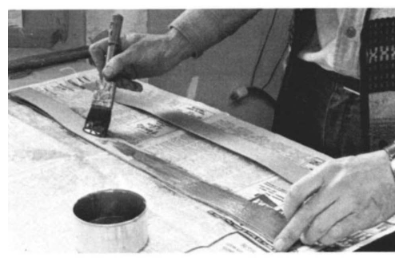
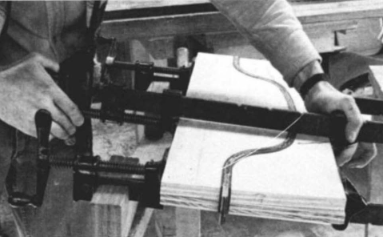
The glue I used was American Cyanamid’s Urac 185, which is excellent for laminating but unfortunately is sold only in industrial barrels. You could use Weldwood plastic resin glue or Cascamite, both of which resist water, or even Franklin’s Titebond (yellow glue) if you don’t mind a little springback when the wood is removed from the form. But avoid whiteglue as it doesn’t resist water and it creeps. Arrange the form on the clamps as shown, and double-spread each glue line with brush or roller. With the stock and liners in place, alternately tighten the center clamp and the two end clamps to bring the two halves together. A little glue should squeeze out all along each glue line. Tap the form with a hammer to keep everything aligned in the same plane. When doing any kind of laminating leave the clamps on overnight, longer if the workshop is chilly.
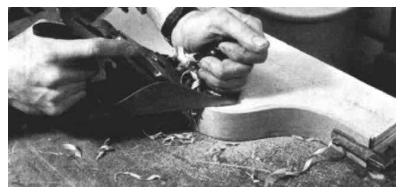
When both sides are glued and dry, clamp the wood to the convex half of the form, clean off the glue with an old rasp, and use a smooth plane to level one edge, as shown below. Turn it over so the finished edge rests flat on the bench and rasp and plane away whatever sticks up above the form to reach finished width.
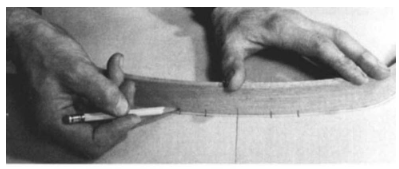
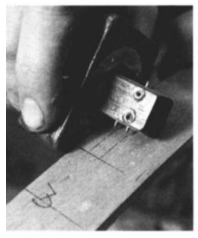
Now carefully mark off and cut the sides to length. The tray bottom is held in the sides by four tabs in mortises, and the mortises are a little wider inside than outside. One mortise on each side will have to be pared at assembly in order to snap the bottom into place. The easiest way to lay them out is to place the side pieces on the shop drawing and transfer the marks, on both the inside and outside, and square them across the wood. The width of the mortise is laid out with a double-pin marking gauge, or a single one set twice; check the thickness of your plywood because commercial stock is noted for being only approximately 1/4 in. thick. The tabs must fit tightly.
 |
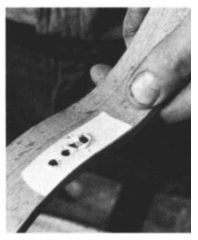 |
I used an eggbeater drill with a twist bit to take out the waste, starting with the two end holes and then the ones in between. Use a bit a little smaller than the tab thickness because the holes may wander and it is easy to clean up to size with rattail and straight files. Put masking tape on the back before drilling—it will minimize splitting. This joint is a through mortise and tenon, and I made the ends of the tenon flush with the outer surface and sanded all the edges slightly round. There are variations. The mortise could be squared off instead of being left round from the drilling, or the plywood tabs could be extra long and pinned with a tiny wedge to emphasize the joint. Or the tabs could be eliminated entirely by fitting the bottom into a shallow groove cut all around the sides with a scratch-stock.
 |
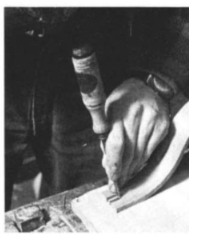 |
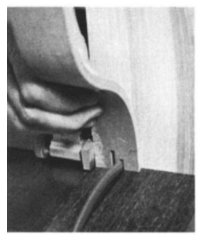
The other joints to be cut in each side are the slots for the handles. I made them 3/8 in. wide and 3/4 in. deep, cutting the sides with the piece held vertically on the table saw and then chopping the ends with a chisel. Then I used a small spokeshave to round the top and bottom edges of the side pieces to a radius of about 1/8 in. It is best to put a radius on an edge like this, to accommodate wear.
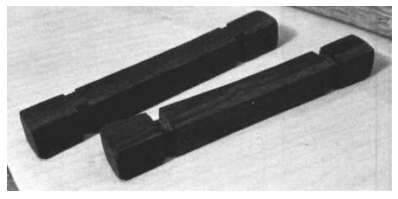
I cut the matching dadoes in the handles (bottom photo) while the stock was still square, taking care to get a good fit as there is not much area for long-grain gluing. Then I rasped the handles slightly concave to give a better feel to the hand.
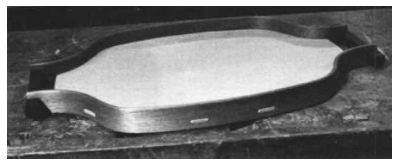
The next step is to lay out and cut the plywood panel. The way to deal with variations in the side curves is to fit the sides and handles together. Place the assembly on the plywood, and carefully trace around both the inside and outside. The plywood piece is 18 in. long and the arc on each end is swung from a center 11 in. away. Since the tray is small enough to be easily picked up, both the top and bottom should be sanded and finished carefully. Start with 80-grit on the plywood and 50-grit on the solid parts, and sand through 120-grit and 220-grit on all surfaces.
The plywood bottom should be finished with lacquer or polyurethane to resist food and drink, and the sides and handles with oil to resist knocks and chips. I’d recommend putting masking tape on the tenons and finishing the plywood before assembly and rubbing on the oil after assembly. If you put lacquer or polyurethane on the sides and handles as well as the bottom, do it before assembly. But mask all the spots that will have to accept glue.



Log in or create an account to post a comment.
Sign up Log in