Build a Pair of Powered Bookshelf Speakers
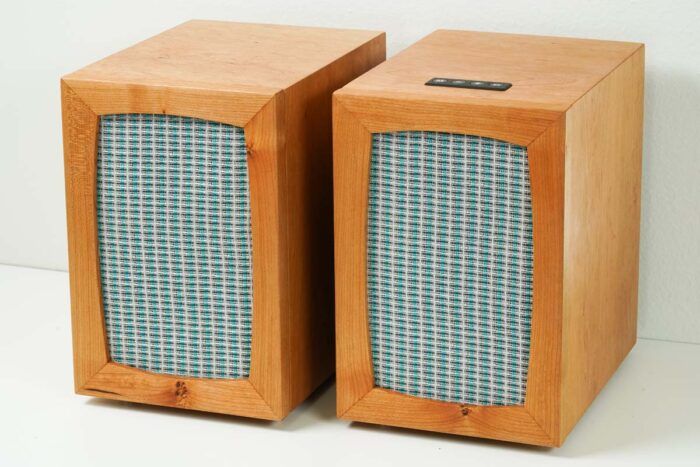
This pair of speakers was included in a larger article by Andrew Gibson in FWW #312 titled, “Build Your Own Speakers.” The main project in the article, however, was a pair of high-quality “passive” speakers, which are wired to a stereo amplifier or receiver as part of a high-fidelity audio system.
For space reasons, step-by-step instructions were provided only for the main project. We’re happy now to share as an online extra the process for making the great-sounding “powered” speakers pictured here.
 |
 |
 |
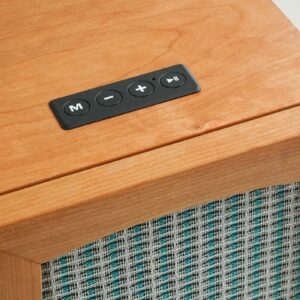
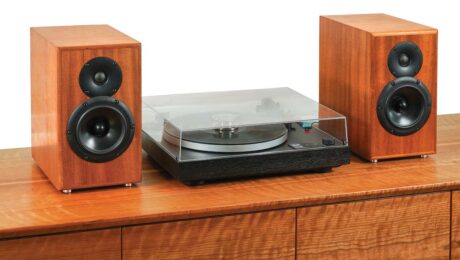
Powered speakers for the home or workshop. The components for these bookshelf-size speakers include a small amplifier and both wired and Bluetooth connections, so the speakers can be connected directly to a TV, phone, or computer. To demonstrate another design option, Gibson added grills to these speakers.
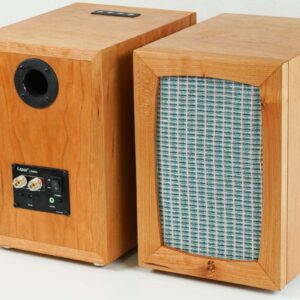
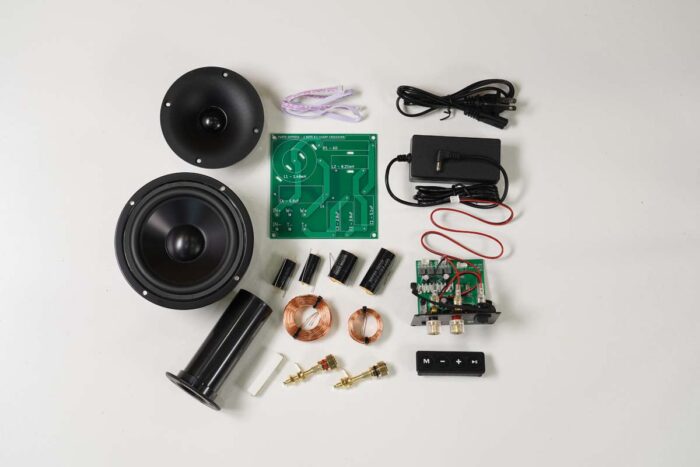
Electrical components come in a kit. The electrical components used to make these speakers are included in a kit from Parts Express (the “C-Sharp” speaker). The kit also includes MDF parts for the speaker boxes, so Gibson purchased the electronic components separately from Parts Express to avoid the extra cost for box parts he was planning to build himself. The small amplifier and control panel are built into just one of the speakers (parts for that speaker are shown here).
Another take on speaker design
Like the passive speakers featured in the magazine article, these powered speakers are made with veneered MDF panels for good looks and optimal acoustic performance, and the sides are joined with tight miters. But the front and rear panels are rabbeted to form tongues, which fit into grooves in the sides.
For this box design, I went with cherry veneer, with 1/2-in. MDF as the substrate. As they are in the passive speakers, the corner joints are miters, but the front and rear panels in this project are glued into grooves this time, not rabbets. So the front and rear edges of the box sides must be edged with solid cherry before veneering.
I’ve included here only the steps that are different for this project from the one featured in the magazine. Flip through that article for some fundamental principles, as well as the basic steps shared by both, like sawing the veneers and applying them to the MDF substrate.
As I described in the magazine article, I cut the veneers roughly 1/8 in. thick on the bandsaw and then used the subtable setup on the planer to bring them down to roughly 3/32 in. After applying them to the MDF and leaving them in the clamps overnight to dry, I planed the panels to 5/8 in. thick. This is a bit thicker than the 1/2-in. sides suggested in the plans from Parts Express, so I cut the parts slightly larger overall to keep the boxes’ interior dimensions the same as recommended.
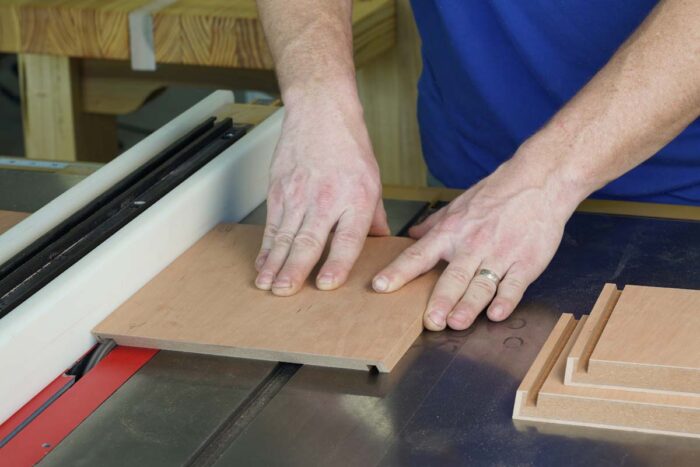
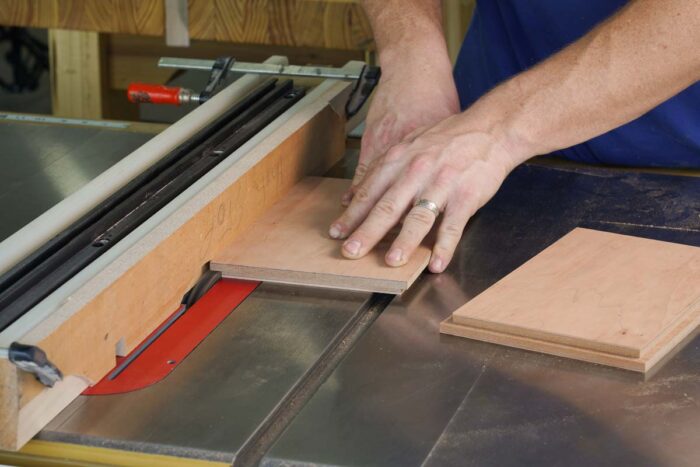
Next, I cut the miters on the corners the same way as before, and then cut 5/16-in.-sq. grooves on inside edges for the front and back panels. The front and back panels were then rabbeted to create a 5/16-in. tongue.
Miter and groove the sides. Start by edging the MDF substrate with solid wood (and planing the edging flush). Then veneer the MDF as described in the magazine article. Miter the sides on a table-saw sled, and then use a dado set to cut grooves for the front and back panels.
Front and back get tongues. Rabbet the front and back to create tongues that fit snugly into the grooves in the sides, leaving the front and back edges of the box flush.
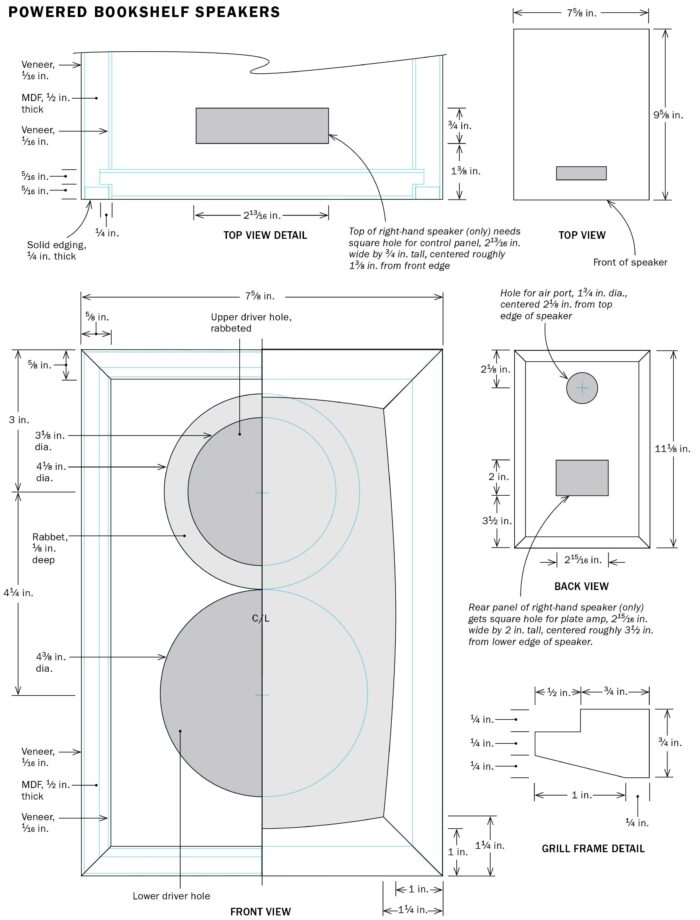
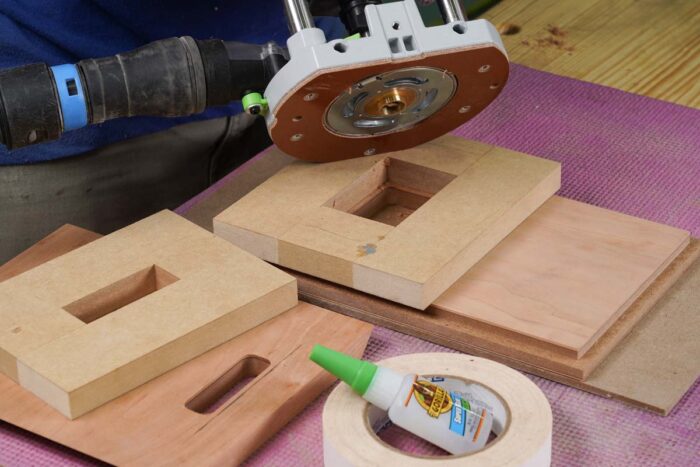
With all the parts cut and fitting nicely, it was time to cut openings for the components, which include a control panel and plate amplifier. As I did in the magazine article, I used router templates to cut smooth holes in custom sizes. For the square openings needed for the control panel and plate amplifier, I created quick, easy router templates by joining blocks of MDF.
Two square openings this time. The plate amp and control panel need square openings (aside from the round ones for the speaker drivers, cut as shown in the magazine article). Create router templates by joining MDF blocks with CA glue, attach the templates with double-stick tape, and then rout the openings using a bushing guide and straight bit.
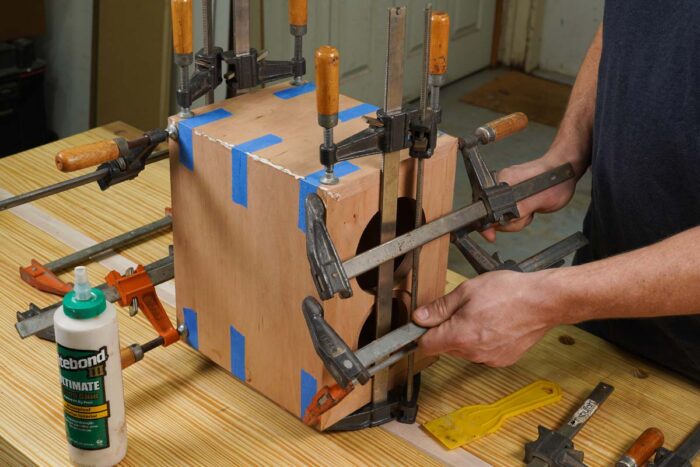
Glue up the boxes. Clamp the miter joints with blue tape to help bring the box together, and then add bar clamps to tighten the joints.
Assemble the electronics
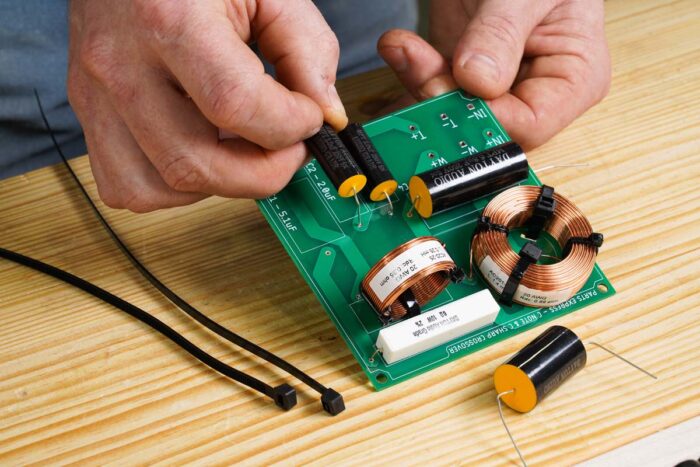
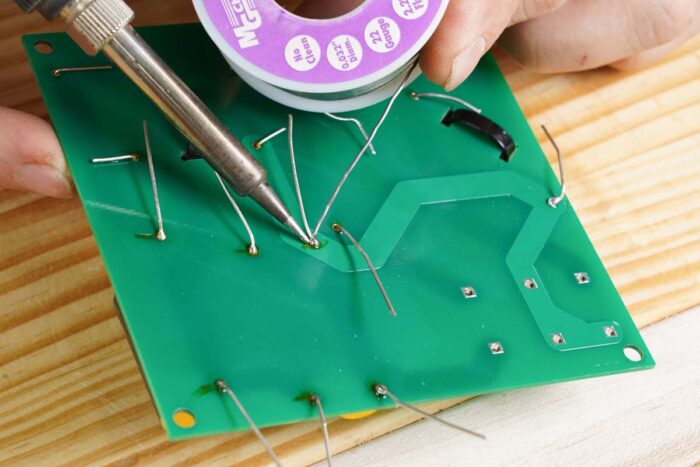
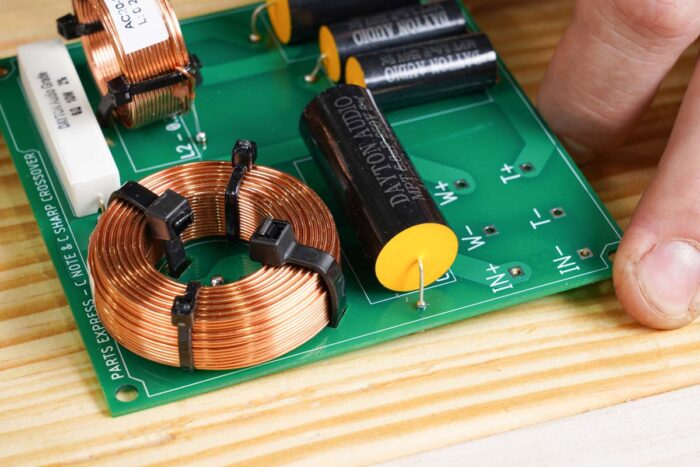
The C-Sharp speaker kit includes a circuit board that makes it very easy to assemble the components that send the sound signals to the drivers. These are called “crossovers.” You slide the leads through the appropriate holes for each component, bend them over so they stay in place, and then flip the board over and solder each of the connection points.
Circuit board included. The crossover electronics for this speaker set are wired into a circuit board that comes with the kit, so the assembly and soldering processes are a bit different from how they were in the magazine project. Use zip ties to lock down the two inductor coils, and then push the leads for the other parts through the board as shown.
Solder the back side. Heat the wires, apply a liberal amount of solder to the back side of the connections, and keep the iron in place for an extra moment to allow some solder to flow through to the front side. Then clip the excess wire that protrudes through the back of the panel.
Check the front side. A bubble of solder on the front side shows that the connection is solid.
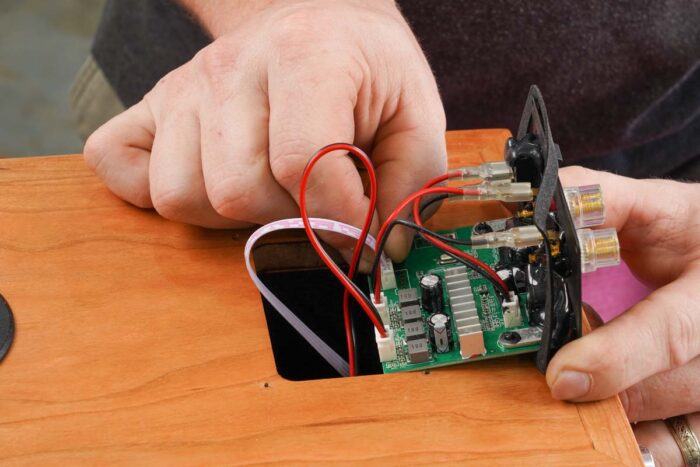
Make the other connections. The other parts, like this plate amp, have click-in connectors, which make things very easy. Read the instructions carefully to figure out what goes where.
Attach the components
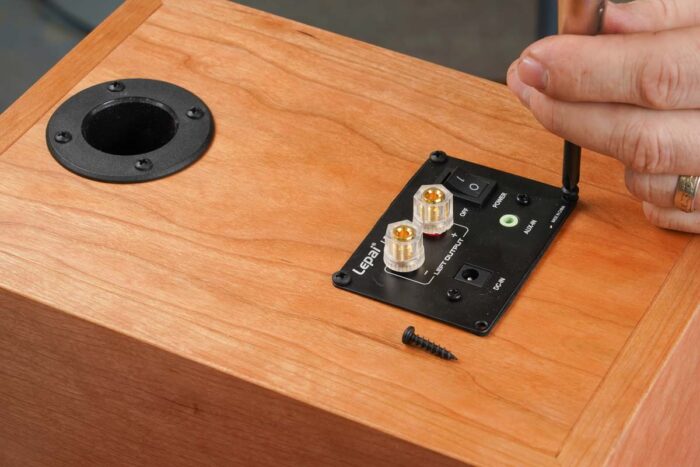
Components come next. When everything is connected, screw the plate amp, control panel, and drivers into place, and install the air port.
Now all of the components can be installed in the boxes. As I did inside the other set of speakers, I lined the interior of these speaker boxes with sound-dampening foam. Then I mounted the crossover on the bottom of each speaker cabinet, connected the plate amp and control panels, and installed them.
Add a grill
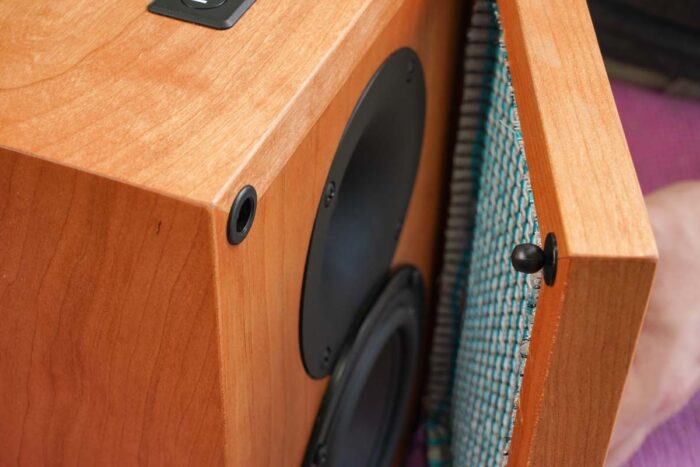
You might want to hide and/or protect the drivers on some speaker designs. With these speakers, I added a grill. It’s easy to do. Start by making a frame, with miters at the corners, adding whatever design details you like. I chose to saw a slight inward taper on the front faces, and shallow arcs along the inside edges.
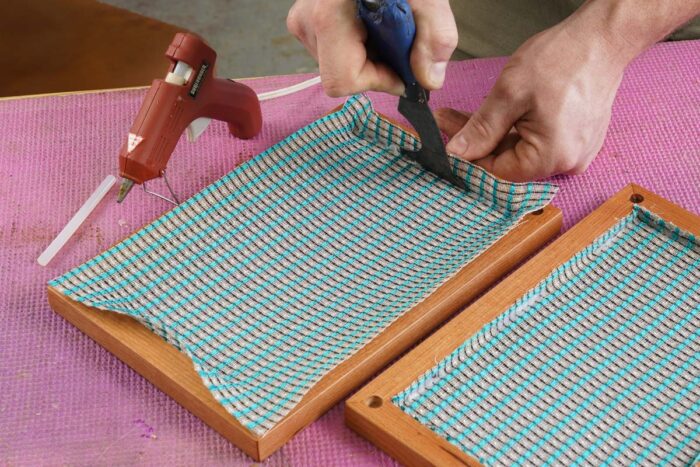
You’ll also need a rabbet along the inside edges, where the grill cloth will be stapled in place. Nice grill cloth is available at Amazon and Parts Express. The easiest way to attach the fabric is by squirting hot glue into the rabbets and then pushing the fabric into the corners using a paint scraper. Start at the centers of the short sides, applying glue there first, and work toward the corners, applying glue by folding back the fabric. Then do the same along the long edges.
To mount the frames on the boxes, I used grill guides from Parts Express. These little connectors press into little receivers in the speaker box and grill frame, allowing the frame to be removed if needed. Then I added the same feet as I did to the pair of speakers in the magazine article.
Connect and enjoy
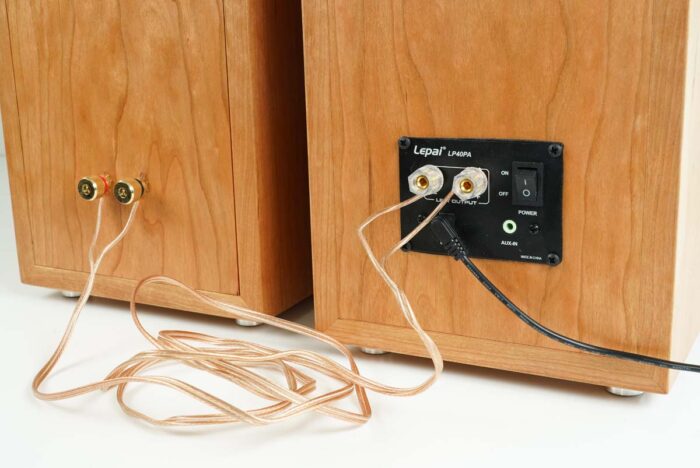
These speakers must be wired to each other, but they can be connected to the audio source via wires or Bluetooth. The black cord is for powering the built-in amplifier.
Fine Woodworking Recommended Products

Suizan Japanese Pull Saw


Log in or create an account to post a comment.
Sign up Log in