Breadboard Ends: Tongue-and-Groove for Bigger Panels
See how Gary Rogowski reinforces his breadboard ends on large panels and tabletops.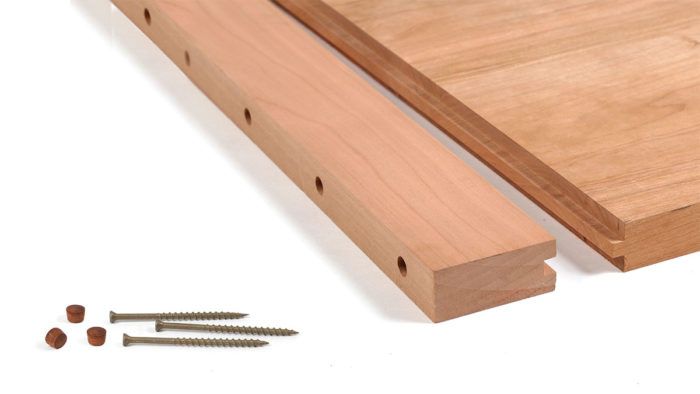
Tables with breadboard ends need more strength because people will inevitably lift a table by the ends. I often use screws in these cases. They sit in elongated holes and are hidden with plugs.

I still use a centered tongue-and-groove, except this time, after cutting the groove at the table saw, I cut the tongue with a plunge router and straight bit. With large panels, I find this method safer than using the table saw.

I cut the tongues about a third as thick as the panel, but typically not under 1/4 in. or over 1/2 in. Clamp the panel to the bench and put an extralong fence on your router to make locating the cut easier. When necessary, such as when making a smooth entry cut, hold the router with one hand and use your other hand to guide the fence along the panel’s end. After the first cut, flip the panel and cut from the other face. I get the tongue close with the router. Final fitting comes with a few passes of my shoulder plane.

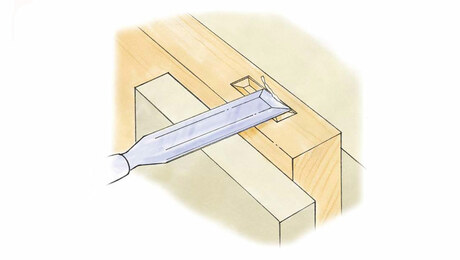
Once the breadboard end fits, I spring the joint before drilling for screws that run through the breadboard end and into the tongue. The screws sit in slotted clearance holes in the breadboard ends, and plugs cover them up. I have a simple method for elongating my screw holes. I drill a clearance hole first and then chuck a 1/4-in. chainsaw file backward in my cordless drill. Then I use the file’s hardened handle to ream the hole by angling the drill back and forth.

Apply glue to the breadboard ends only in the middle 3 in. Clamp the ends in place and let the glue dry before adding the screws and plugs.

For more ways to attach breadboard ends, read the full article: Breadboard Ends: 4 Ways
Fine Woodworking Recommended Products

Marking knife: Hock Double-Bevel Violin Knife, 3/4 in.

Festool DF 500 Q-Set Domino Joiner

Olfa Knife








Log in or create an account to post a comment.
Sign up Log in