Build a Contemporary Coat Rack
When asked to create a simple coat rack, Christian Becksvoort came up with this design, which includes a rod for hangers as well as shelves for shoes and hats.
Synopsis: When asked to create a simple coat rack, Christian Becksvoort came up with this design, which includes a rod for hangers as well as shelves for shoes and hats. The rack’s distinctive X-shaped ends have angled half-lap joints, which Becksvoort cut with a handsaw and chisels. The shelves are independent assemblies, with five slats on a frame for the bottom and three slats on two cleats for the top. Except for the two half-lap joints, the entire coat rack is fastened with screws. Becksvoort made the original piece out of white pine, but he chose walnut for the piece shown in the article.

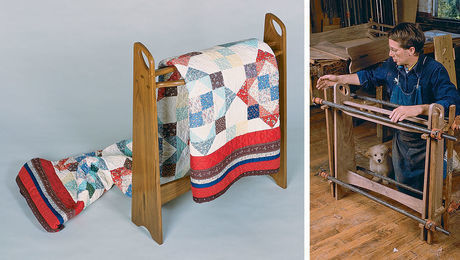
A few years ago, I was asked to build a simple coat rack. Nothing fancy—pine would do, since it might be painted. I suggested a Shaker pegboard. No, it needed to be movable, with places for shoes and hats. After a bit of thinking and a few sketches, I came up with X-shaped ends, a shelf below for shoes, a rod for hangers, and a shelf above that for hats. Although the original was white pine, I decided to make the one shown here out of walnut.
The design of this structure means that it has a bit of side-to-side racking. I drastically reduced that with beefier rail sizes and strategically placed screws. The rack is easy enough to move around, but it also can be disassembled into five separate pieces: two sides, the closet rod, and the top and bottom shelves. It’s the perfect piece for an entryway, mudroom, or large walk-in closet.
X-shaped ends are the focus
 |
 |
 |
 |
To lay out the angled lap joints, I stood the crosspieces on end. Using my workbench as a support, I clamped the two crosspieces together and marked the edge of each exactly where they intersected. Then, with a small square, I extended those lines halfway across the faces of the crosspieces. I used a marking gauge to strike a line at the halfway point—the bottom of the lap joint. Although the joints can be cut at the table saw using a dado blade and with the miter gauge set to the angle, I thought it was just as easy to make the cuts by hand with a small crosscut saw. Then I carefully removed the waste with a chisel.
 |
 |
 |
 |
Uprights and cross braces
With the joints cut, I dry-fit the uprights. From there I used a straightedge at the top and the bottom of the uprights, lined up at the outside corners, and struck that straight line across the uprights. Cutting the crosspieces at this angle allows them to sit flat on the floor and be flat on top.
| From Fine Woodworking #313
To view the entire article, please click the View PDF button below. |
 |
Fine Woodworking Recommended Products

Suizan Japanese Pull Saw


Comments
The pdf is not available.
fixed
PDF is not available for this
fixed
The vertical height of the coatrack is shown as 84".
The length of the angled uprights is shown as 72½".
If the angled uprights shown as 72½" form the hypotenuse (using 11º to form the longest side of the triangle, opposite the right angle) isn't one of these measurements incorrectly shown?
I noticed the same thing. Judging by the photos in which Christian Becksvoort appears slightly taller than the finished piece I think it’s the vertical height that is incorrect in the drawing. Should be ~71-7/32” vertically if the other dimensions are correct.
Simple, clean & Elegant - well done! Is it possible to post a photo of the original?
Log in or create an account to post a comment.
Sign up Log in