Throwback: Illustrations of a Drawbored Tenon
How to measure and design this joint so it remains strong with or without glue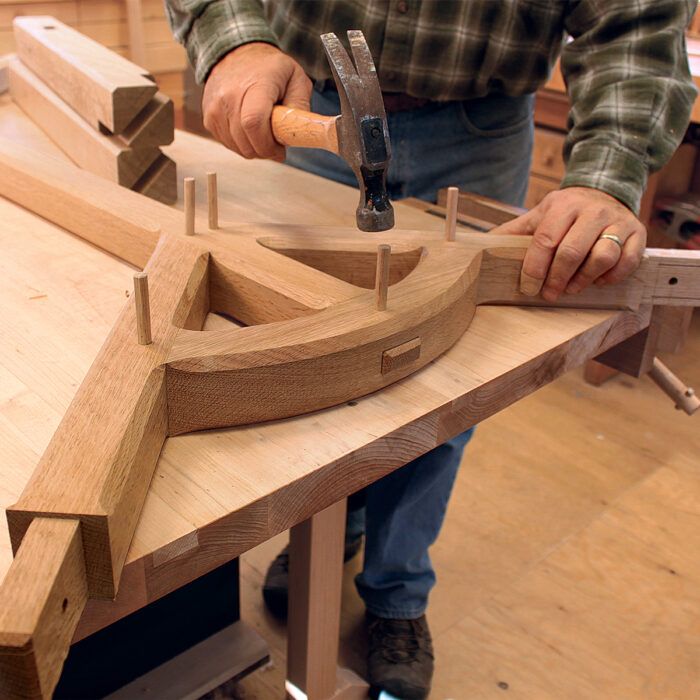
This blog is one part of three comprising Ian Kirby’s exploration of mechanically joined mortise-and-tenons. The other two cover through-wedged tenons and tusk tenons. These joints have the unusual characteristic of being able to function well without glue. Two of them, the tusk tenon and the drawbored tenon, can be disassembled without too much trouble. Once made, all three can be put together and worked on immediately; they are mechanically locked. The tusk tenon and the drawbored tenon need no clamps at all, and the wedged mortise-and-tenon can be clamped until the wedges are driven, and then the pressure can be removed.

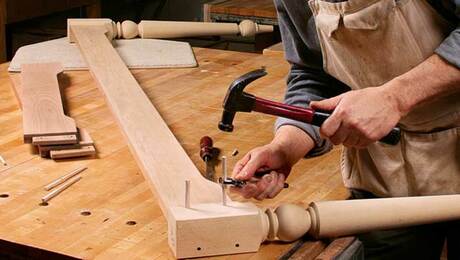
Good examples of drawboring can be found in old-style post-and-beam houses, and the joint is of course used by enthusiastic builders today. It is traditionally made by offsetting the drilled holes so the entry of the peg draws the structure tightly together. But I don’t think it is cheating too much in cabinet work to put the work into clamps, apply normal gluing pressure, and drill through both parts all at once. For that matter, it can be done at the time of gluing (unless of course you want the joint to knock down). If you draw the joint together in a small cabinet, don’t overdo the off-centering. The result might be an unsightly mess on the emerging side of the peg hole, and excessive strain along the shear lines of the tenon.

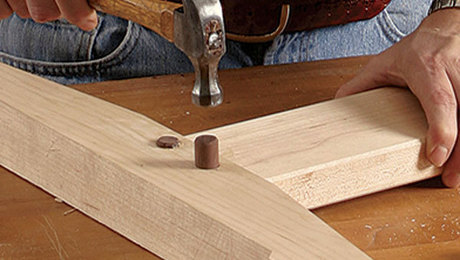
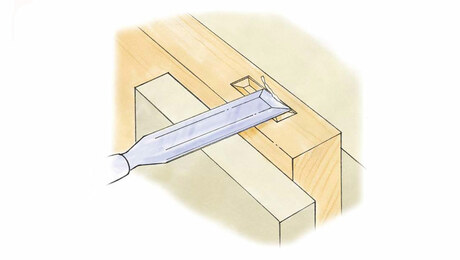
Choose a dense and somewhat pliable material for the pegs, and consider the diameter. Large pegs in buildings—treenails—are usually oak, hickory, or ash. These ring-porous woods are less suitable for small work, where maple, birch, or a denser exotic wood are preferred. Position is also a matter for judgment. If too close to the shoulder line, the mortise cheeks might split. If too close to the end of the tenon, the wood may fail in shear along the grain (lines SL in the drawing above). If distance BC is less than 1-1/2 in., use only one peg.

In old work the pegs were often square, hexagonal, or octagonal in section, and split out rather than sawn. Their corners bite into the drilled hole for increased holding power. Their heads are often left proud as a design detail and then chamfered or whittled.

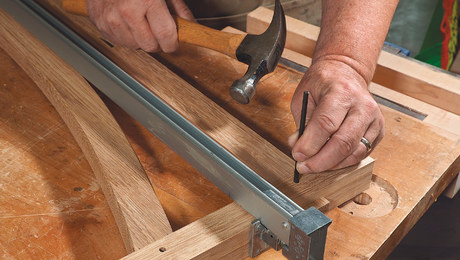
Make the mortise-and-tenon joint in the usual way. Whether one or two pegs are used depends on the size and shape of the members. Fit the joint, remove the tenon, and drill through both cheeks of the mortise at Y (drawing above). Replace the tenon, clamp the joint, and mark the center of the hole on the face of the tenon. This can be done by putting the drill back in the hole and giving it the lightest turn. Remove the tenon again, and drill the same-size hole about 1/32 in. nearer the shoulder line from the marked center, at X. Thus, the two holes are slightly off-center. When the pegs are driven home the joint will be drawn tight. The procedure may be done entirely by measurement.
The tenons in this type of cross-joint may be short; place the pegs with care.

Fine Woodworking Recommended Products
Freud Super Dado Saw Blade Set 8" x 5/8" Bore
Veritas Standard Wheel Marking Gauge
Bessey EKH Trigger Clamps


Log in or create an account to post a comment.
Sign up Log in