Shooting Boards 101
Q:
I want to use a shooting board to prepare 3/4-in.-thick by 3-in.-wide walnut stock for a mitered frame. I’ve read that shooting boards are appropriate for trimming miters on small parts, but will they work for the larger material I’m using? Also, do you have any other comments on the utility of shooting boards?
MKetelsen, via Ask the Experts, None
A:
Yes, a shooting board will work with your stock dimensions. And since these are shopmade jigs, their capacity depends on how big you make them.
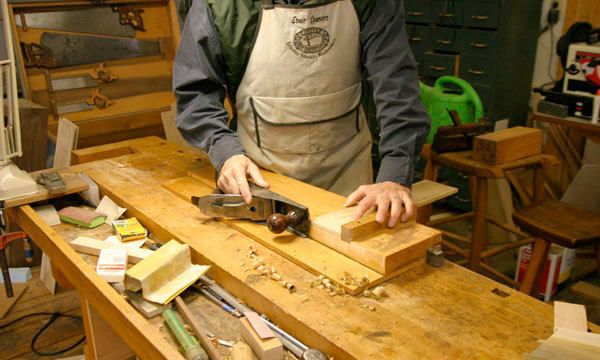
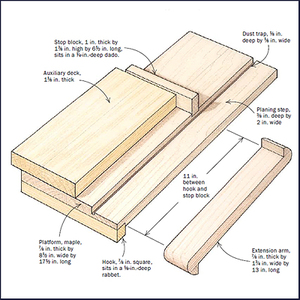
Shooting boards come in a variety of forms that are easy to make and even easier to use. They are generally comprised of three parts: a base for the hand plane to ride against, a ledge (or ramp) that aligns the work with the plane blade, and a stop (or fence) to hold the workpiece steady.
There are three versions of the shooting board that I find most useful: one to plane an edge square, and two to plane perfect miters. For each of these, I use high-grade plywood for the base and a stable hardwood, such as poplar, for the ledge and stop.
Each shooting board should have a dust groove where the ramp and ledge meet to collect debris and keep it out of the path of the plane. These jigs can be finished with a couple of coats of white or orange shellac. To keep the work from sliding around, you can glue fine sandpaper to the ledge.
Plane an edge square
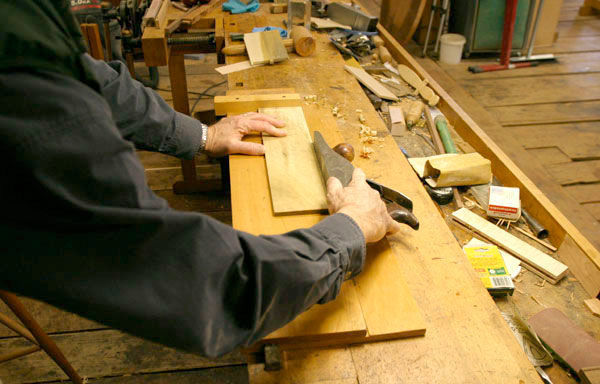 A shooting board designed for trimming edges and ends to 90° is the simplest type to make and use. I design my shooting boards with an extra-wide base to accommodate long edges. I also attach the ledge on an incline to distribute the cut across the full width of the plane iron. A shooting board with a flat ramp will work, but you will wear quickly a groove in the sole of the plane and dull the iron.
When making a shooting board of this design, it is important to align the stop at exactly 90° to the ledge.
You may find that the simple shooting board is like bicycle training wheels, which you’ll discard as your skills progress. On the other hand, I find that the miter shoot is always helpful.
Trim perfect miters on frames
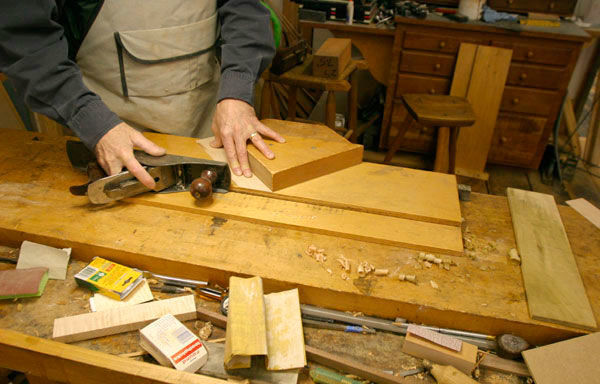 The miter shooting board is used for trimming 45° miters on flat work such as picture frames or the molding around windows and doors. This version of the shooting board is also easy to make, although the stop block requires precision placement to ensure perfect miters.
The jig should be about the same size as the simple shooting board, but the work area can be somewhat narrower. Also, the ledge doesn’t need to be ramped. The cut is so small it will have little or no effect on the plane.
Create mitered ends for boxes
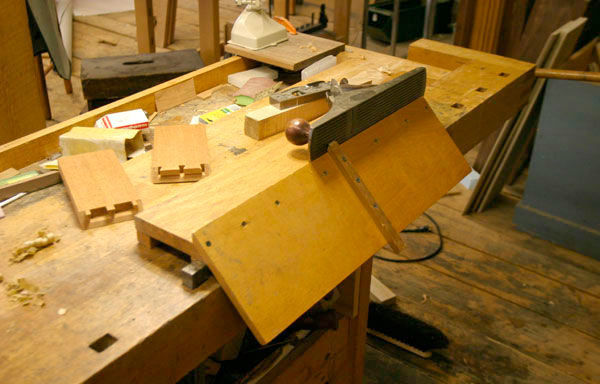 I could not live without this jig, known as a donkey’s ear shooting board. It tunes wide or standing miters, such as those found in a mitered box or the corner of baseboard molding. The end view of the jig resembles a donkey’s ear (stretch your imagination), giving the shooting board its name.
Making this board may look somewhat daunting, but it is simple. The important element is to rip the ledge at a perfect 45°. Also, before assembling the jig, screw it together for test cuts.
Tips and tricks
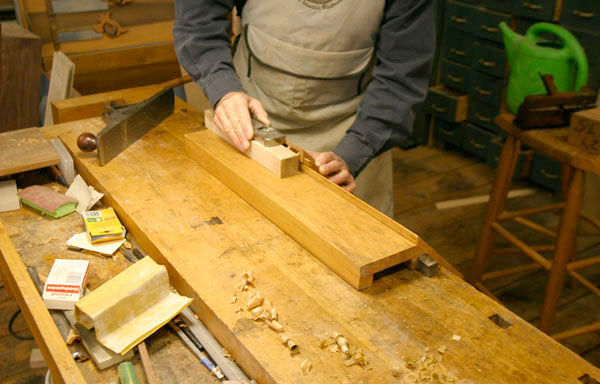 I design my shooting boards for use with a No. 5 or No. 5-1/2 plane. Check your plane to verify that the side is square with the sole. If a plane is badly out of square, you can correct the base to make things come out square.
Many people wonder why the shooting board isn’t planed away along with the stock. In fact, the plane does cut the shooting box at first. However, because the plane blade does not extend the width of the sole, the bottom of the ledge will always provide a consistent edge for the plane to register against.
Finally, apply wax to the side of the plane to keep it moving smoothly on a shooting board.
Photos: Ernie Conover
Fine Woodworking Recommended Products
Hedgehog featherboards
MicroJig Matchfit dovetail clamps
Pfiel Chip Carving Knife








Log in or create an account to post a comment.
Sign up Log in