All About Rabbet and Dado Joints
Mario Rodriguez provides a quick guide to these simple joints.

Rabbet Joints
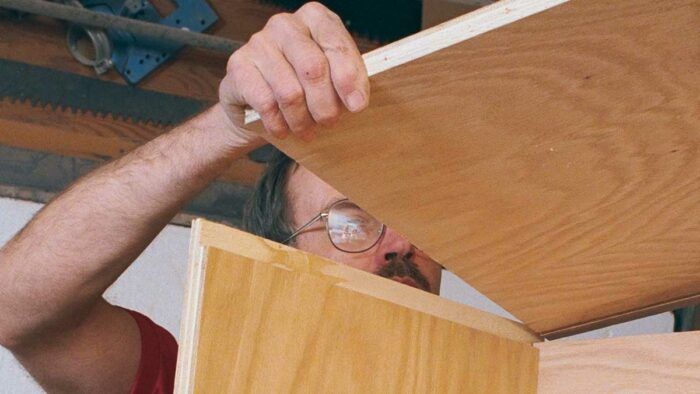
This simple joint, in which the ends of boards are joined at right angles by removing a portion of one board’s thickness to accommodate another board, is very easy to make. In addition to increasing the glue surface, the rabbet joint also provides support and alignment for the two pieces.
- The Basics: Anatomy of the joint: Remove a portion of one board’s edge to accept the edge of another.
- By hand or machine: Rabbets and dadoes are best cut by machine, but traditional hand-tool methods can be used.
- Where it’s used: A variety of projects, from boxes to cabinets, incorporate rabbet and dado joints.
Anatomy of the rabbet joint
Unless the construction is made of plywood, the grain on both pieces should run in the same direction. The proportion of the rabbet to the thickness of the material is about 1/3. For example, on a piece of 3/4-in.-thick material, the depth of the rabbet should be at least 1/4 in. and should never exceed 1/2 in.
Rabbets by hand or machine
The rabbet joint can be cut in a single operation on a tablesaw using a dado head set to the thickness of the material. The depth of the rabbet can be adjusted by raising or lowering the blade height, or the joint can be executed with compound cuts (two perpendicular cuts using a combination blade). It can also be done with a router.
Historically, a rabbet joint was prepared with a handplane, but the time and effort required has made this method somewhat obsolete. The rabbet plane, more commonly called the shoulder plane, is the ideal tool for this operation.
Where to use the rabbet
Because of its limited mechanical properties, the rabbet should be limited to small-scale structural applications, like small boxes, wall cabinets, and desk organizers.
The rabbet joint is used primarily to set backboards onto the back of a case piece or to accommodate the glass on a mirror frame. Sometimes on a simple cabinet, drawer sides are joined to a drawer face with a rabbet joint. Japanese tansu chests, an ancient and beautiful furniture form, have their drawers joined together with rabbets instead of dovetails.
Dado Joints
Anatomy of the dado joint
The dado is a groove cut across the width of one board to accept the end of another. This common joint is found in furniture of all types, from built-ins to sideboards. It can be employed horizontally to support shelves on a bookcase or vertically to hold partitions.
There are two types: The through dado runs across the full width of a board, leaving the joint visible. This can be attractive and is very often turned into a feature of the piece. The stopped dado does not extend across the full width of the board and is stopped from the front edge by an amount equal to the thickness of the material. When the project is assembled, the stopped dado is not visible from one side (usually the front). This version of the joint is used when a cleaner, more formal appearance is desired. Generally, both types of dadoes are cut to a depth equal to 1/3 the material thickness and never more than half.
Dadoes by machine or hand
The dado isn’t a difficult joint to make but requires careful execution for a snug fit and a good appearance. The through dado can be cut either on the tablesaw or with a router. The stopped dado can be done with either a router or with hand tools.
When using a tablesaw for a through dado, a dado set is prepared to the thickness of the shelf or partition. Then the blade(s) is raised and set for the depth of cut. In some cases, the tablesaw fence can be used to position the dado on the workpiece. When using a router for either the through or stopped dado, a clamped-on fence is employed to guide the router. The projection of the router bit determines the depth of cut.
If a woodworker chooses to use hand tools, the width of the dado is first marked out with a knife, then the shoulders are cut with a tenon saw. After that, the waste is removed with a chisel. Finally, a router plane cleans out the remaining waste and levels the bottom of the dado.
Additional Reading:
- Three Ways to Cut Rabbet Joints by Hand
- Video: Cut Clean, Accurate Rabbets on a Router Table
- Using Rabbets: Fine Drawers Without Dovetails
- Easy Dadoes with Basic Hand Tools
- Rout Perfectly Sized Dadoes
- Dado Joints: 3 Steps to Great Glue-Ups
Fine Woodworking Recommended Products

Leigh D4R Pro

Starrett 4" Double Square

Veritas Standard Wheel Marking Gauge


Log in or create an account to post a comment.
Sign up Log in