Kid’s Woodworking Project: A Small Box
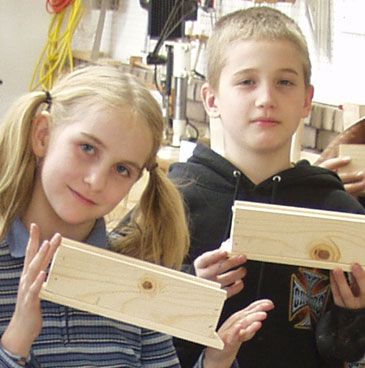
A basic box with a sliding top, from the students of the Clear Spring School in Eureka Springs, Ark.
The projects in this series were first made by the students at the Clear Spring School, a small independent school in Northwest Arkansas. When my daughter Lucy was a student there, I developed a woodworking program called Wisdom of the Hands. It recognizes the importance of integrating the head and hands in the development of intelligence for all students. My daughter is now in college, but woodworking remains a favorite activity throughout the school. The direct, hands-on problem-solving that goes on in the woodshop helps the kids in all their other classes.
 The Clear Spring students made this project as a pencil box, but don’t let that limit you. Encourage the kids to think about alternatives: To make it shorter, longer, wider, or taller. Or, adding one or more dividers inside. Or using different combinations of woods.
|
Rules for Grownups 1. Set an example of caring craftsmanship. Rules for Kids 1. Listen to what the grownups tell you. Rules for Working Safely 1. No woodworking without adult supervision. |
How to Build the Box 1. Grownups mill stock to thickness and cut it to the lengths given in the cutlist. 2. Grownups cut a saw kerf in the 24-in.-long piece to fit the birch-ply top, as shown in the plan. Check the fit of the Baltic birch and widen the kerf as necessary.
4. Kids measure, mark, and cut that 1-3/4-in.-wide board to length to make the ends. 5. Kids nail the sides to the ends, being careful that the bottom edges of all the parts align. 6. Kids cut the 10-in.-long board to length for the bottom. Kids use a plane or sanding block to shape the edges of the box bottom. 7. Kids nail the box bottom to the box sides. 8. Kids slide the box lid in place, mark it for the desired length, and cut it to size. Then, kids use a drill with a 1/8-in. bit to make a hole for the lid stop dowel, cut the dowel to length, and fit it in the hole. 9. Kids sand everything smooth and fill the box with whatever they want the box to hold. |
|
The secret to nailing without splitting There’s a secret to driving a nail without splitting the wood. It’s revealed in the way the point is shaped. The sharp edges created when the nail is formed must be oriented across the grain, so that the nail cuts its way into the wood. Take the time to study the end of a nail, then turn it over and drive it in place. That can be a challenge with small nails. But if you rely on the sensitivity of touch, you can roll the nail in your fingers until you feel the sharp edge in the right position, then hammer it in. The ridges on the upper part of the nail can also be used to orient the point properly. If your fingers are pointing along the grain and you dont’ feel the ridges on the nail, that means it’s oriented properly for split-free driving. |
Fine Woodworking Recommended Products

Suizan Japanese Pull Saw
 3. Kids measure, mark, and cut the 24-in.-long board for the long side pieces. That will leave a piece almost 6 in. long. The kids cut it lengthwise along the saw kerf to make the board 1-3/4-in. wide. Kids use a plane to smooth the sawn edge of that piece.


Log in or create an account to post a comment.
Sign up Log in