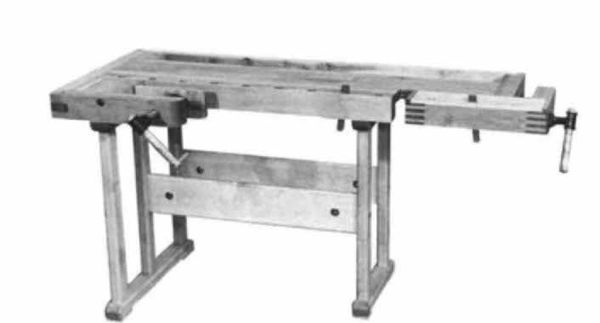
Synopsis: After teaching in a U.S. school for a few months, Tage Frid decided the workbench he wanted did not exist in this country, so he designed a workbench like the one he was taught on in Denmark. Frid has his students build their own workbenches, which they take with them upon graduation; it takes about three days to build from rough lumber to have all the parts ready to fit and assemble and have the top glued up. In this article, he includes all the features — its two vises and accessory side clamps, simple construction, and dimensions. Unfortunately, the blueprints for the bench are no longer available.
There are many workbenches available on the market today. Aside from obvious reasons of economics, why make my bench? I can convince my students and myself easily enough, but to convince you I should explain the benefits of this design and how I arrived at these specifics.
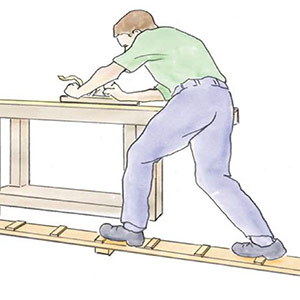
When I came to this country in 1948 I was given a tour of the school where I was to teach. I was guided to a large room and introduced to the teacher with whom I was to work. We talked for a while, or rather he did the talking because my vocabulary didn’t go much beyond yes and no. By using arms and legs I finally conveyed to him that I wanted to see the woodshop. When I was told I was standing in it I just about passed out. In the room was a huge thickness planer I think Columbus’ father must have brought over, and a few small power tools. I was really flabbergasted when I saw the student “workbenches.” These were large tables for two persons with a vise in each end. Most of the time the students were holding down their work with one hand and working with the other. Some had taken much time to make special contraptions to hold their work so they could use both hands, which I’m sure was the Lord’s intention when he designed us with two. (Of course the Japanese use their feet to secure their work, leaving both hands free.)
After being in school for a few months I realized that the bench I wanted did not, to my knowledge, exist in this country. So I designed my first workbench, which was quite similar to the one I was taught on. Later we made one for each student. Since then we have been making workbenches every two or three years so that the students have their own when they graduate. I find it a good exercise in which they learn how to set up the machines for mass production and work together as a production team. It takes us three days from rough lumber to have all the parts ready to fit and assemble, and to have the bench top glued up. This year each bench cost us about $100, half for wood and half for hardware.
Over the years, having made the bench so many times and having had numerous people using and criticizing them, I have arrived at this design and these dimensions as best suited for a cabinetmaker. With its two vises and accessory side clamps there are five possibilities for holding the work—two in the right vise, one in the left vise, one between the bench dogs and one between the side clamps.
From Fine Woodworking #4
For the full article, download the PDF below:
Fine Woodworking Recommended Products

Woodriver Rechargeable Desiccant Bag
WoodRiver Router Bit Storage Case

CrushGrind Pepper Mill Mechanism








Comments
I recently saw this bench in a antique store! It was imported from Europe, was old and very well used. The manufacturer’s name was faded and obscured from its years of use. Is this a common style in Europe?
Every singel one I have ever seen in a wood shop in Norway, including the ones used at the primary school where I teach and the one my father and myself has, is very similar to this one. They are often longer and thicker though.
In the mid 1990s, I was finally in a position to create a wood shop - starting with a "proper" bench. This was the article and bench design that captured my imagination. It took me almost a year to build, and another 6 months to put it onto a cabinet type base with drawers and on retractable wheels. Now, 30 years later, I cannot believe how "right" that decision was! This bench is a joy to use and the basis around which my entire shop and skills as a woodworker are built.
Log in or create an account to post a comment.
Sign up Log in