Sam Maloof: How I Make A Rocker
A master craftsman reveals the details of his iconic rocker.

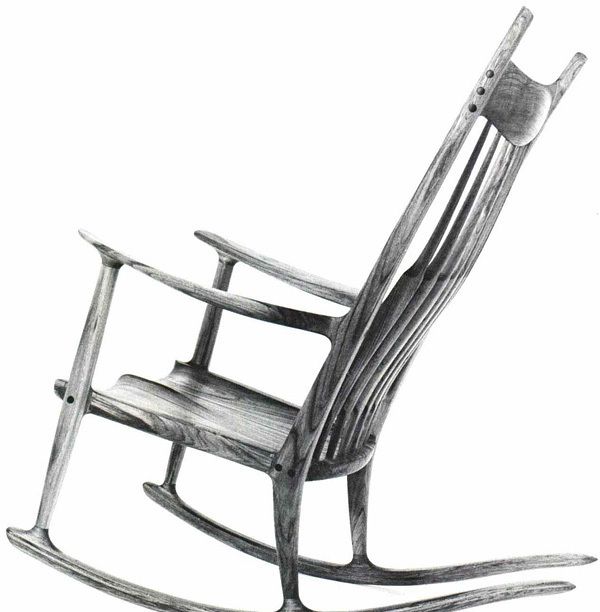
Synopsis: Sam Maloof’s rocker with a solid wood seat and flat spindles is frequently imitated. Maloof doesn’t have a formula that he follows, nor does he work out mathematically the way his rocker rocks. Each one he makes differs somewhat in dimension and density of its parts, so he works out its balance along the way. He arranges seat boards for the nicest figure match, regardless of whether it’s bark-side up or down. Then he lays out both back legs, looking for a curve in the grain to match the curve in the legs. He tablesaws a notch in each rear corner of the seat blank and miters it; the notches for the front legs are less complicated; they are simply dadoed out and rabbeted. He bandsaws the back spindles and explains how he makes the crest rail and arms, and how he finishes the piece.
Of the twelve different basic rocker designs I make, the model with solid wood seat and flat spindles is the most popular, and the most imitated. I don’t believe in copying, but if knowing the way I work will help other serious woodworkers develop their own ideas, I’m happy to share my methods. I don’t have a formula that I follow, nor do I work out mathematically the way my rocker rocks. Each rocking chair differs somewhat in dimension and also somewhat in the density of its parts, so I just work out its balance along the way. I aim for a rocker that doesn’t throw you back or tip you out, and somehow I’m usually right on.
I begin with the seat, cutting from 8/4 stock usually five boards at least 22 in. long and 3 in. to 7 in. wide—enough to add up to a 20-in. width after glue-up. I buy random width and length, common #1 or #2 walnut because its figure is more interesting than that of firsts and seconds. After milling the wood to size, I arrange the boards for the nicest figure match, regardless of whether this happens to be bark-side up or down. I then take the middle board and draw on its long edge the contour of a dished seat, a gentle curve whose maximum depth leaves ½in. of thickness about three-quarters of the way back from the front of the seat. I bandsaw this curve, holding the board on edge, then I angle the board through the blade and saw the top of the seat toward the front, to leave a ridge in the middle. I put this middle board back between the two seat boards to which it will be glued, and mark the contour I’ve just sawn on the edge of each. I bandsaw this contour, and transfer it to the edge of each outer board of the seat. I angle the boards to saw this contour, so that when joined together the five boards form a hollowed out seat. Before gluing up, I mark and drill for 3-in. long, ½-in. dia. dowels, staggering them about 2 in. apart for ease of assembly, and for strength.
From Fine Woodworking #42
For the full article, download the PDF below:
Fine Woodworking Recommended Products

Dividers

Circle Guide

Sketchup Class


Log in or create an account to post a comment.
Sign up Log in